Serial Debug
Preparing a USB Serial adaptor
Lots of adaptors for converting USB to serial port are available for sale in the online stores. And according to the different chips, these adaptors can be divided into the following types:
PL2303
CH340
*** Note:The default baud rate of ROC-RK3308-CC is 1500000. Some usb to serial converter, it’s baud rate can’t reach 1500000,even different series of the same chip may also have differences,so be sure to support before purchasing adaptor. Here, the official recommended adapter for the CP2104 chip. ***
Connecting to the Debug Serial Port
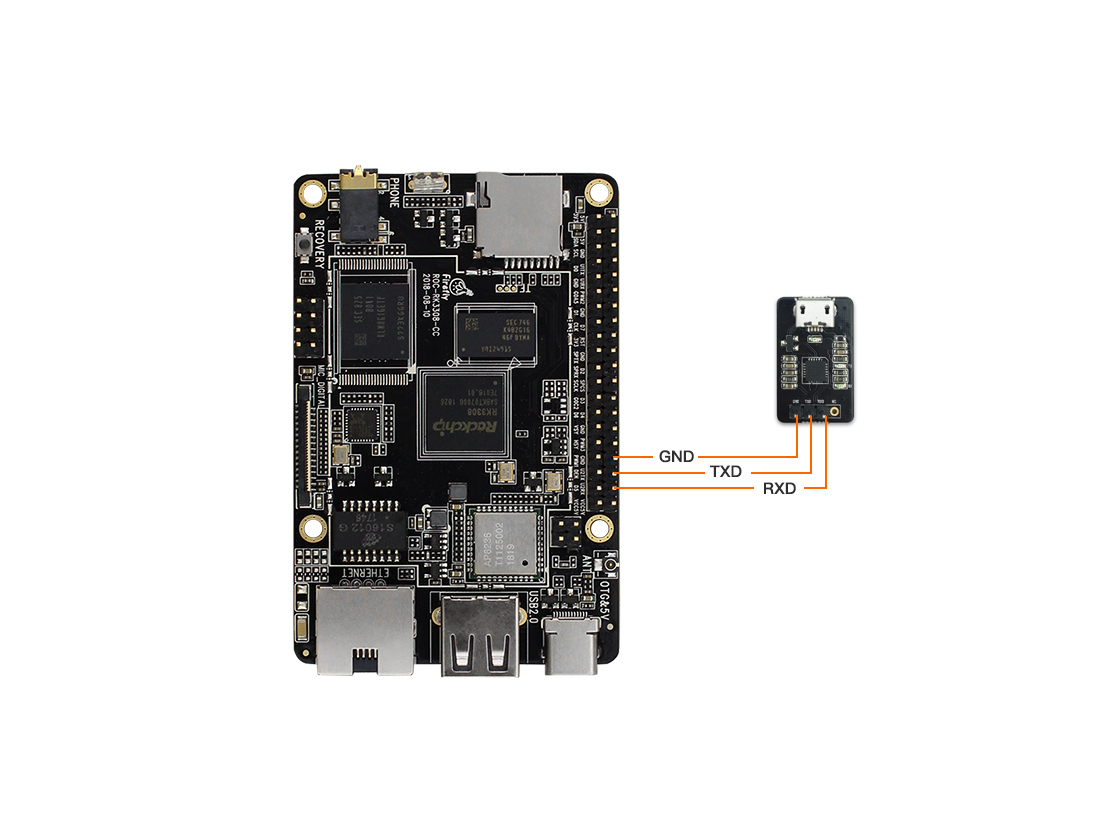
ROC-RK3308-CC debug serial port default baud rate is 1500000, and it is recommended to use the official CP2104 USB-to-UART serial port converter, the connection method is as follows:
GND line: ground line of serial port, connect to GND needle of demoboard
TXD line : output line of serial port, connect to TX needle of demoboard
RXD line: input line of serial port, connect to RX needle of demoboard
The hardware connection is as below:
Serial Parameters
ROC-RK3328-CC uses the following serial parameters:
Baud rate: 1500000
Data bits: 8
Stop bit: 1
Parity: None
Flow control: None
Serial Debugging in Windows
Install drive
Download and install drive:
After installing the CP210X driver which is from the official website on a Windows system, use a tool such as PUTTY or SecureCRT to set the serial port baud rate to 1500000 . If the settings are not available or are invalid, you can download the old version driver.
When inserting the adapter, the system will prompt to discover new hardware. You can find the corresponding COM port in the device manager.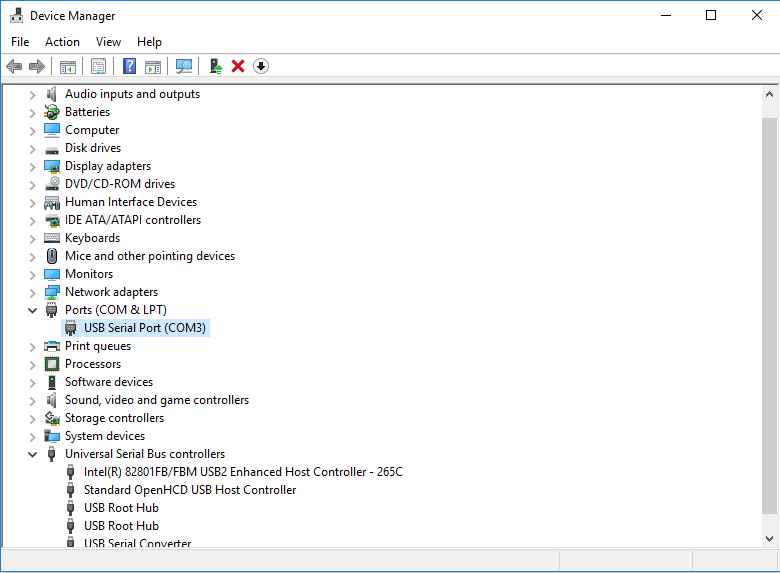
Install tools
As for Windows, the putty or SecureCRT are usually used. Putty is a open source software program. This paper mainly introduces how to use putty. And the method for using SecureCRT is similar to that of putty.
Comimg here to Download putty, it is recommended to download putty.zip, because it contains other useful tools.
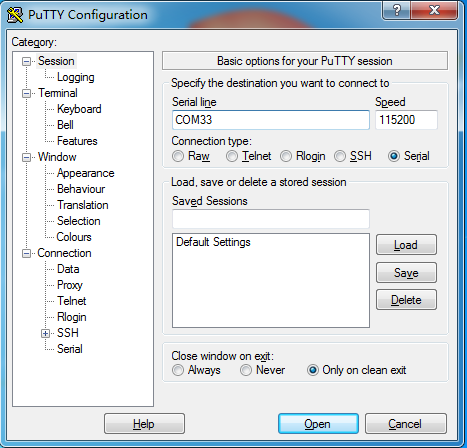
Unzipping it and run PUTTY.exe, choosing Connection type of Serial(serial port), set Serial line as a COM port that can be seen from device manager, and set Speed(baud rate)as 1500000, then press Open:
Serial Debugging in Linux
There could be multiple choices on Ubuntu:
picocom
minicom
kermit
It is quite easy to use picocom, and we will introduce how to use picocom below. The method to use other software is similar.
Install picocom
sudo apt-get install picocom
After connecting the serial cable, look at the serial device file. for example:
ls /dev/ttyUSB*
/dev/ttyUSB0
Running picocom
picocom -b 1500000 /dev/ttyUSB0
picocom v1.7

port is        : /dev/ttyUSB0
flowcontrol    : none
baudrate is    : 1500000
parity is      : none
databits are   : 8
escape is      : C-a
local echo is  : no
noinit is      : no
noreset is     : no
nolock is      : no
send_cmd is    : sz -vv
receive_cmd is : rz -vv
imap is        :
omap is        :
emap is        : crcrlf,delbs,

Terminal ready
As for the above prompts, Ctrl-a is the escape key, press Ctrl-a Ctrl-q to exit the terminal. Besides, Ctrl-q , there are also several commonly used control commands:
Ctrl-u: raise baud rateCtrl-d: reduce baud rateCtrl-f: switch flow control setting(hardware flow control RTS/CTS, software flow control XON/XOFF, none)Ctrl-y: switch parity check ( even, odd, none)Ctrl-b: switch data bits (5, 6, 7, 8)Ctrl-c: switch local-echoCtrl-v: show parameters and status of current serial port