1. OpenWRT Manual
1.1. List of supported devices
| Main Control | Board Model |
|---|---|
| RK3568 | ROC-RK3568-PC/Station-P2 |
1.2. Login IP, login password and WIFI name
The default login IP of the firmware is 192.168.1.1, and the login password is firefly.
Default WIFI name is OpenWRT-XXXX, no password
1.3. WAN port and LAN port mapping
Station P2/ROC-3568-PC:
| Shell | Linux NIC | |
|---|---|---|
WAN port |
Ethernet port 1 | eth0 |
LAN port |
Ethernet port 2 | eth1 |
1.4. Firmware download
Download address: https://www.stationpc.cn/download
1.5. firmware burning
1.5.1. Burn to SD card (recommended)
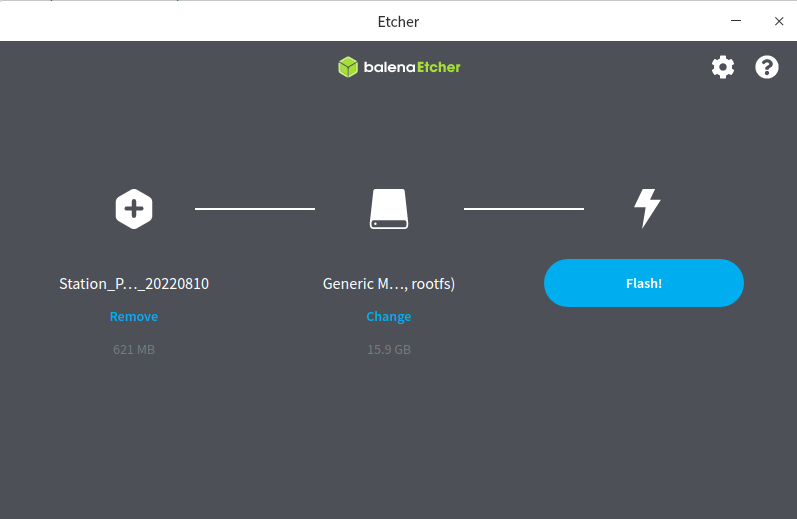
1.5.1.1. Download balenaEtcher
Download address: https://www.balena.io/etcher/, the installation process is omitted
1.5.1.2. Use balenaEtcher to make SD boot card
1.5.2. Program to EMMC
1.5.2.1. Download RK burning tool
Install
RKdriver assistantDownload address: https://en.t-firefly.com/doc/download/89.html#other_11
Install
Android Toolsprogramming toolDownload address: https://en.t-firefly.com/doc/download/89.html#other_343
Download
RK3566/RK3568 NorFlash2eMMCLoaderDownload address: https://en.t-firefly.com/doc/download/89.html#other_480
Switch to
EMMCmemoryDisconnect the power supply, connect the
type-ccable to the development board, press and hold therecoverybutton, plug in the power supply, and enter themaskrommodeProgram
RK356x_NorFlash2eMMC-Loader_xxx.img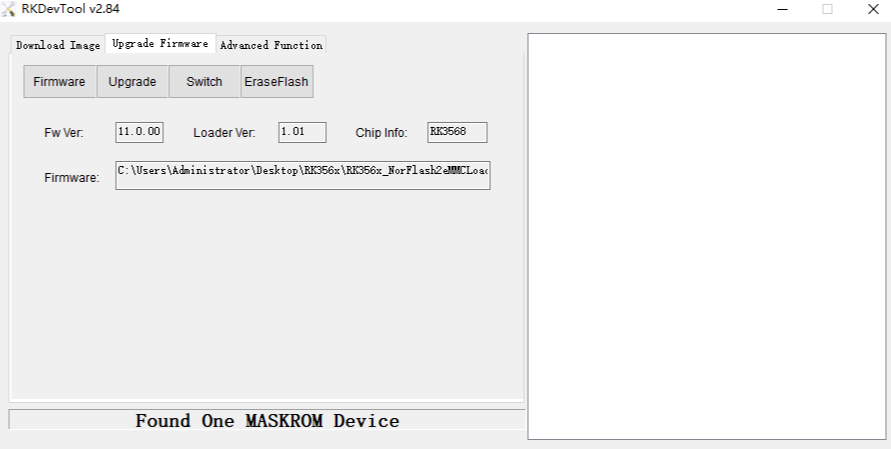
After the programming is successful, wait for about 20s, the system will enter the
Loadermode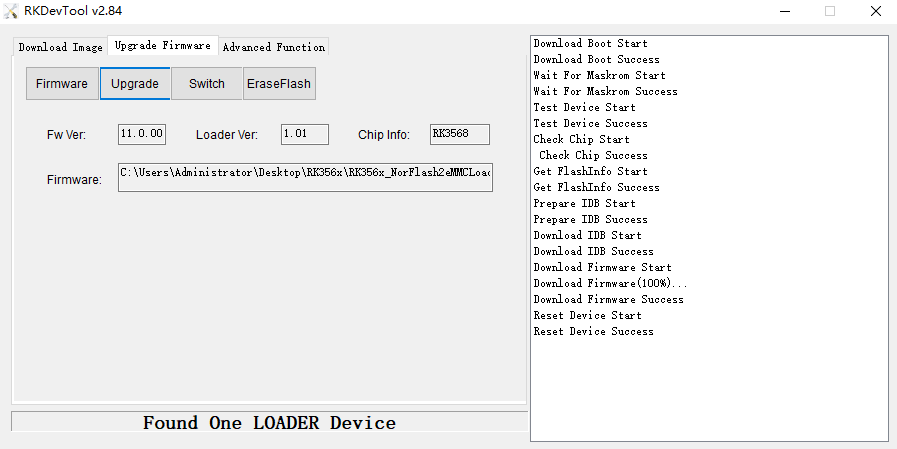
Program to
EMMCmemoryDecompress the firmware (note that the firmware programmed to
EMMCmust be decompressed)Press the right button to add an “
OpenWRT” option, the address is 0, select the decompressed firmware, and then burn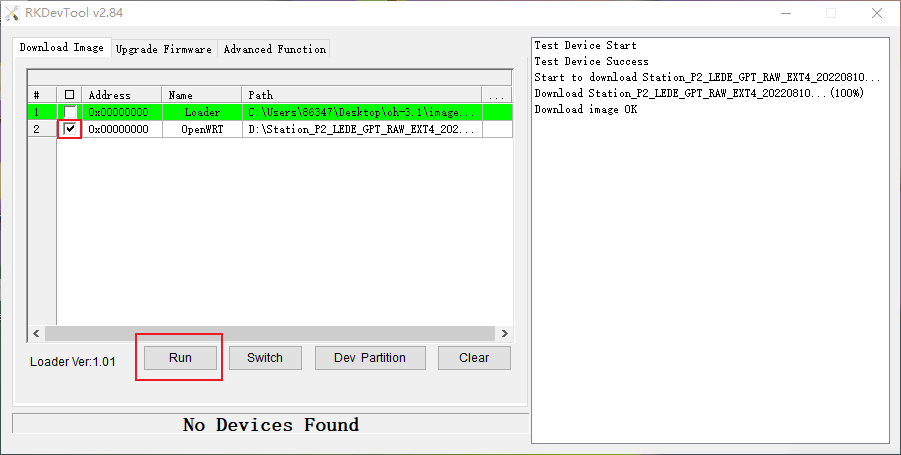
1.6. firmware compilation
1.6.1. Prerequisites
Install the system of
Ubuntu18.04and above
1.6.2. Environment setup
sudo apt update -y
sudo apt full-upgrade -y
sudo apt install -y ack antlr3 asciidoc autoconf automake autopoint binutils bison build-essential \
bzip2 ccache cmake cpio curl device-tree-compiler fastjar flex gawk gettext gcc-multilib g++-multilib \
git gperf haveged help2man intltool libc6-dev-i386 libelf-dev libglib2.0-dev libgmp3-dev libltdl-dev \
libmpc-dev libmpfr-dev libncurses5-dev libncursesw5-dev libreadline-dev libssl-dev libtool lrzsz \
mkisofs msmtp nano ninja-build p7zip p7zip-full patch pkgconf python2.7 python3 python3-pip libpython3-dev qemu-utils \
rsync scons squashfs-tools subversion swig texinfo uglifyjs upx-ucl unzip vim wget xmlto xxd zlib1g-dev
1.6.3. Source code download
git clone https://github.com/FireflyTeam/lede
cd lede
./scripts/feeds update -a
./scripts/feeds install -a
make download -j$(nproc)
1.6.4. source code compilation
Compile
ROC-RK3568-PC/Station-P2cp config/station_p2_base_defconfig .config make defconfig make V=s -j$(nproc)
1.6.5. After successful compilation
After the compilation is successful, the path of the firmware is: bin/targets/rockchip/armv8/
-rw-r--r-- 1 user1 user1 26085956 8月 17 09:49 Station_P2_LEDE_GPT_RAW_20220817.zip
1.7. extended partition
After the firmware is burned, generally only a few hundred MB of space is available, so the partition needs to be expanded. This step can be configured in the luci interface:
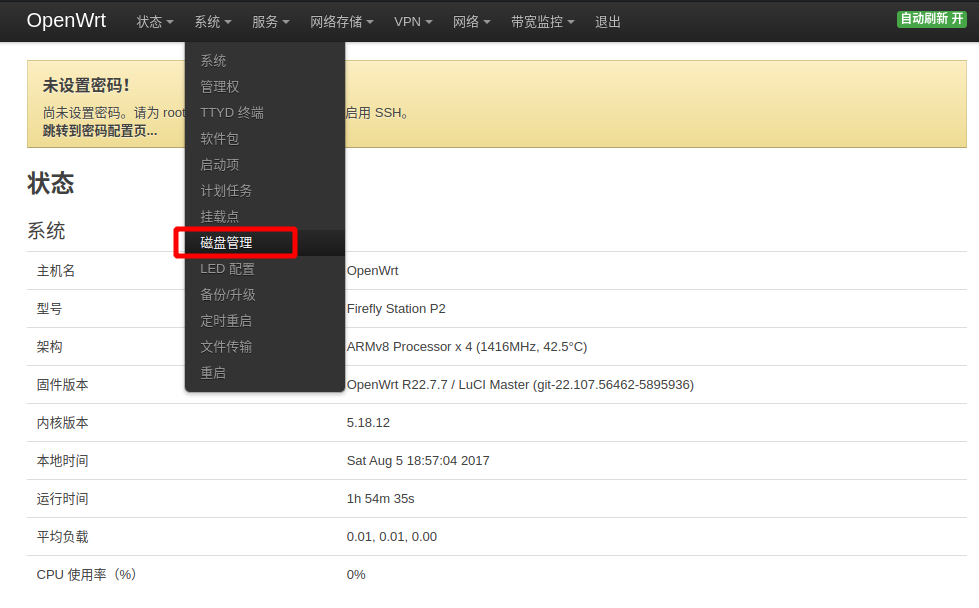
Go to Disk Management and create a new partition with the remaining space
Click on Disk Management
Modify disk
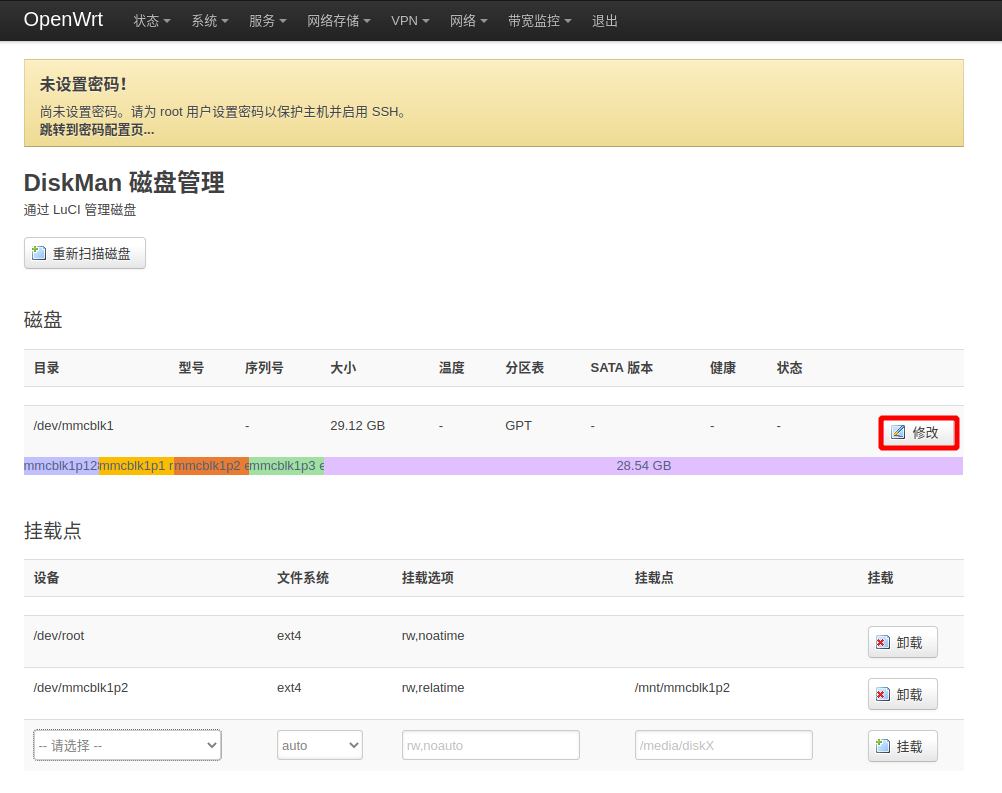
create a new partition

Format the new partition as
ext4filesystem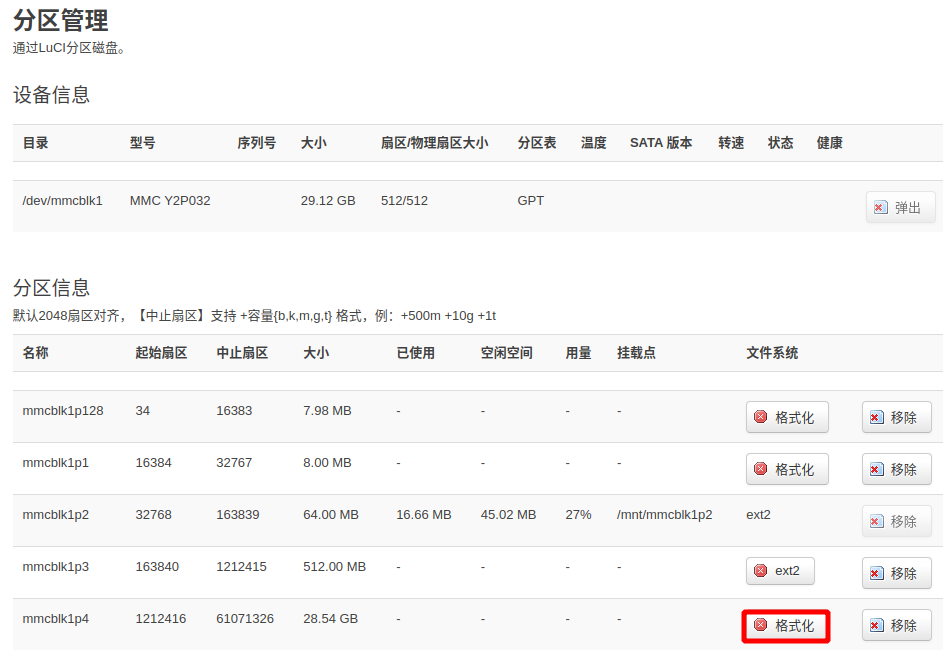
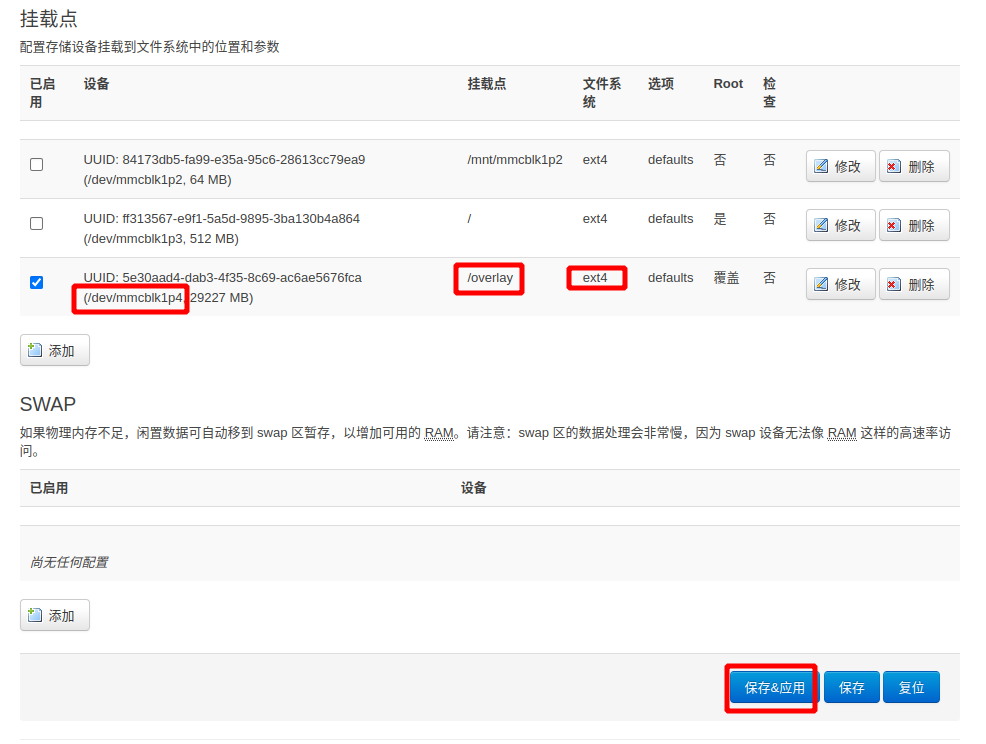
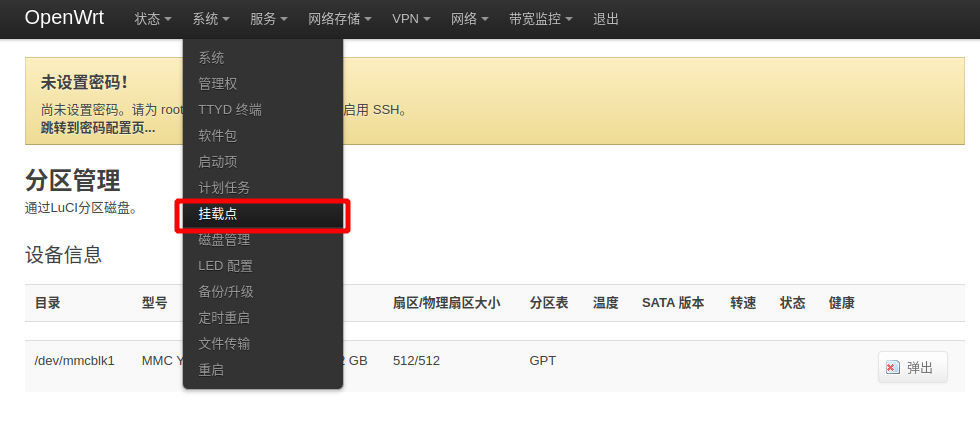
Go to the mount point and mount the new partition to /overlay
Click on the mount point
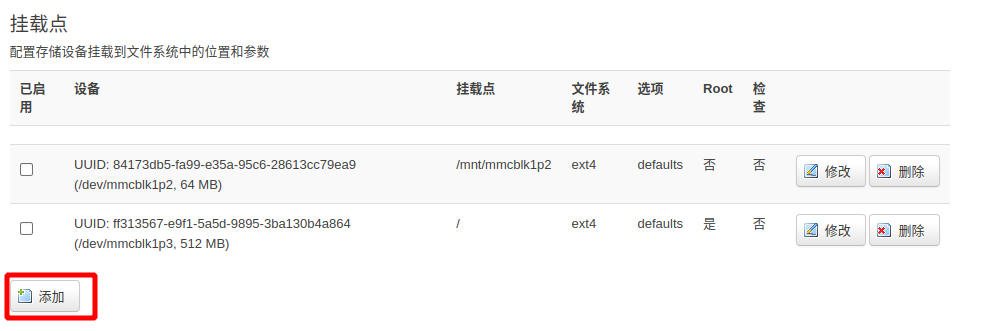
add a new mount point
Enable this mount point and create a new partition where the
UUIDis located, and the mount point is/overlay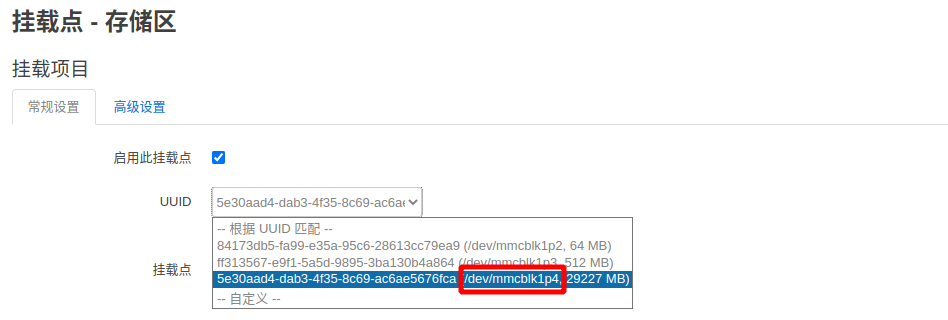
Remember to save and apply
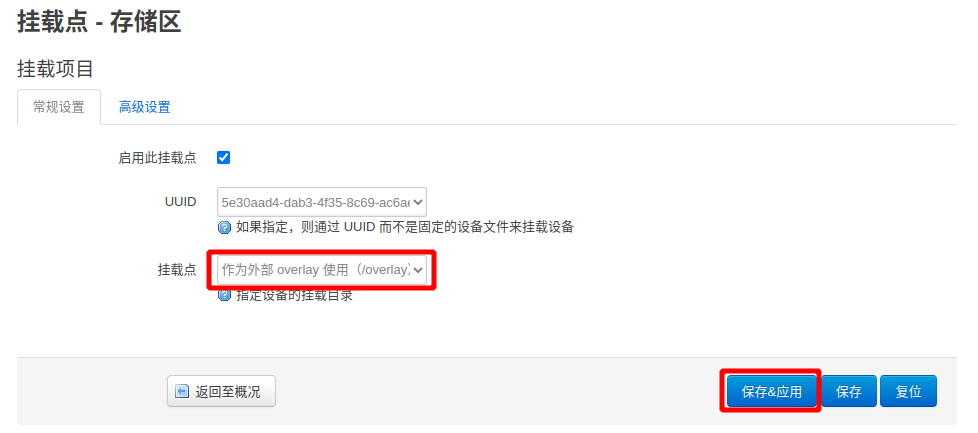
Save mount point information