4. Switching Upgrade Storage
4.1. Introduction
This article describes what you should pay attention to when burning firmware when the host is attached to both the eMMC(default) and the NOR Flash storage media:
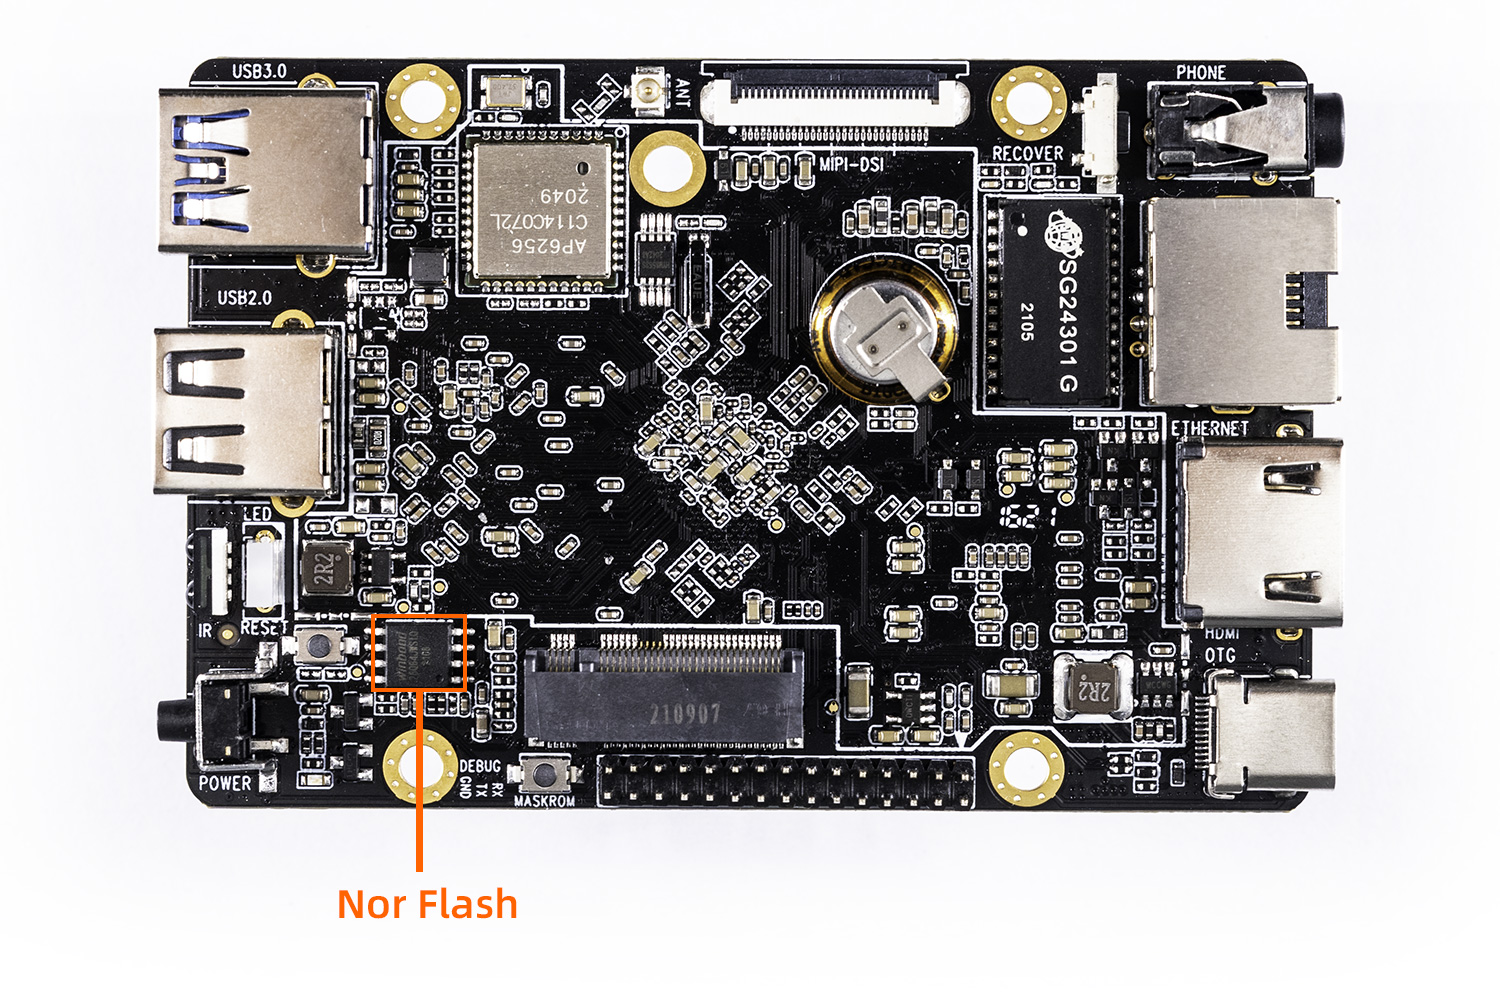
As shown in the figure below, the device has a Nor Flash storage media.
4.2. Loader Mode
If you enter the loader download mode by executing ‘reboot loader’ in software or by using the hardware Recovery key, you don’t need to look at the next content, just skip to the operation of 《upgrade_firmware》 .
4.3. Maskrom Mode
If you enter Maskrom mode through “How to enter MaskRom mode”, and the board has both Nor-Flash and EMMC storage media, this raises the question of which storage media we use to burn firmware. The following introduces how to download firmware to different storage media.
4.3.1. Download to Nor-Flash
In Maskrom mode, the system will download firmware to Nor-Flash by default if the board has the Nor-Flash. However, Nor-Flash storage space is too small to load the whole system firmware, so only small files will be load, such as MiniLoaderAll.bin .
If we accidentally download the whole system firmware to Nor-Flash, the board will turn brick due to the failure of downloading firmware(下载固件失败). At this time, if we want to re-enter Maskrom mode, we could short circuit test points(or pins) between D0(CLK) and GND of Nor-Flash, refer to chapter MaskRom mode for more details.
4.3.2. Download to EMMC
There are two methods to burn firmware into EMMC. One is the burning method provided by Rockchip, which needs to burn MiniLoaderAll.bin and switch storage media.
The other is a reference burning method provided by Firefly to facilitate everyone to burn, this method does not need to switch the memory storage media in operation, and it can also support uprade_tool for Linux System.
4.3.2.1. The 1nd Method From Firefly
This method is only available in the latest official SDK compilation firmware or the latest official firmware. If the firmware is accidentally downloaded to the NOR flash in Maskrom mode, causing the device to fail to start up properly after reboot, you can enter the MaskRom mode and upgrade the latest SDK compilation or the firmware provided by the official. Regardless of whether the upgrading is successful or not, when the machine restarts, if there is data in the NOR flash, it will be automatically erased. The erasing process takes about 30 to 60 seconds. After successful erasing, the machine will automatically enter the Loader mode, and then you can directly upgrade the firmware.
4.3.2.2. The 2rd Method From Rockchip
To download firmware to EMMC, we need to download Boot first, and then select to switch storage media to EMMC. The specific operation steps are as follows:
Step 1: We need to get MiniLoaderAll.bin which will download to the Boot, this kind * Loader *. bin can be compiled firmware of the corresponding device model in SDK to generate, we could find it in the directory rockdev finally.
#Android SDK
rockdev/Image-rk3566_roc_pc/MiniLoaderAll.bin

#Linux SDK
rockdev/MiniLoaderAll.bin
If we have not compiled, we can download a MiniLoaderAll.bin for the corresponding CPU model.
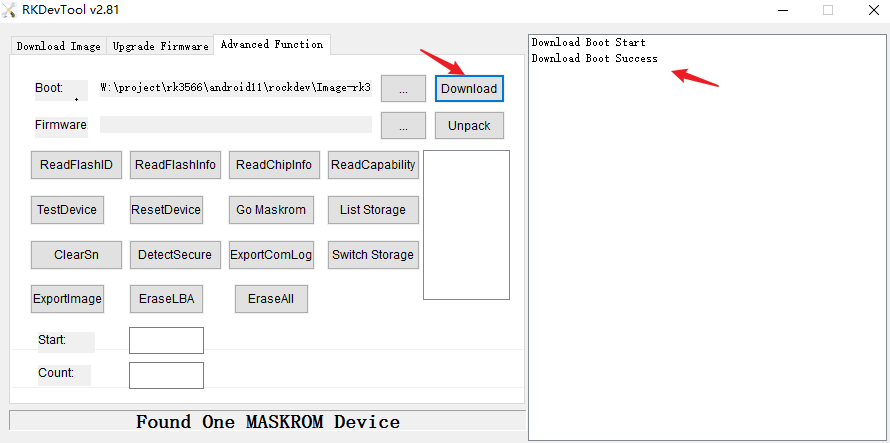
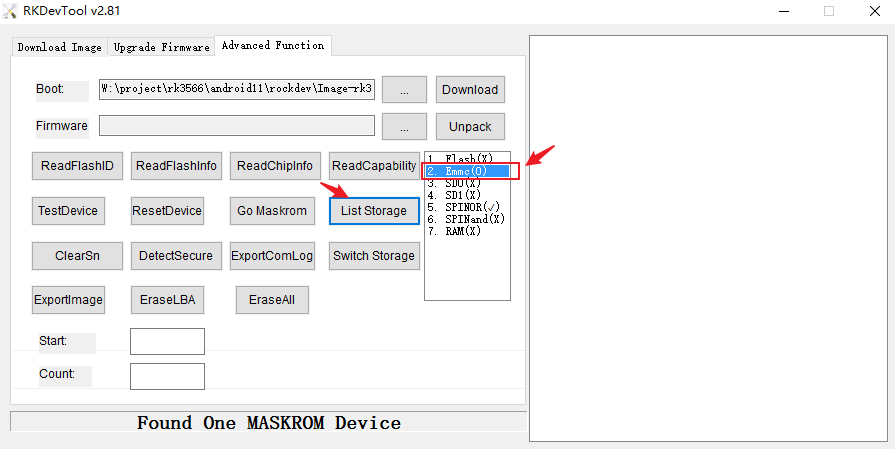
Step 2: Click the option Adanced Function of the RKDevTool found at directory RKTools/windows/AndroidTool in SDK, and then download the file MiniLoaderAll.bin to the Boot by clicking the button Download when MiniLoaderAll.bin has been selected at the Boot text box. The figure shown as following:
Step 3: Click the button List Storageto get the storage media list, the SPINOR is selected in the list, we click EraseAll to erase Nor-Flash
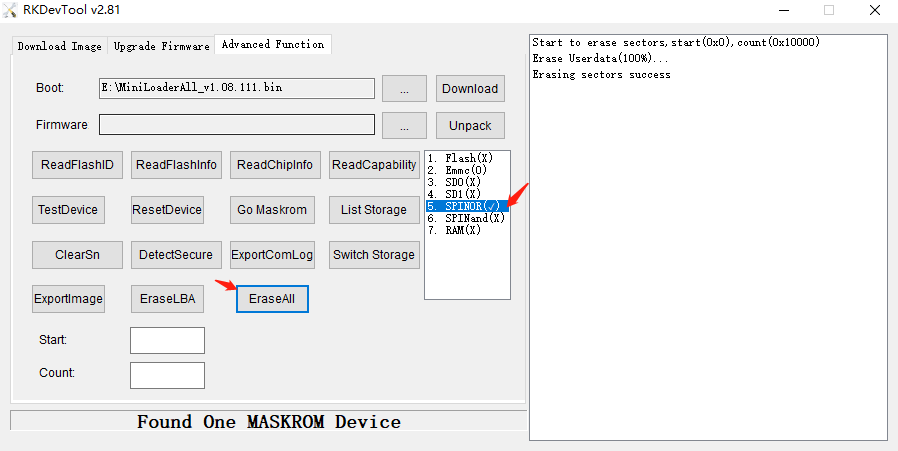
Xmeans device does not exist0means the media exist, but is not selected√means the media exist and in the selected state
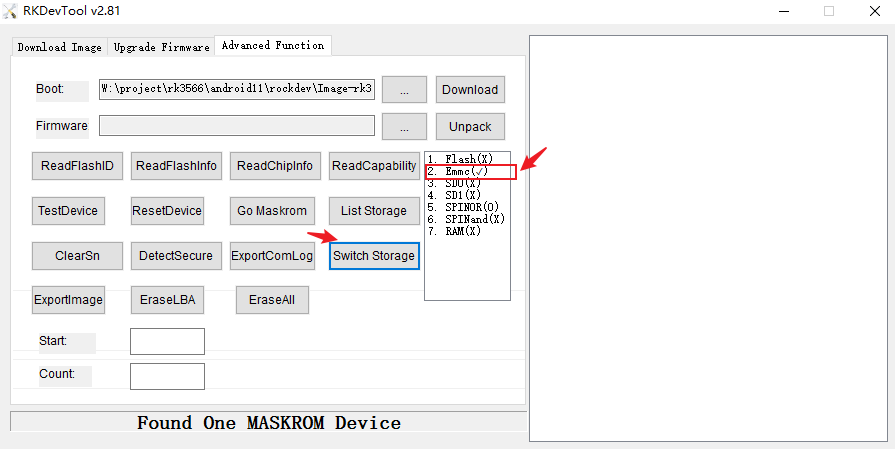
Step 4: Select the storage media Emmc of the list and click the button Switch Storage
the storage media Emmc state of the list will go from 0 to √, indicating EMMC is selected. At this time, the firmware we dowload to the board will be burned into EMMC
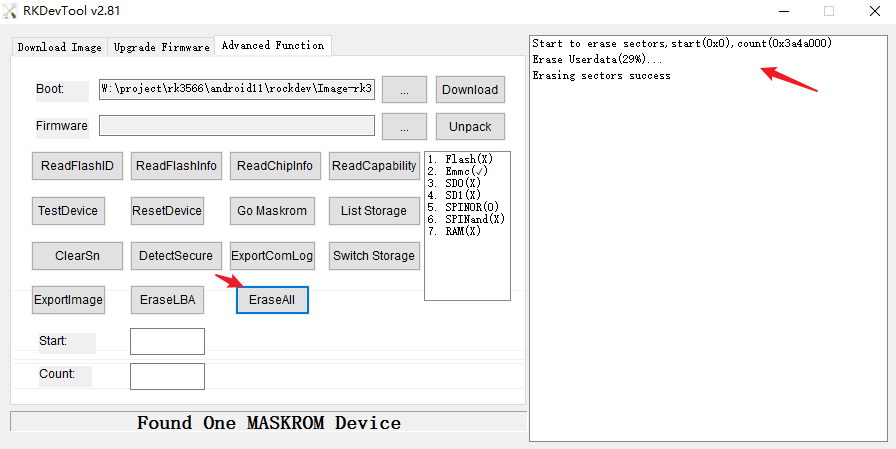
Step 5: click the button EraseAll to erase EMMC
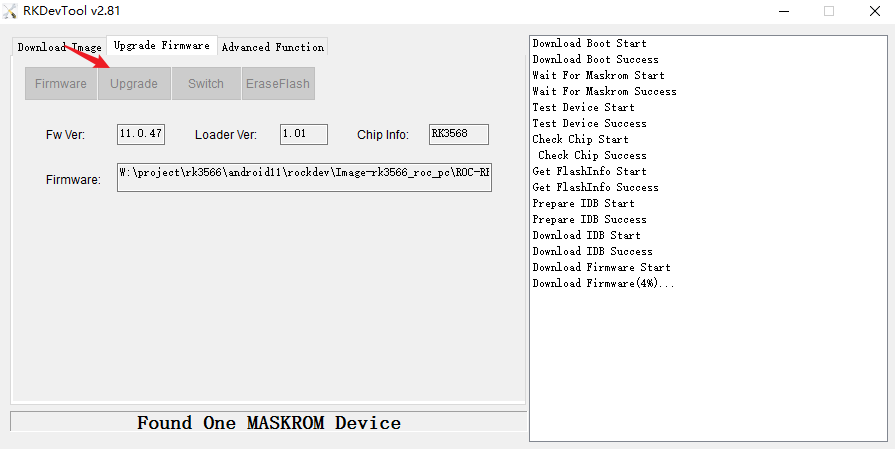
Step 6: Click the option Upgrade Firmware,select one system firmware we want to download in and click Upgrade done
4.4. FAQ
4.4.1. Download Firmware Fail in Maskrom mode
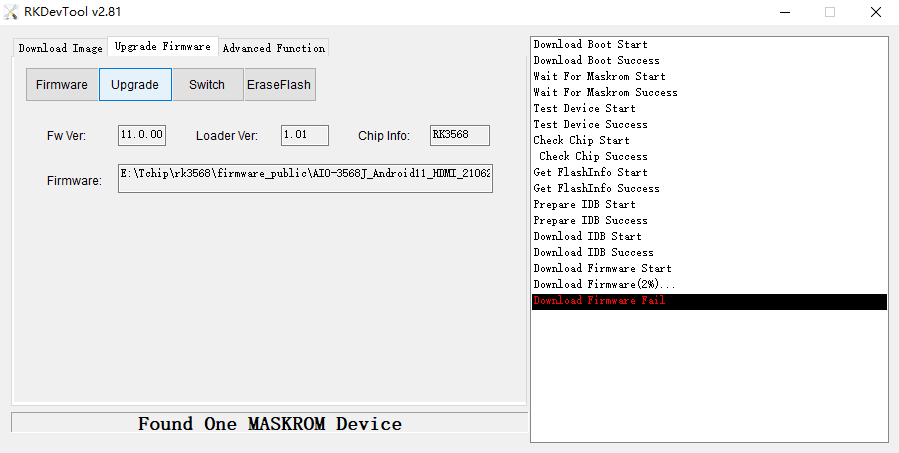
This failure is caused by the firmware burning directly into Nor-Flash. We must follow steps of Download to EMMC.
4.4.2. Enter in Uboot by Nor-Flash
Bootdev(atags): mtd 2
GUID Partition Table Header signature is wrong: 0xA9425BF5A94153F3 != 0x5452415020494645
*** ERROR: Can't write GPT header ***
Backup GPT repair fail!
PartType: EFI
...
Device 0: unknown device
No ethernet found.
missing environment variable: pxeuuid
...
Retrieving file: pxelinux.cfg/default
No ethernet found.
Config file not found
No ethernet found.
No ethernet found.
=>
This phenomenon indicates that there are burned files in Nor-Flash, and it is necessary to erase Nor-Flash. We could erase Nor-Flash in this Uboot command line mode, it will take about 3-5 minutes
=> mtd erase nor0
Erasing 0x00000000 ... 0x01ffffff (8192 eraseblock(s))
=> reboot
Nor-Flash also could be erased by AndroidTool, refer to chapter “How to enter MaskRom mode” to short circuit Nor-Flash to enter in Maskrom, the premise is that EMMC is empty.
If EMMC is not empty, you need to short circuit EMMC at the same time or press ctrl+c to enter uboot command line and enter rbrom during EMMC startup
U-Boot 2017.09 (Jul 07 2021 - 10:03:57 +0800)
...
dwmmc@fe2b0000: 1, dwmmc@fe2c0000: 2, sdhci@fe310000: 0
Bootdev(atags): mmc 0
MMC0: HS200, 200Mhz
...
  pclk_pmu 100000 KHz
Net:   eth1: ethernet@fe010000, eth0: ethernet@fe2a0000
Hit key to stop autoboot('CTRL+C'):  0
=> <INTERRUPT>
=> <INTERRUPT>
=> rbrom
And then, the mode is Maskrom, we follow steps of Download to EMMC