.png)
串口调试
使用 Type-C 串口调试
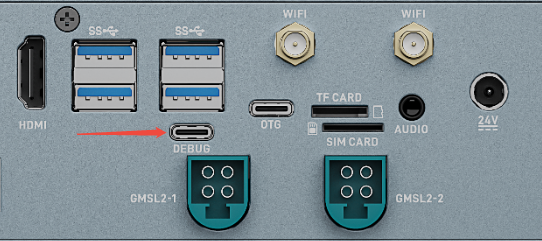
EC-AGXOrin 可以使用 Type-C 线连接到 PC 机进行串口调试:
Windows 上使用串口调试
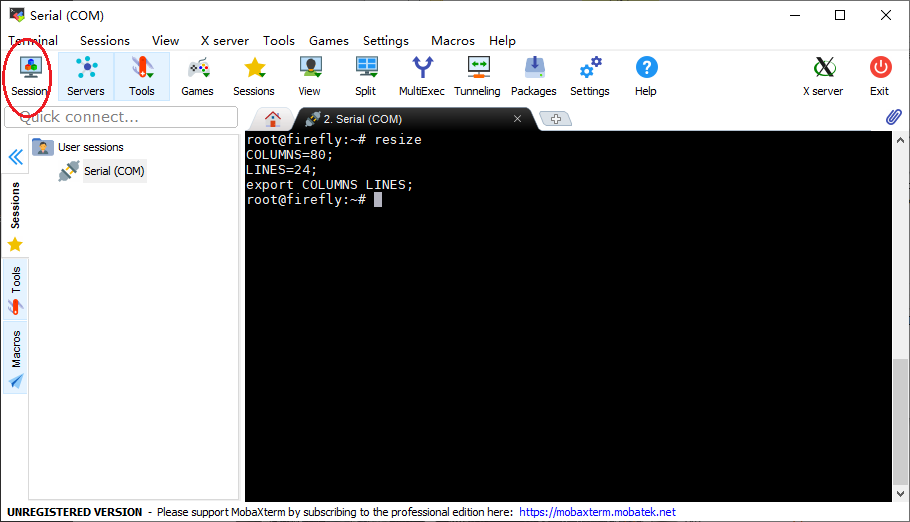
Windows 上一般用 putty 或 SecureCRT 软件。其中我们推荐使用 MobaXterm 免费版本。这是一款功能强大的终端软件,在这里介绍一下,其他软件的使用方法与之类似。
到这里下载 MobaXterm:
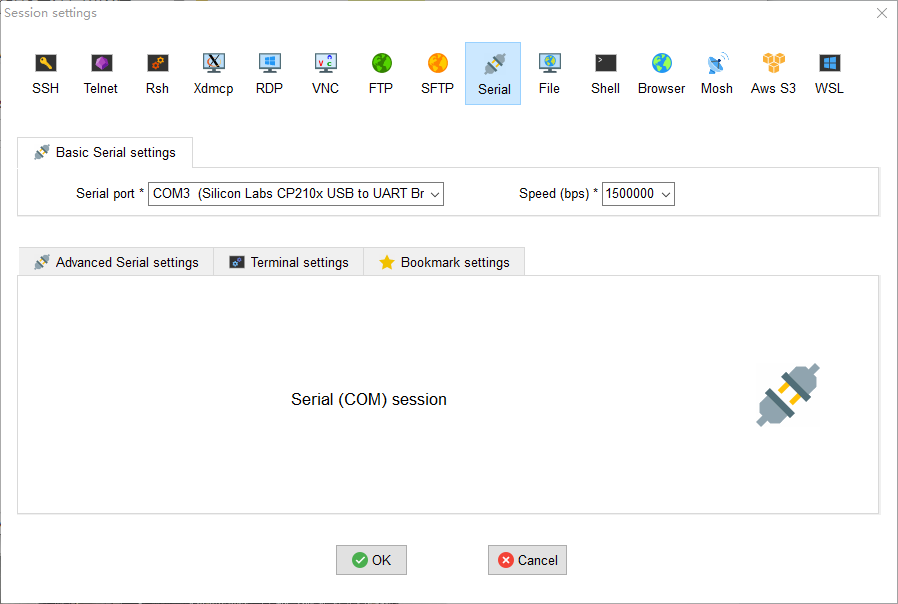
选择
session为Serial。将
Serial port修改为在设备管理器中找到的 COM 端口。设置
Speed (bsp)为115200。点击
OK按钮。
Linux 上使用串口调试
在 Linux 上可以有多种选择:
minicom
picocom
kermit
篇幅关系,以下就介绍 minicom 的使用。
安装 minicom:
sudo apt-get install minicom
连接好串口线的,看一下串口设备文件是什么(注意,如果 Type-C 接口,在 Linux 系统的设备文件为:/dev/ttyACMx),下面示例是 /dev/ttyUSB0:
$ ls /dev/ttyUSB*
/dev/ttyUSB0
运行:
$ sudo minicom
Welcome to minicom 2.7
OPTIONS: I18n
Compiled on Jan  1 2014, 17:13:19.
Port /dev/ttyUSB0, 15:57:00
Press CTRL-A Z for help on special keys
以上提示 CTRL-A Z 是转义键,按 Ctrl-a 然后再按 z 就可以调出菜单:
   +-------------------------------------------------------------------+
                          Minicom Command Summary                      |
  |                                                                    |
  |              Commands can be called by CTRL-A <key>                |
  |                                                                    |
  |               Main Functions                  Other Functions      |
  |                                                                    |
  | Dialing directory..D  run script (Go)....G | Clear Screen.......C  |
  | Send files.........S  Receive files......R | cOnfigure Minicom..O  |
  | comm Parameters....P  Add linefeed.......A | Suspend minicom....J  |
  | Capture on/off.....L  Hangup.............H | eXit and reset.....X  |
  | send break.........F  initialize Modem...M | Quit with no reset.Q  |
  | Terminal settings..T  run Kermit.........K | Cursor key mode....I  |
  | lineWrap on/off....W  local Echo on/off..E | Help screen........Z  |
  | Paste file.........Y  Timestamp toggle...N | scroll Back........B  |
  | Add Carriage Ret...U                                               |
  |                                                                    |
  |             Select function or press Enter for none.               |
  +--------------------------------------------------------------------+
根据提示按 O 进入设置界面,如下:
           +-----[configuration]------+
           | Filenames and paths      |
           | File transfer protocols  |
           | Serial port setup        |
           | Modem and dialing        |
           | Screen and keyboard      |
           | Save setup as dfl        |
           | Save setup as..          |
           | Exit                     |
           +--------------------------+
把光标移动到“Serial port setup”,按enter进入串口设置界面,再输入前面提示的字母,选择对应的选项,设置成如下:
   +-----------------------------------------------------------------------+
   | A -    Serial Device      : /dev/ttyUSB0                              |
   | B - Lockfile Location     : /var/lock                                 |
   | C -   Callin Program      :                                           |
   | D -  Callout Program      :                                           |
   | E -    Bps/Par/Bits       : 115200 8N1                                |
   | F - Hardware Flow Control : No                                        |
   | G - Software Flow Control : No                                        |
   |                                                                       |
   |    Change which setting?                                              |
   +-----------------------------------------------------------------------+
注意:Hardware Flow Control 和 Software Flow Control 都要设成 No,否则可能导致无法输入。
设置完成后回到上一菜单,选择 Save setup as dfl 即可保存为默认配置,以后将默认使用该配置。