6. Algorithm Adaptation
This chapter is mainly aimed at two types of users:
(i) Users use ready-made third-party model algorithms. At this time, users do not need to care about the details of model training, conversion and inference, and only need to complete the deployment of the algorithm.
(ii) Users implement the algorithm and train the model themselves. Users need to refer to the 《NPU Usage》 section to convert their own model to the RKNN model available for the NPU in the CAM-C1126S2U/CAM-C1109S2U device. This chapter takes the deployment and development of ArcSoft and Rockchip algorithms as examples.
6.1. Adapting ArcSoft Algorithms
ArchSoft provides two development kits
Provide the most basic SDK. Here it is called the
pure version.Provide a complete face recognition management system. Here it is called the
full version.
The difference between the pure version and the full version:
The pure version only contains the libraries required for face recognition, and users can design UI and business logic according to their own needs.
The full version includes the face recognition gate UI and face backend management application, which greatly facilitates project development.
6.1.1. Pure version
Click to download the ArcFace Linux RV1109 SDK version package: ArcFace_RV1109_SDK.zip
Unzip ArcFace_RV1109_SDK.zip
Refer to 《Quick Use》 to complete the device networking. If you use offline authorization, you can skip this step.
Refer to the package API documentation to complete device activation and application development. The technical requirements for using the pure version are relatively high, and you need to be familiar with the call of the ArcSoft face recognition algorithm API.
6.1.2. Complete version
The official firmware has a built-in complete version by default, so you can use it directly after booting. The following steps can be used for full version deployment as well as update versions.
Click to download the ArcFace Linux RV1109 version package, ArcFaceGo_RV1109_App.zip.
Unzip ArcFaceGo_RV1109_App.zip.
Make sure the device and host are connected and ADB is available.
Execute the script to complete the installation and deployment.
chmod 777 firefly.sh
./firefly.sh
ADB executes the gate application startup script. At this time, the screen can see that the program is running, but the device is not activated and cannot perform face recognition.
adb shell ./userdata/arc/start_app.sh 90
The host computer sets the USB network card static IP to 172.16.110.5.
Open 172.16.110.2 in the browser to enter the Web terminal.
Refer to 《Quick Use》 to complete the device networking. If you use offline authorization, you can skip this step.
Log in to the Web and refer to the document in the software package to complete the activation. You can also refer to the document for specific application usage.
6.2. Adapt Rockchip Algorithm
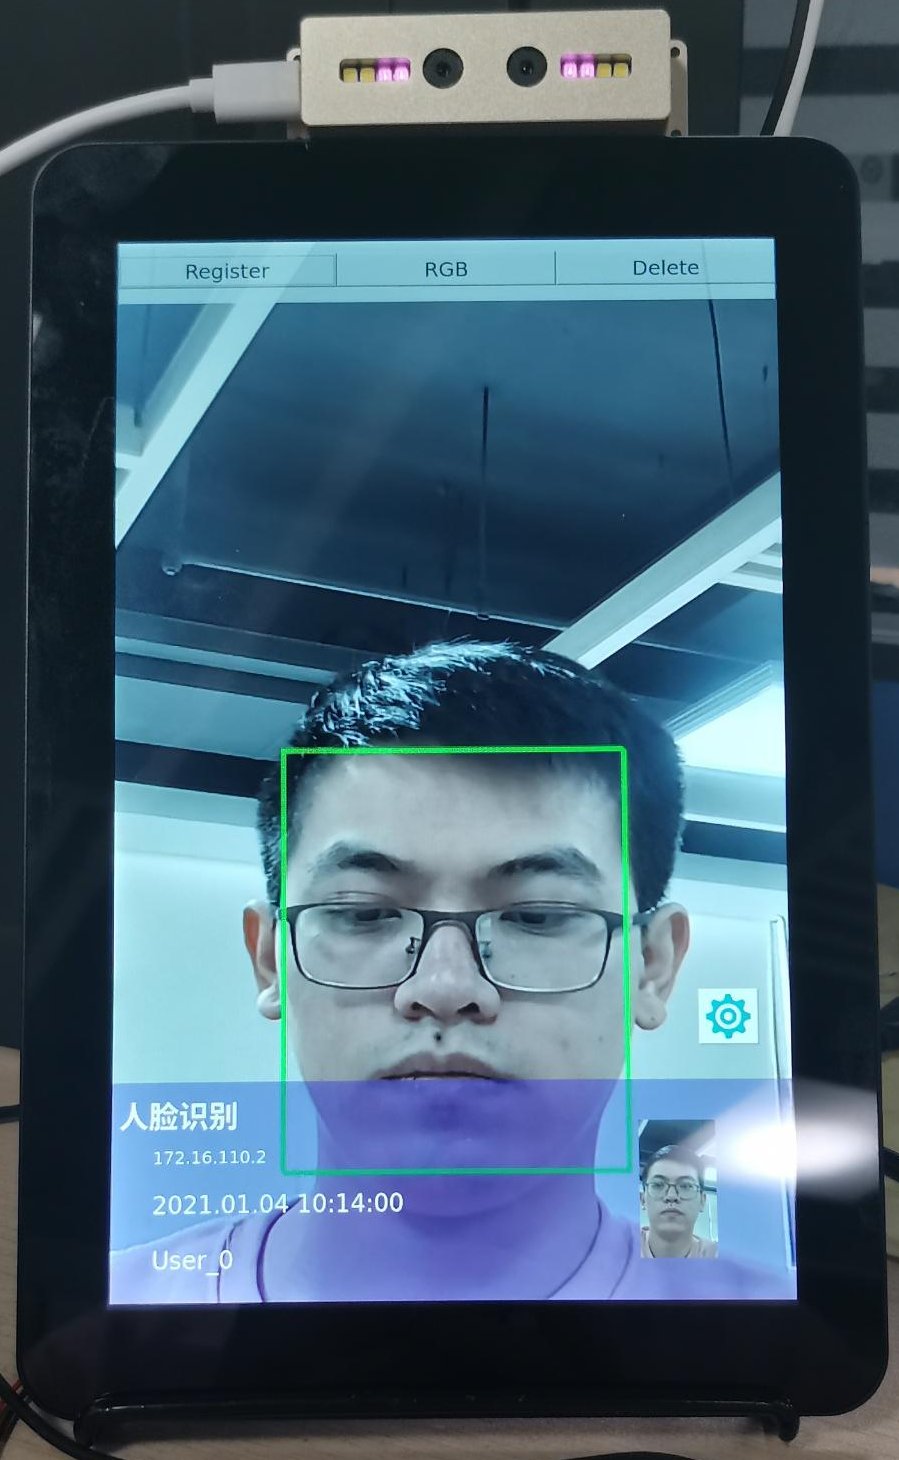
Rockchip independently developed a face recognition algorithm called rockface. Based on rockface, it encapsulates camera preview function, voice broadcast, face recognition UI partial display function and face registration management function. This application developed based on rockface is called rkfacial. Here, rockface is also called the pure version, and rkfacial is called the full version.
6.2.1. Code location
rockface
Path: /path/to/sdk/external/rockface
Description: rockface face SDK provides a series of face recognition analysis related functions, making full use of NPU to accelerate the algorithm model. Developers can quickly build face AI applications through the API interface provided by the SDK.
rkfacial
Path: /path/to/sdk/external/rkfacial
Description: rockface API reference guide.
QFacialGate
Path: /path/to/sdk/app/QFacialGate
Description: The final running QT application
6.2.2. Configuration Compilation
Rockchip has added the code to the buildroot source code compilation. You only need to turn on or off the corresponding configuration during buildroot compilation.
BR2_PACKAGE_QFACIALGATE=y
BR2_PACKAGE_RKFACIAL_USE_WEB_SERVER=y
BR2_PACKAGE_ROCKFACE_FACE_DETECTION_V3_FAST=y
BR2_PACKAGE_ROCKFACE_LIVING_DETECTION=y
In addition to the above configurations, there are some dependent configurations. For details, please refer to the configs/firefly_rv1126_rv1109_facial_gate_defconfig configuration file.
6.2.3. QT Development
QFacialGate is the entry point of the program. Since the factory firmware has a built-in Rkfacial trial version, you can directly modify, compile, and replace QFacialGate to complete the preliminary development.
After completing a complete buildroot compilation, enter the compilation output directory for secondary development of QFacialGate.
# Here is the output path after compiling with the default configuration
cd sdk/buildroot/output/firefly_rv1126_rv1109_facial_gate/build/QFacialGate-1.0/

# Execute compilation
make
You can add some of your own controls after successful recognition, such as external relays and LED lights.
# desktopview.cpp -> paintBox()
if(ret) {
        display_paint_box(left, top, right, bottom);
        switch(desktopView->videoItem->facial.state) {
                case USER_STATE_REAL_UNREGISTERED:
                        display_set_color(set_yuv_color(COLOR_B));
                        break;
                case USER_STATE_REAL_REGISTERED_WHITE:
                        display_set_color(set_yuv_color(COLOR_G));
                        break;
                case USER_STATE_REAL_REGISTERED_BLACK:
                        display_set_color(set_yuv_color(COLOR_BK));
                        break;
                default:
                        display_set_color(set_yuv_color(COLOR_R));
                        break;
        }
# You can add corresponding operations in the identification of registered, unregistered, and blacklist, and recompile to cover the board.
# It is worth noting that the camera preview is not done with QT, but with Rkfacial. All frames,
# Information drawing is achieved by configuring the Rkfacial callback function. After the modification is completed, you can directly make
# compile. If the final modification is to be solidified in buildroot, you need to add the modification to sdk/app/QFacialGate
After modification, deploy via adb
adb shell "/etc/init.d/S06_QFacialGate stop"
adb push QFacialGate /
adb shell "cp /QFacialGate /usr/bin/QFacialGate"
adb shell "/etc/init.d/S06_QFacialGate start"
Related development documents
QFacialGate
Path:/path/to/sdk/app/QFacialGate/doc/Rockchip_Instruction_Linux_QFacialGate_CN.pdf
Rkfacial
Path:/path/to/sdk/external/rkfacial/doc/Rockchip_Instruction_Rkfacial_CN.pdf
Web backend development framework
Path:/path/to/sdk/docs/RV1126_RV1109/ApplicationNote/Rockchip_Developer_Guide_Linux_Application_Framework_CN.pdf
Web page introduction
Path:/path/to/sdk/docs/RV1126_RV1109/ApplicationNote/Rockchip_Instructions_Linux_Web_Configuration_CN.pdf