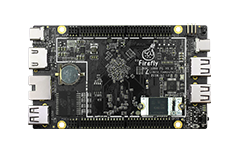
ROC-RK3399-PC is a phone sized mini PC board。
Dual-core Cortex-A72 up to 1.8GHz & Quad-core Cortex-A53 up to 1.5GHz
Mali-T864 GPU,support OpenGL ES1.1/2.0/3.0, OpenCL1.2, DirectX11.1.
LPDDR4 RAM (4GB)
3 x USB 2.0 & 2 x USB 3.0
10/100/1000M Ethernet
IR Receiver Module
HDMI 2.0a with HDCP 2.2
DisplayPort 1.2 (4K 60Hz)
3 x MIPI interface:MIPI0 only for DSI, MIPI1 for DSI or CSI, MIPI2 only for CSI
eDP 1.3
I2S, supports 8 channels
High-Speed eMMC extension interface
MicroSD (TF) Card Slot
2 x Typec interface:Typec-0 support DP 1.2、PD 2.0、USB3.0,Typec-1 support DP 1.2、USB3.0
RTC : battery model – CR1220 ; Battery seat – CR1220,BS-12-A3B0J002
132 pin expansion interface:I2C、SPI、Uart、I2S….
Shipping list (for reference only)
1 x ROC-RK3399-PC
1 x USB Type-A to Type-C data cable
Accessories
In addition, you may need the following accessories during use:
PD power supply 15V / 3A (45W)
SD card, emmc
ROC-RK3399-PC expansion board
Serial port module
Note: The development board uses PD (15V / 3A, 45W) power supply, please use it with a suitable power supply.
Development board power on
Before powering up the development board, confirm the following:
Bootable SD card or eMMC
15V / 3A / 45W PD power supply
Since the development board is powered by Type-C0, and Type-C1 supports DP video signal output, there are two cases for booting:
Connect the independent PD power supply:
Insert one of the bootable SD cards or eMMC with the power off.
Plug in an HDMI cable, USB mouse or keyboard (optional).
After checking that all connections are normal, Type-C0 is connected to the PD power supply and powered on.
Connect to the Type-C port of the display, and supply power to the board through the display while outputting signals
Insert one of the bootable SD cards or eMMC with the power off.
Plug in an HDMI cable, USB mouse or keyboard (optional).
After checking that all connections are normal, Type-C0 is connected to the Type-C port of the display and powered on.
Note: There are two Type-C ports on the board. ** The power input can only be connected to Type-C0 port **, not to Type-C1.
