Flashing to the SD Card
We will introduce how to flash the firmware to the SD card. Read about firmware format if of any doubt.
We recommend using SDCard Installer to flash the Raw Firmware, and SD Firmware Tool to flash the RK Firmware.
Here’s the available OS list of firmware:
Android 7.1.2
Ubuntu 16.04
Ubuntu 18.04
Debian 9
LibreELEC 9.0
Preparing the SD Card
Please read this good article about how to prepare a SD card first, to make sure that you have a good, reliable and fast SD card, which is of essential importance for system stability.
Download Firmware
Firmware description: the firmware is divided into Raw Firmware and RK Firmware, which has been classified into different folders. The latest firmware is the one with the latest date, which is often more stable. Please choose the correct tool according to the type of firmware you need.
Flashing Tools
Please choose the flashing tool according to your host PC OS:
Flash the Raw Firmware
GUI:
SDCard Installer (Linux/Windows/Mac)
Etcher (Linux/Windows/Mac)
SD Firmware Tool (Windows)
CLI:
dd (Linux)
Flash the RK Firmware
GUI:
SD Firmware Tool (Windows)
CLI:
dd (Linux)
SDCard Installer
The easiest way to flash the Raw Firmware is to use the official SDCard Installer, a handy firmware flashing tool derived from Etcher / Rock64 Installer. It saves time to search for available firmwares for your device. You just need to select the board, choose firmware, plugin in the SD card, and finally click the flash button, which is simple and straightforward.
Instructions:
Download SDCard Installer from the Download Page.
Install and run:
Windows: Extract the archive file and run the setup executable inside. After installation, run SDCard Installer as administrator from the start menu.
Linux: Extract the archive file and run the
.AppImagefile inside.Mac: Double click the
.dwgfile, install to the system or run directly.
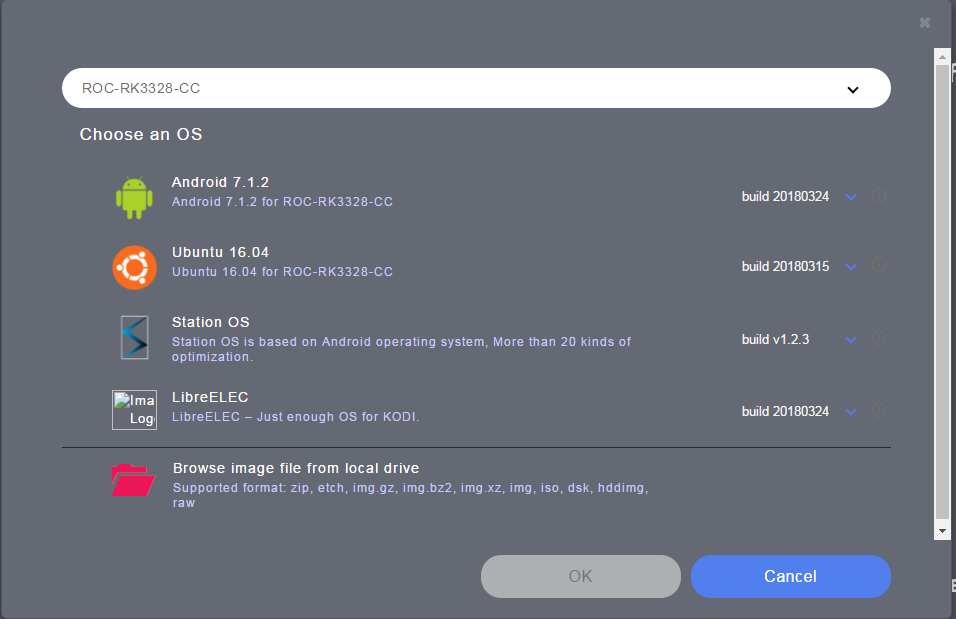
Click the “Choose an OS” button, and select “ROC-RK3328-CC” in the “Please select your device” combobox.
A list of available firmware is updated from the network and presented to you, as illustrated below:

Choose an firmware OS, and click “OK” button. To flash local firmware, drag it from your local drive and drop to SDCard Installer.
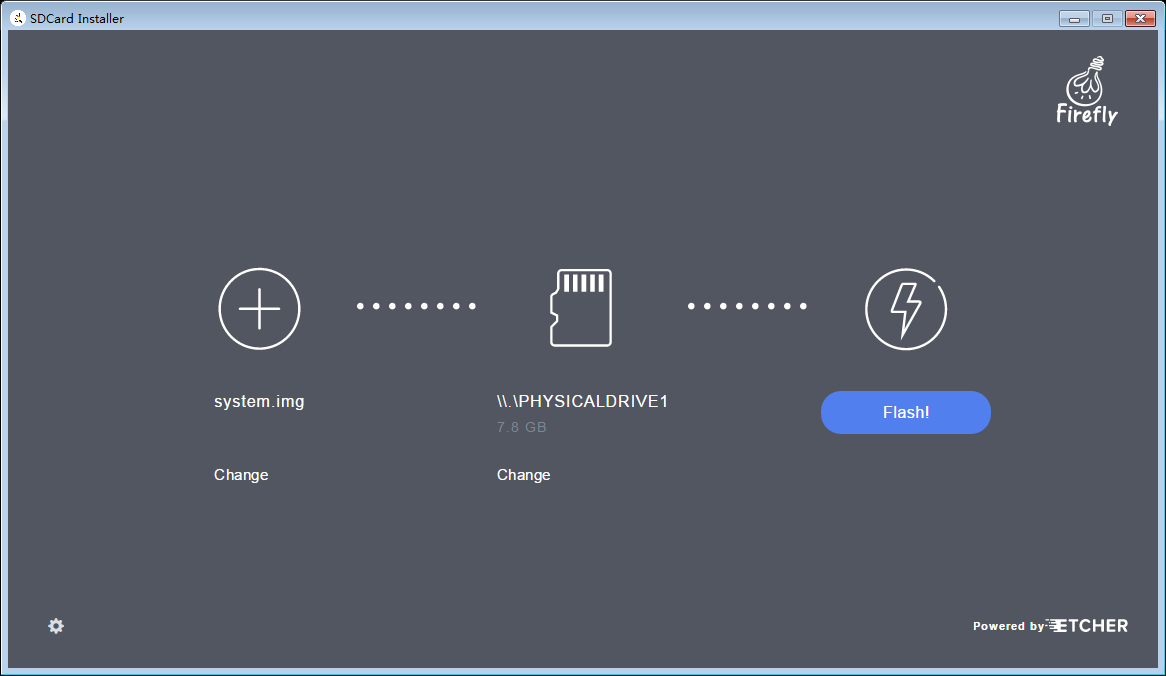
Plug in the SD card. It should be automatically selected. If there are multiple SD cards, click the “Change” button to choose one.
Click the “Flash!” button. SDCard Installer will start to download the firmware, flash to the SD card, and verify the content. Please wait patiently.

Note:
To run SDCard Installer with proper permission in Windows, you need to right click the shortcut and select Run as administrator.
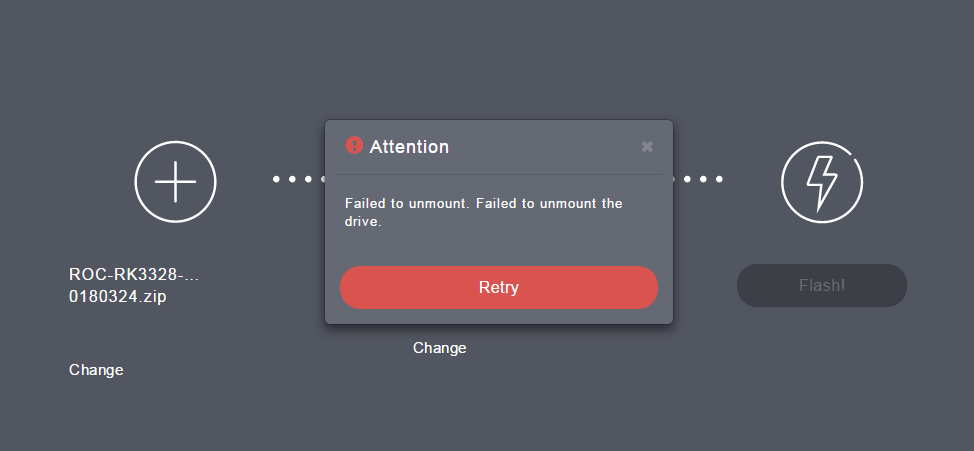
Sometimes, when the progress reaches to 99% or 100%, an error of unmounting the SD card may occur, which can be ignored and does no harm to the data flashed to the SD card.

The downloaded firmware will be saved to the local directory, which will be reused the next time you flash the same firmware again. The download directory can be set by clicking the setting icon in the bottom left of the main window and changing the “Download Location:” field.
Etcher
Compared with SDCard Installer, Etcher lacks of firmware list and download. But its code is newer. If you have any flashing problem with the SDCard Installer, you can try Etcher, reusing the firmware file in the download directory of SDCard Installer.
Etcher can be downloaded from the Etcher official site. Installation and usage are similiar with SDCard Installer.
dd
dd is a commonly used command line tool in Linux, which is suitable for flashing Raw Firmware.
First, plug in the SD card, and unmount it if it is automatically mounted by the file manager.
Then find the device file of the SD card by checking kernel log:
dmesg | tail
If the device file is /dev/mmcblk0, use the following command to flash:
sudo dd if=/path/to/your/raw/firmware of=/dev/mmcblk0 conv=notrunc
Flashing takes lots time and the command above does not show the progress. We can use another tool pv to do this job.
First install pv:
sudo apt-get install pv
Then add pv to the pipe to report progress:
pv -tpreb /path/to/your/raw/firmware | sudo dd of=/dev/mmcblk0 conv=notrunc
SD Firmware Tool
NOTE: This section is about how to flash RK Firmware to the SD card.
Tool: SD Firmwware Tool v1.56
After extraction, in the directory of SD Firmware Tool, edit config.ini by changing the 4th line from Selected=1 to Selected=2, in order to select English as the default user interface language.
Run SD_Firmware_Tool.exe:

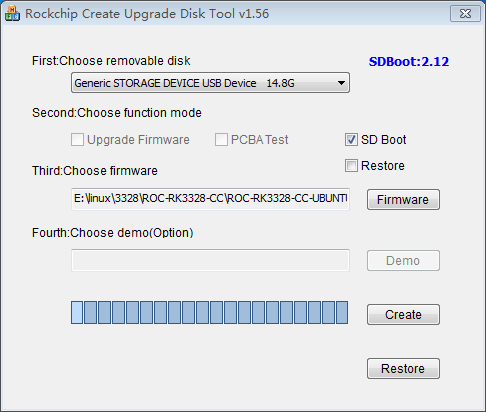
Plug in the SD card.
Select the SD card from the combo box.
Check on the “SD Boot” option.
Click “Firmware” button, and select the firmware in the file dialog.
Click “Create” button.
A warning dialog will show up. By making sure you have the right SD card device selected, select “Yes” to continue.
Wait for the operation to complete, until the info dialog shows up.

Plug out the SD card.
