Usage
This chapter describes how to use CAM-CRV1126S2U/CAM-CRV1109S2U, and does not include specific application development. For application development, please refer to the “Application Development” section.
Very important:
Earlier devices are shipped with
Facial_gatefirmware by default, which requires an external screen to preview. According to market feedback, users use more scenes without a screen, so we will change to the factory-builtAI_UVC. If you don’t know what firmware your device is using, We suggest you refer to the Firmware Upgrade to upgrade the required firmware.We are constantly maintaining the firmware and code, so the factory firmware versions of the devices purchased at different periods may be inconsistent. Some known bugs may have been fixed in the new firmware and code. If you encounter problems during use, please try to update the firmware first. For example, we have repaired some Windows systems
RNDISnetwork card cannot be recognized or theyellow exclamation markproblem occurs. If this phenomenon occurs on your device, you can first try to update the firmware.
Power On
Facial_Gate
The device only needs to be connected to the Typec cable for power supply, which is very convenient. But there are a few things to note.
When connecting to the host computer for debugging, you need to connect the
USB 3.0interface from the host computer’s motherboard.If the device does not need to be connected to the upper computer for deployment, please connect Typec to a 5V/2A power supply separately.
If the host finds the ADB device, the device has been powered on normally.
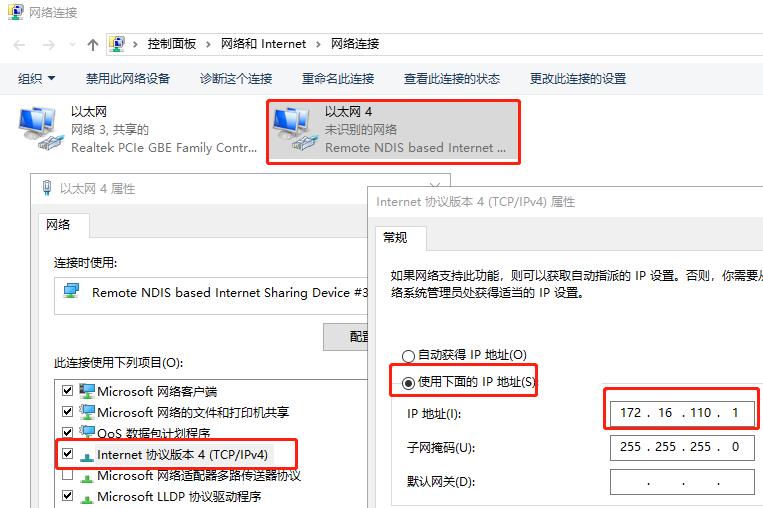
After normal boot, the host will recognize a USB network card. After setting the static IP of the network card to
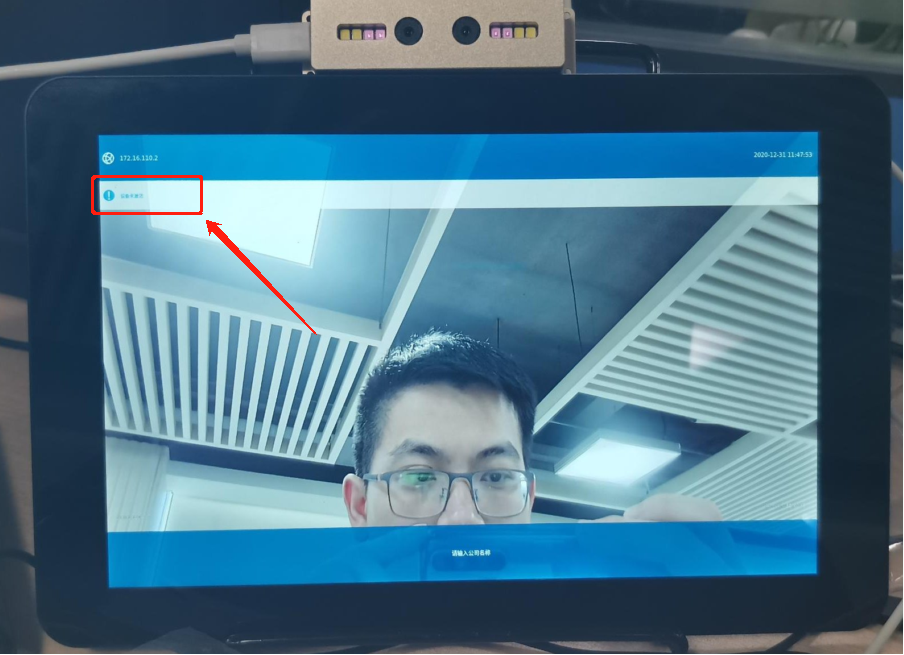
172.16.110.1, open the browser address bar and enter172.16.110.2to enter the Web back-end management platform.If the device is connected to an external screen, you will see the Firefly boot logo first, and then wait a moment for the interface to enter the preset gate application. If the gate application is not authorized, it will display unauthorized or authorization failure and face recognition cannot be performed.
AI_UVC
AI_UVCWindows exe、Android APK and instructions can be obtained in this link:https://gitlab.com/firefly-linux/external/arcuvc_app.git
Windows
The official test uses win10 system.
It needs to be connected to the USB 3.0 interface from the windows device.
After normal startup, the infrared fill light will be on。
After normal boot, the host will recognize a
USB NDISnetwork card. After setting the static IP of the network card to172.16.110.1,it can communicate with the device on the network.Install
ArcAICameraSetup.exeand open it. After authorization, you can use the AI_UVC application. PS: Please contact us to purchase authorization code.
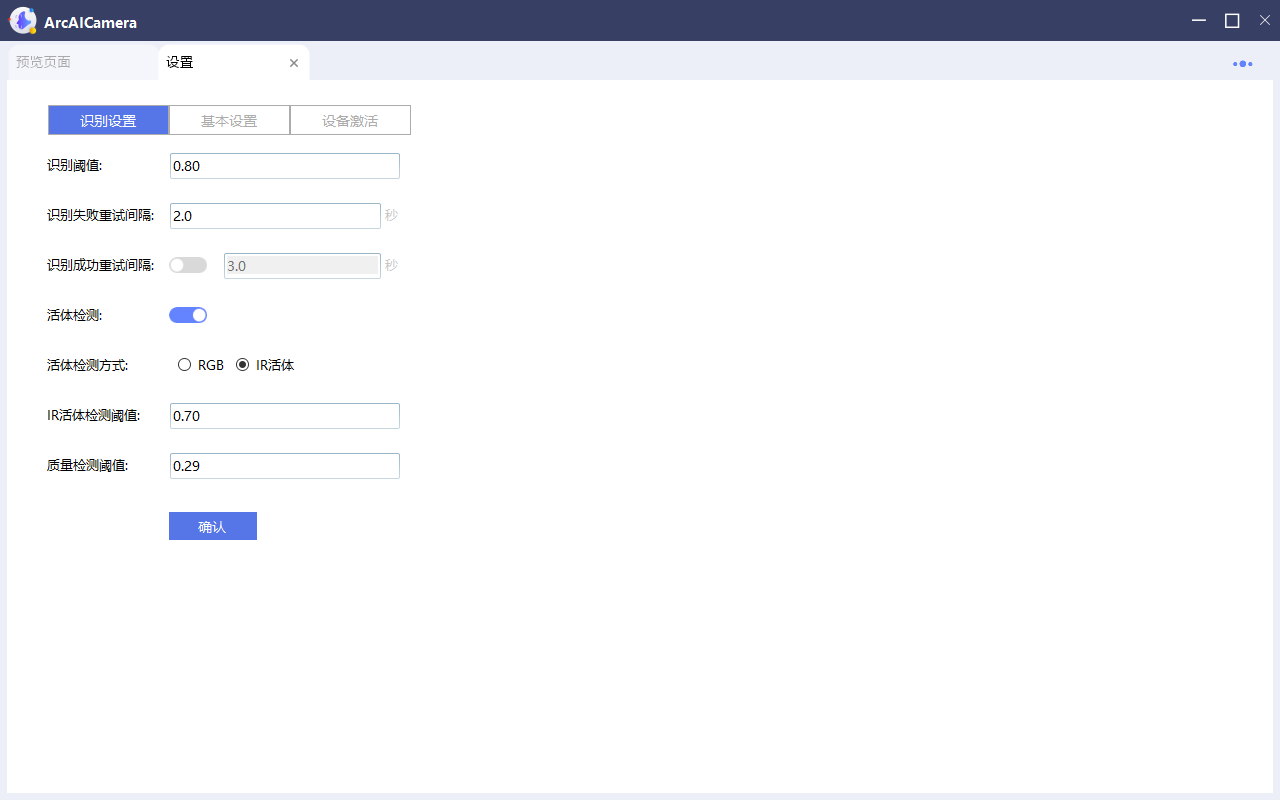
Setting interface, click the top right button to enter the face registration:
After successful recognition and registration, you can return to the preview page to see the effect:

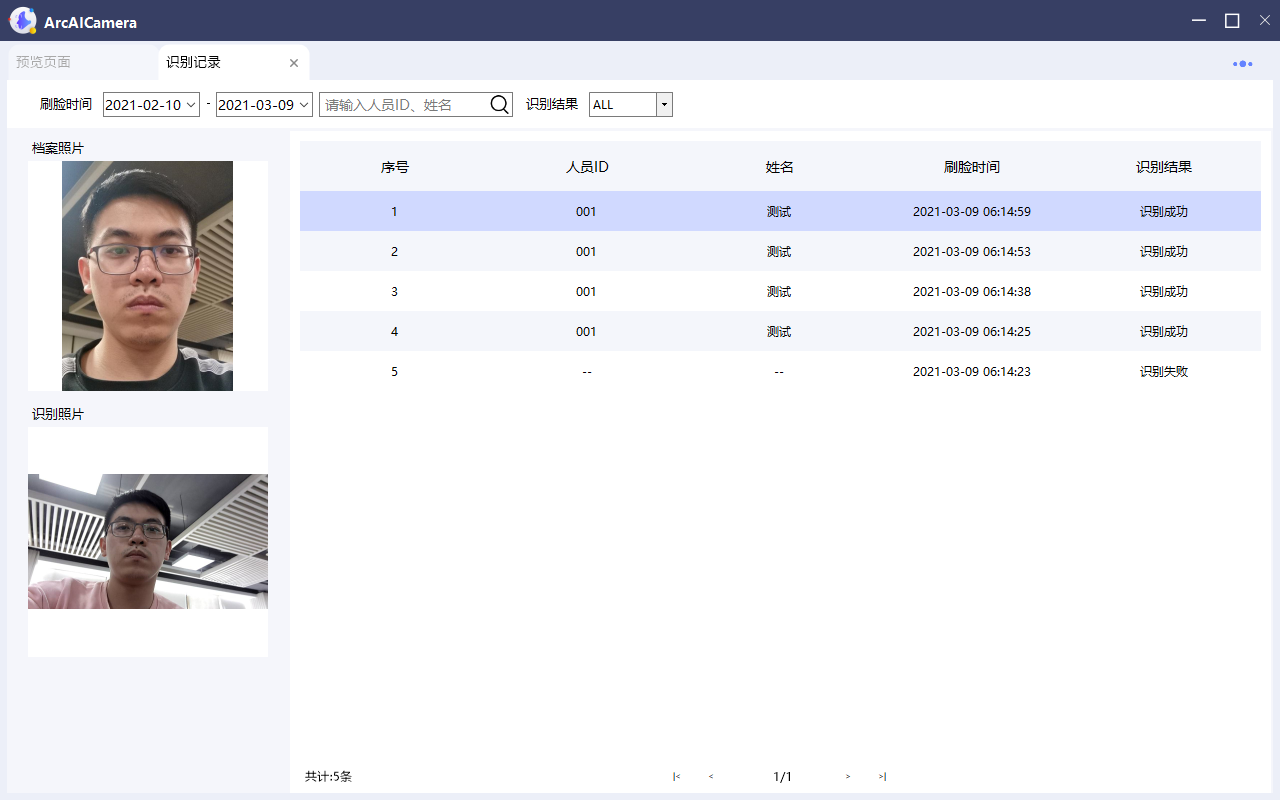
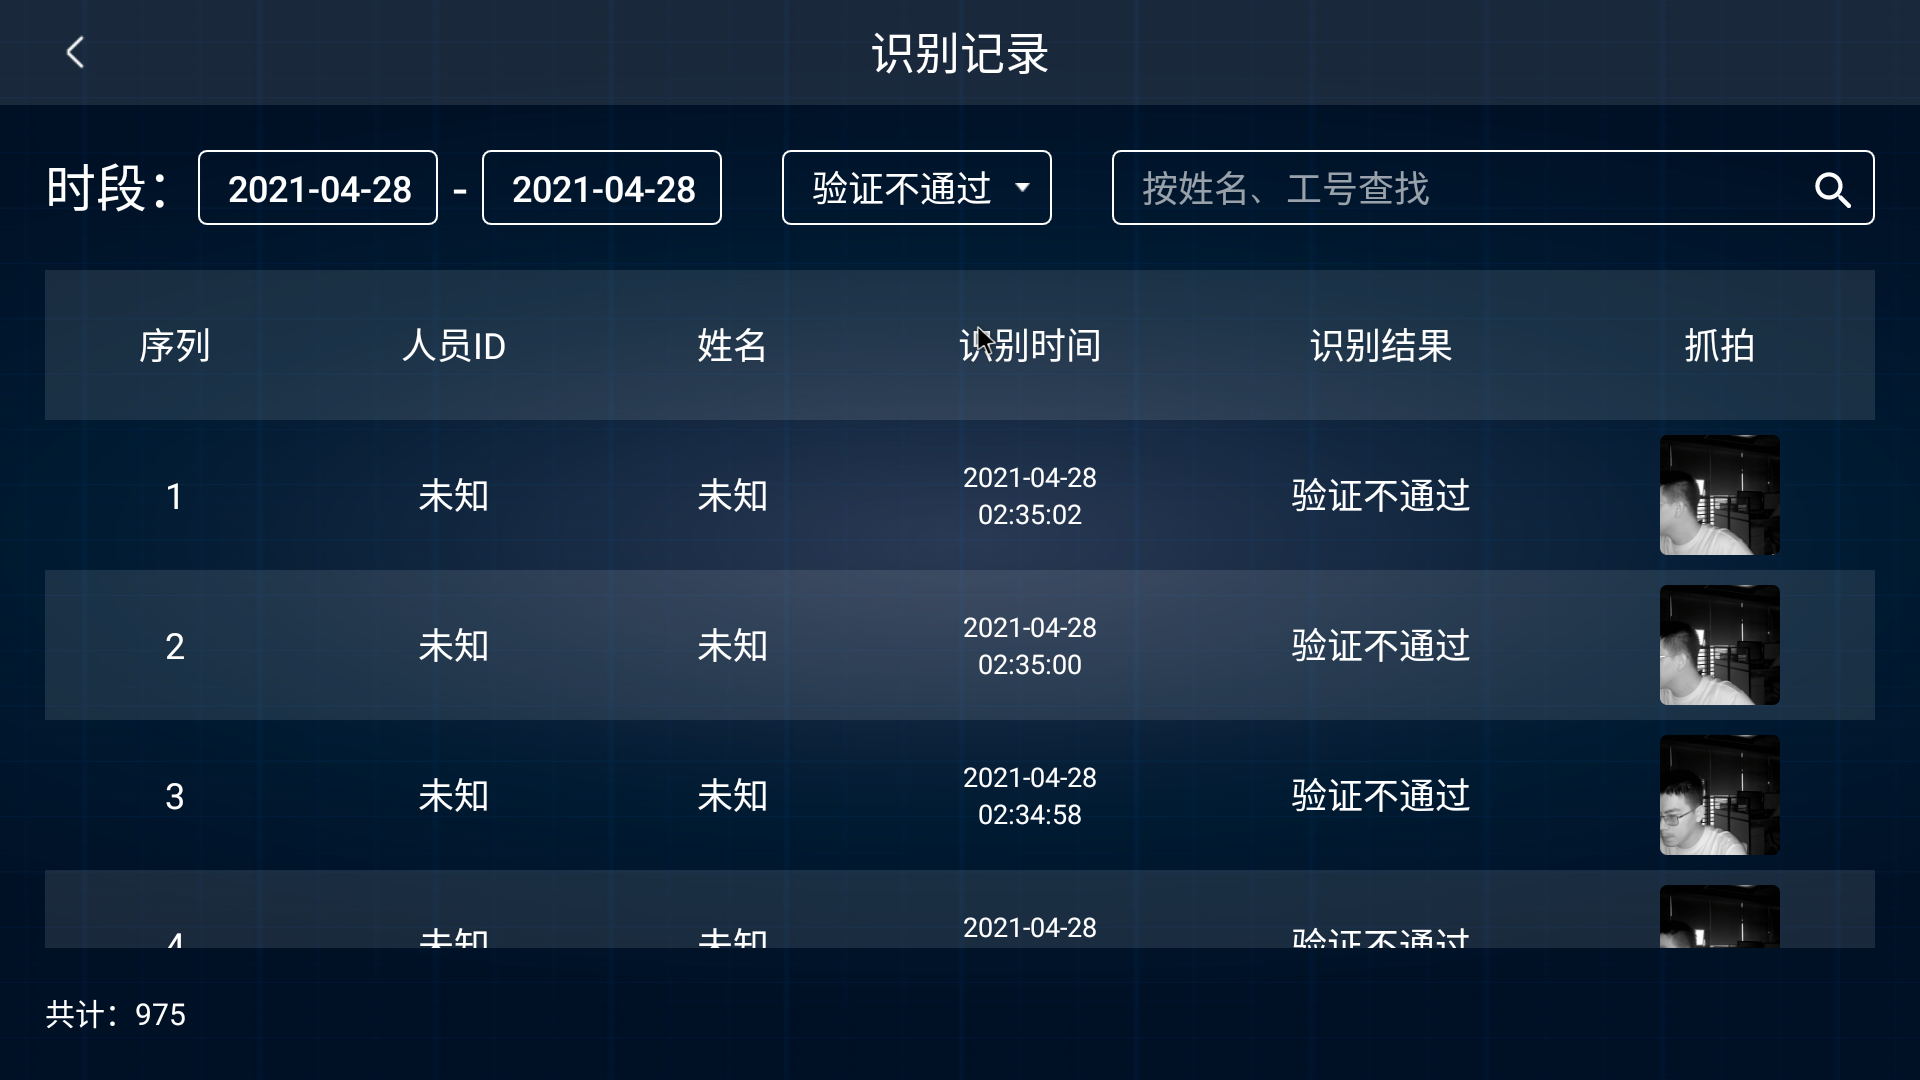
Recognition record, the recognition of the face will be recorded:
Android
The official test uses rk3399 andorid 7.1
You need to connect the Android device’s USB 3.0 interface。
After normal startup, the infrared fill light will be on。
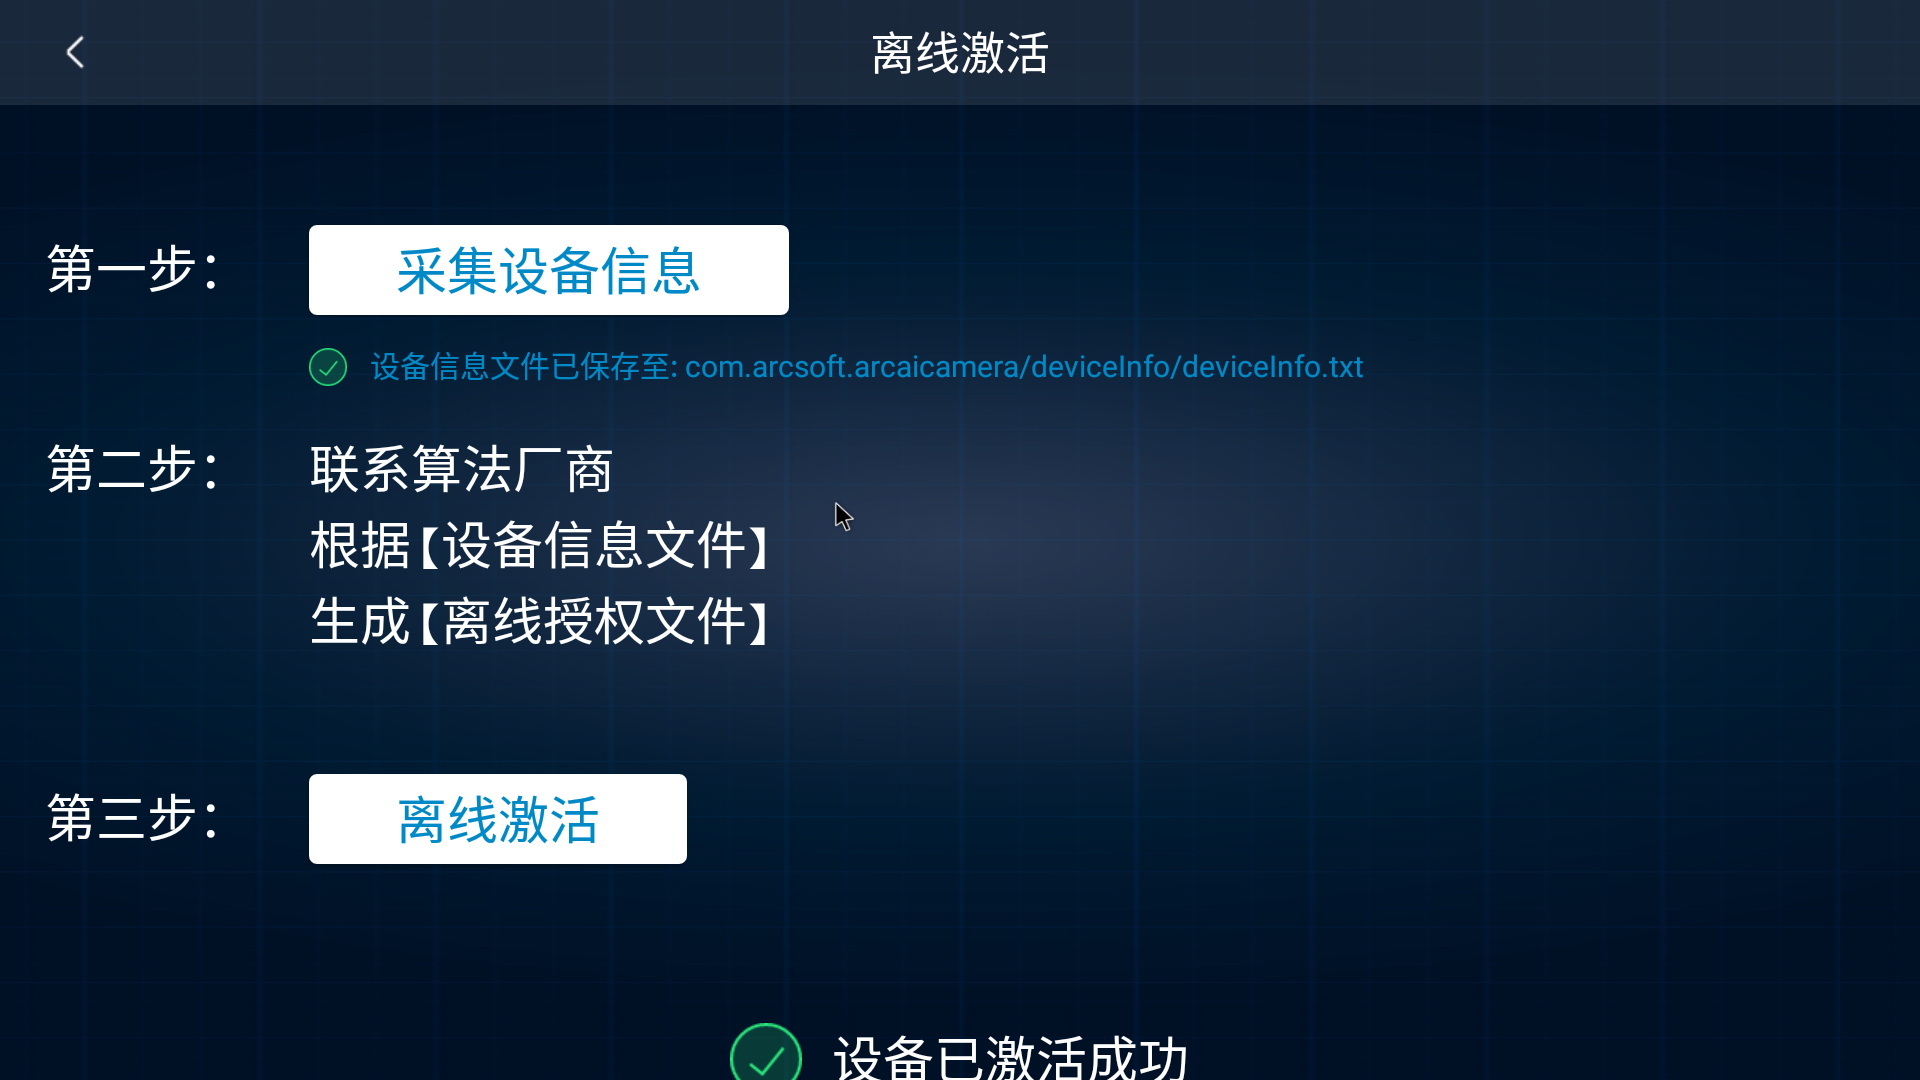
Download and install` ArcSoft_AICamera_XXX.apk ‘and open the app. After authorization according to the prompt, you can use the AI_UVC application。PS: Please contact us to purchase authorization code.
Authorization, get device information and contact us to generate offline authorization file according to device information:
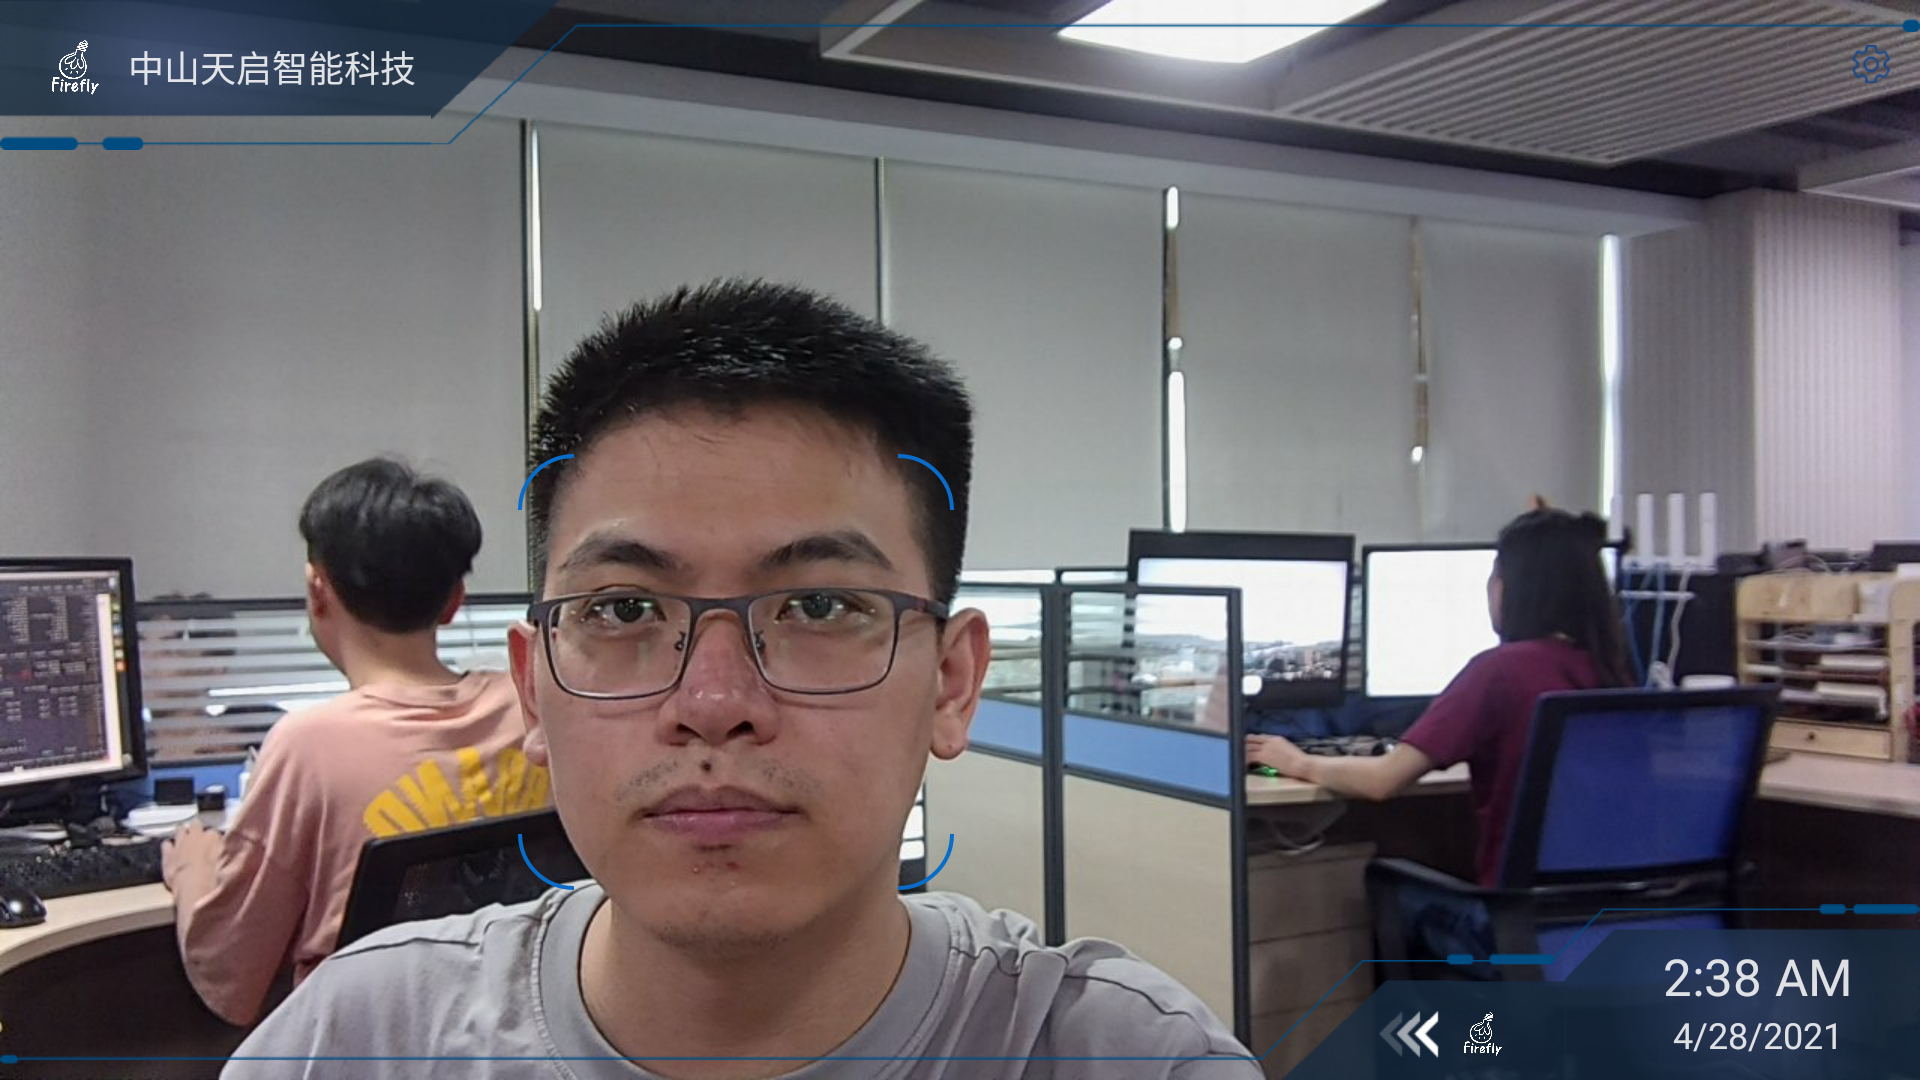
Preview. After the authorization is successful, return to the preview screen to see that the face recognition function has been activated:
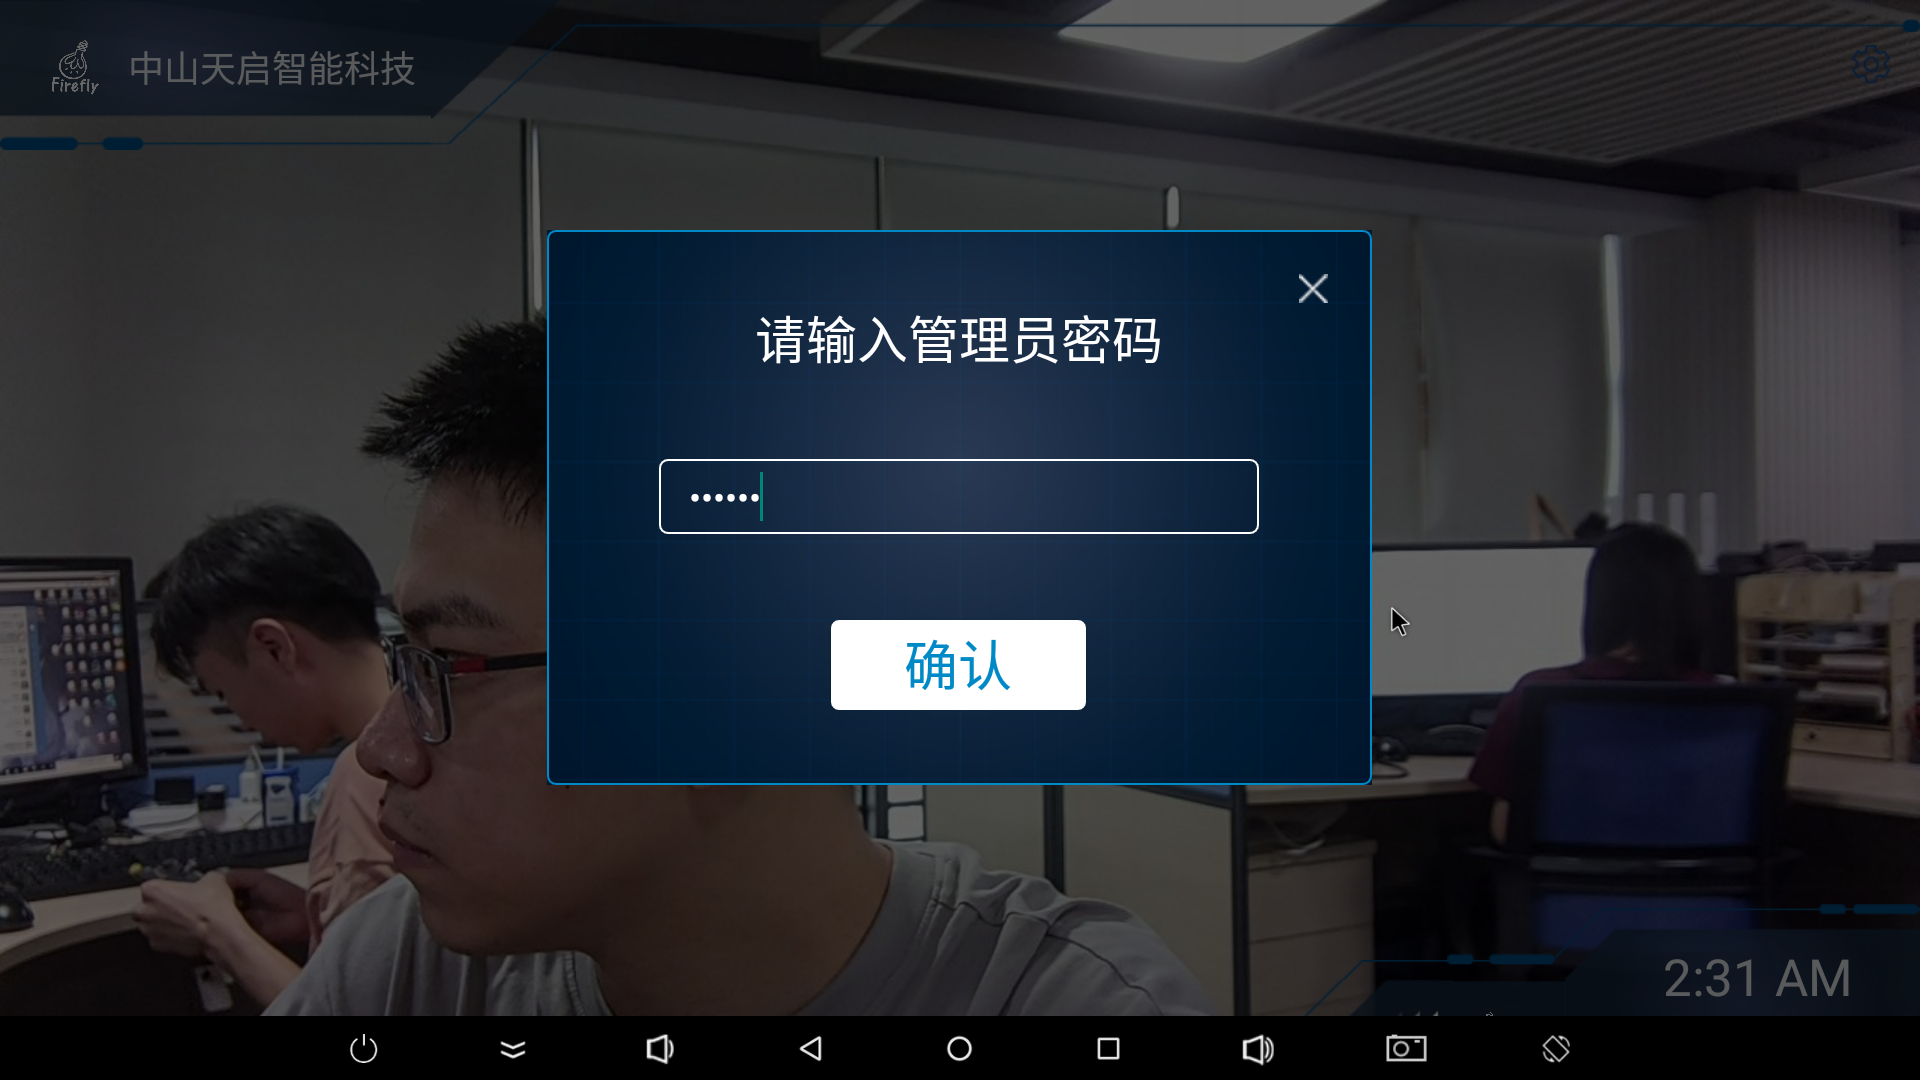
Setting. Click the gear at the top right of the preview interface to enter the setting interface. The default administrator password is 123456 :
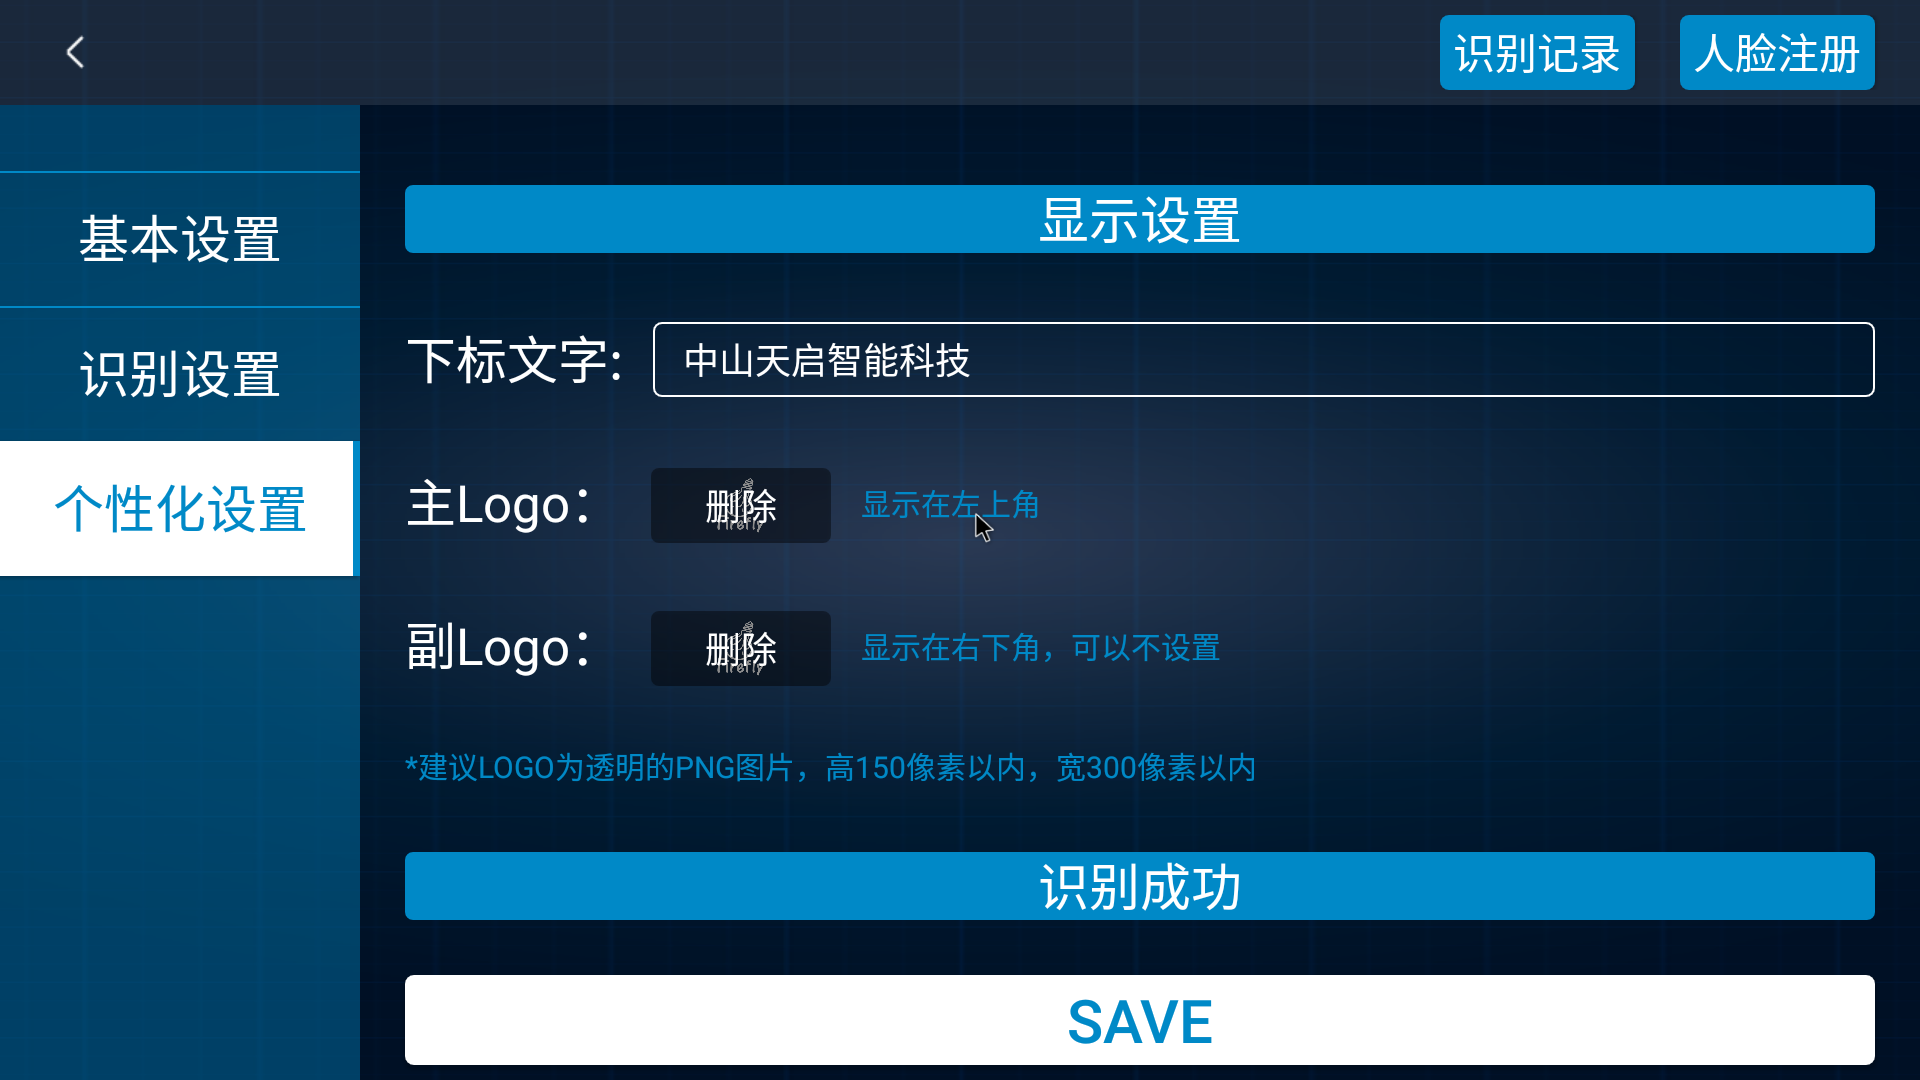
You can change your company’s logo and company name at will`:
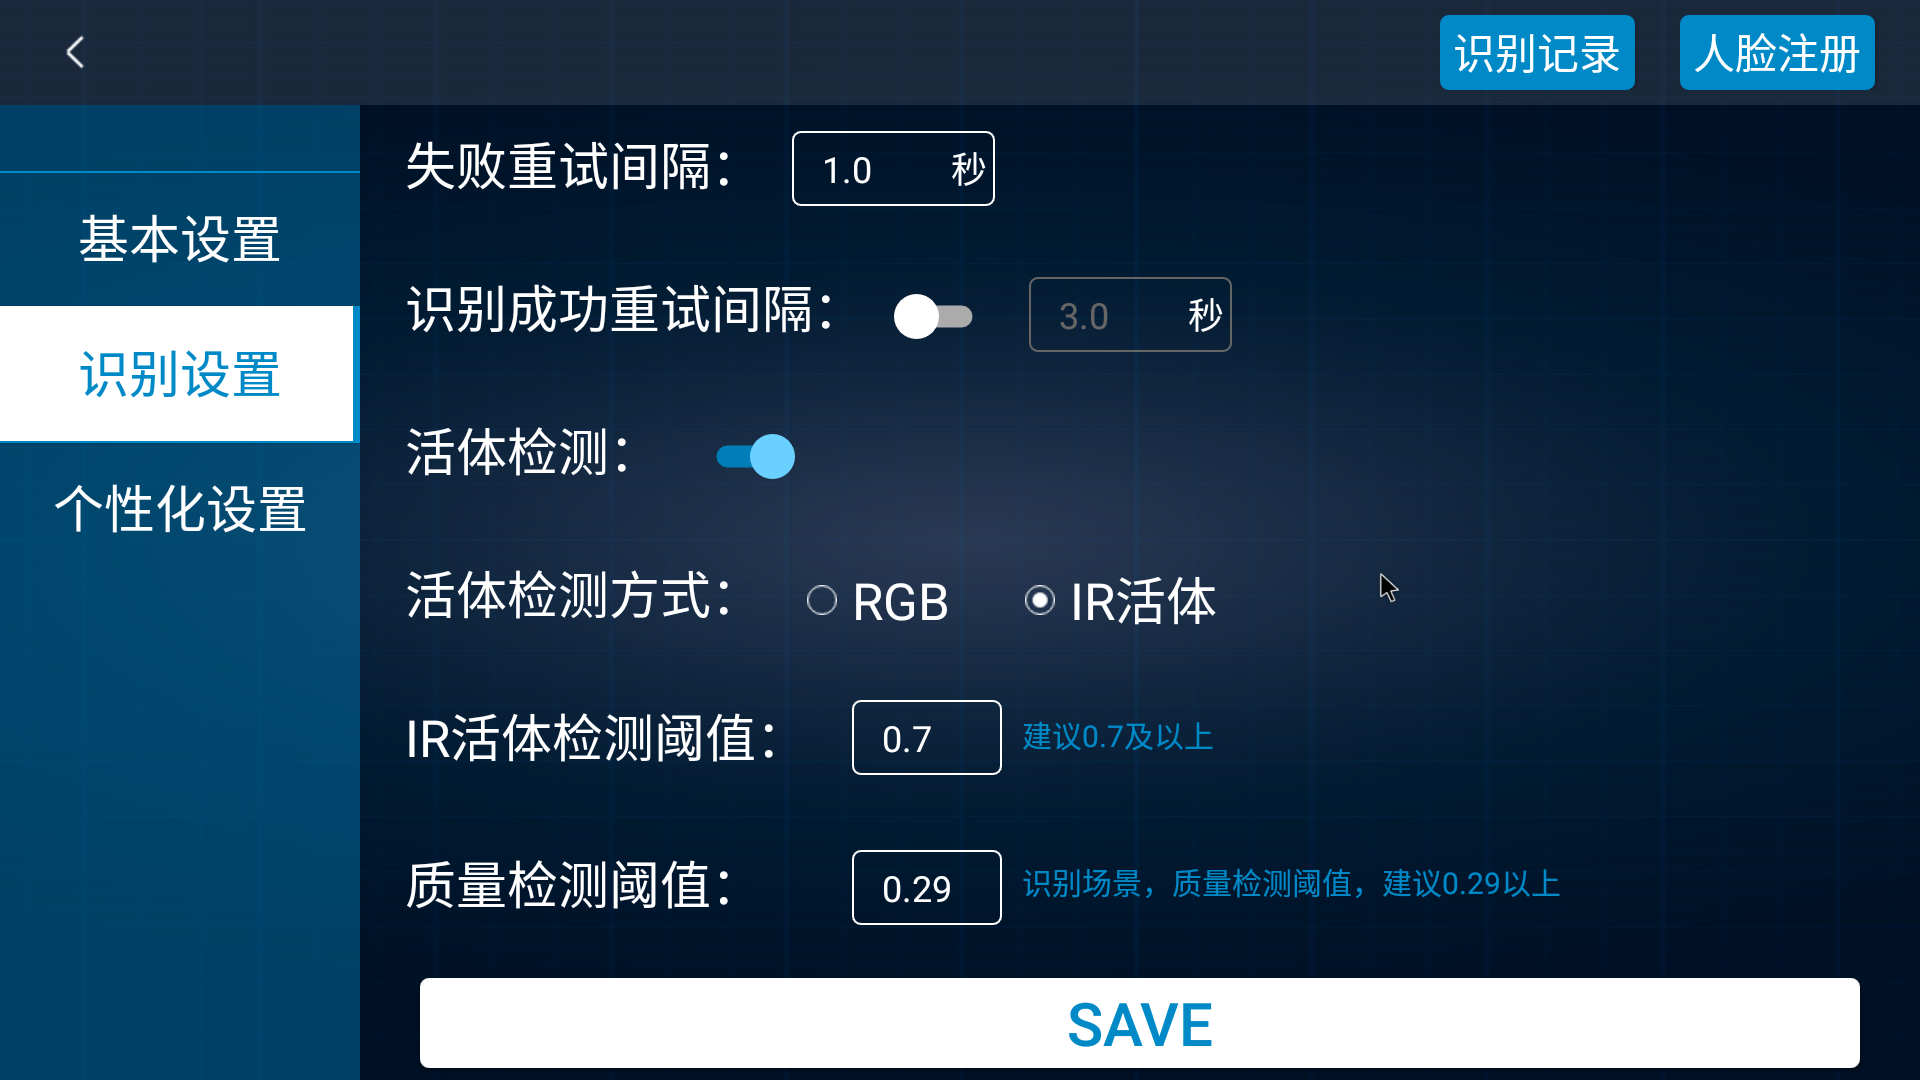
You can configure your own identification parameters according to your own needs:
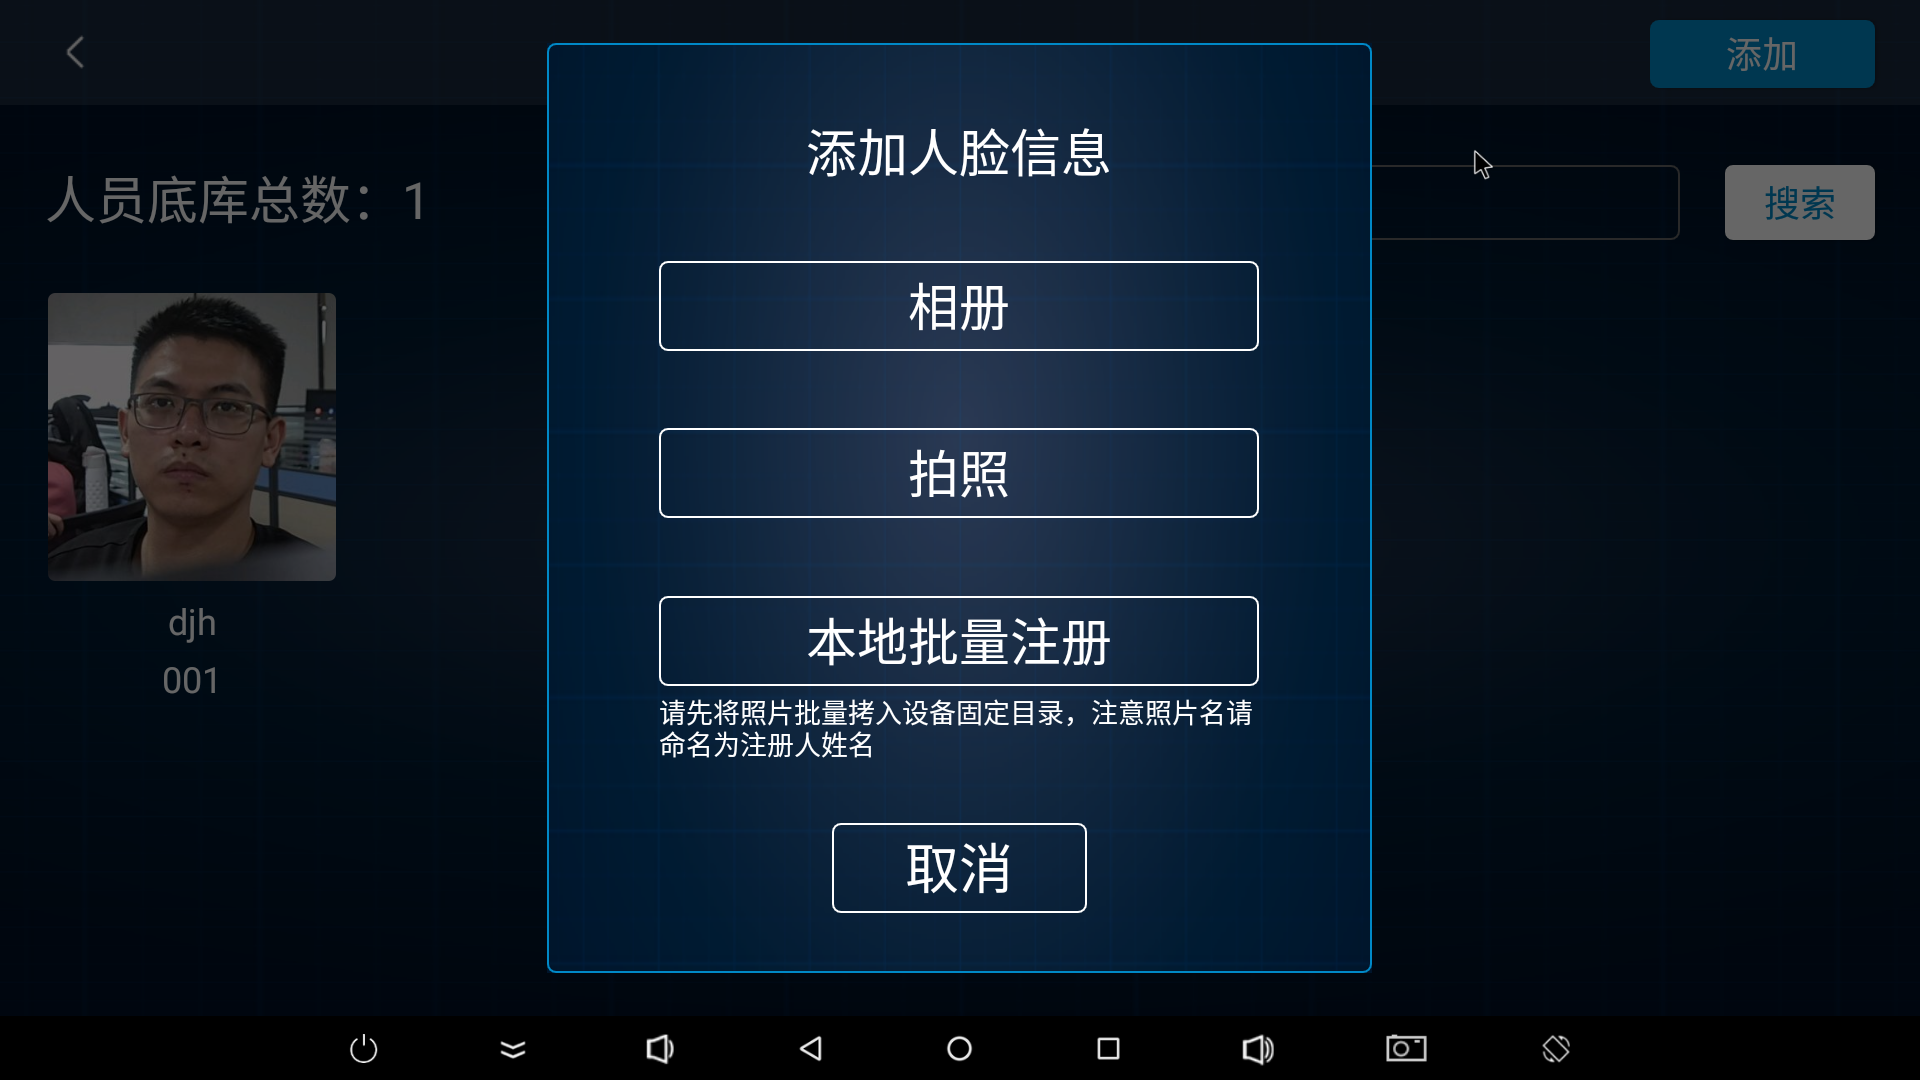
Click face registration in the upper right corner to register your first face:
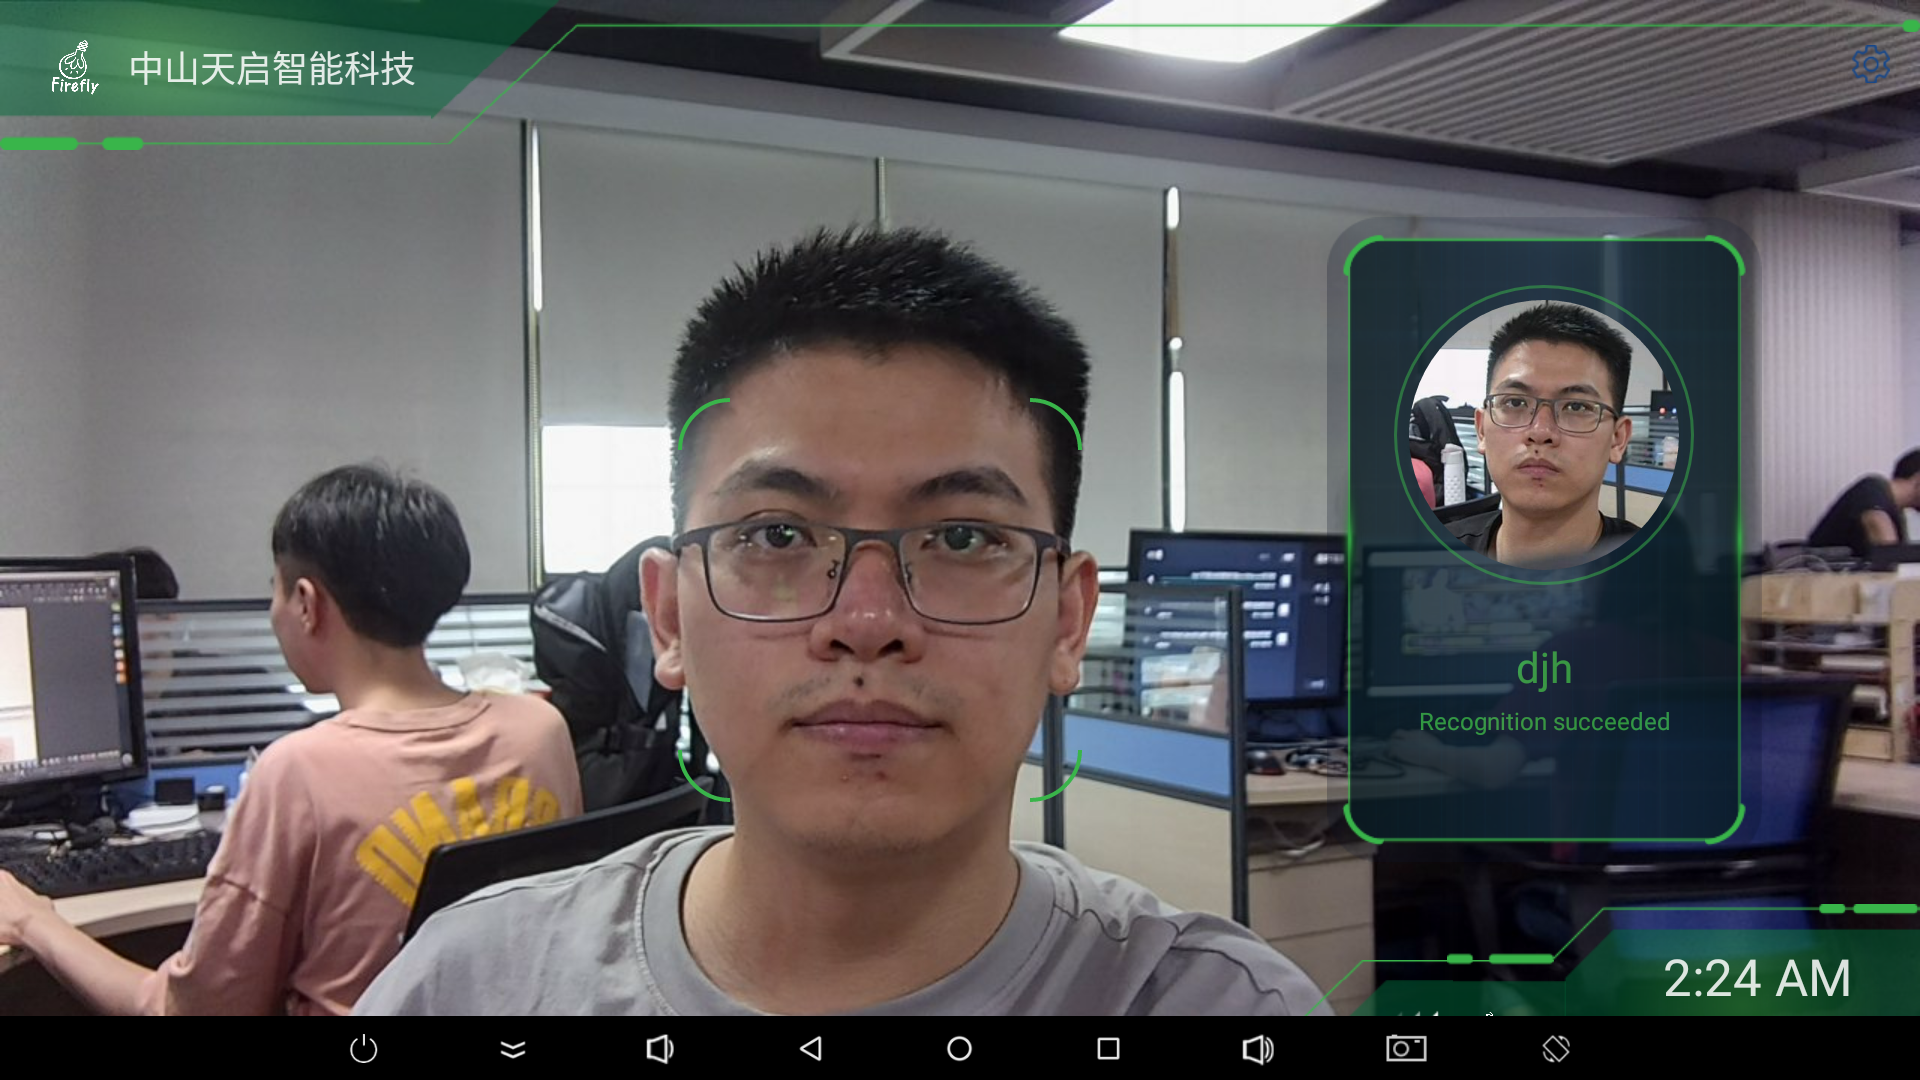
After successful registration, return to the preview interface to view the effect:
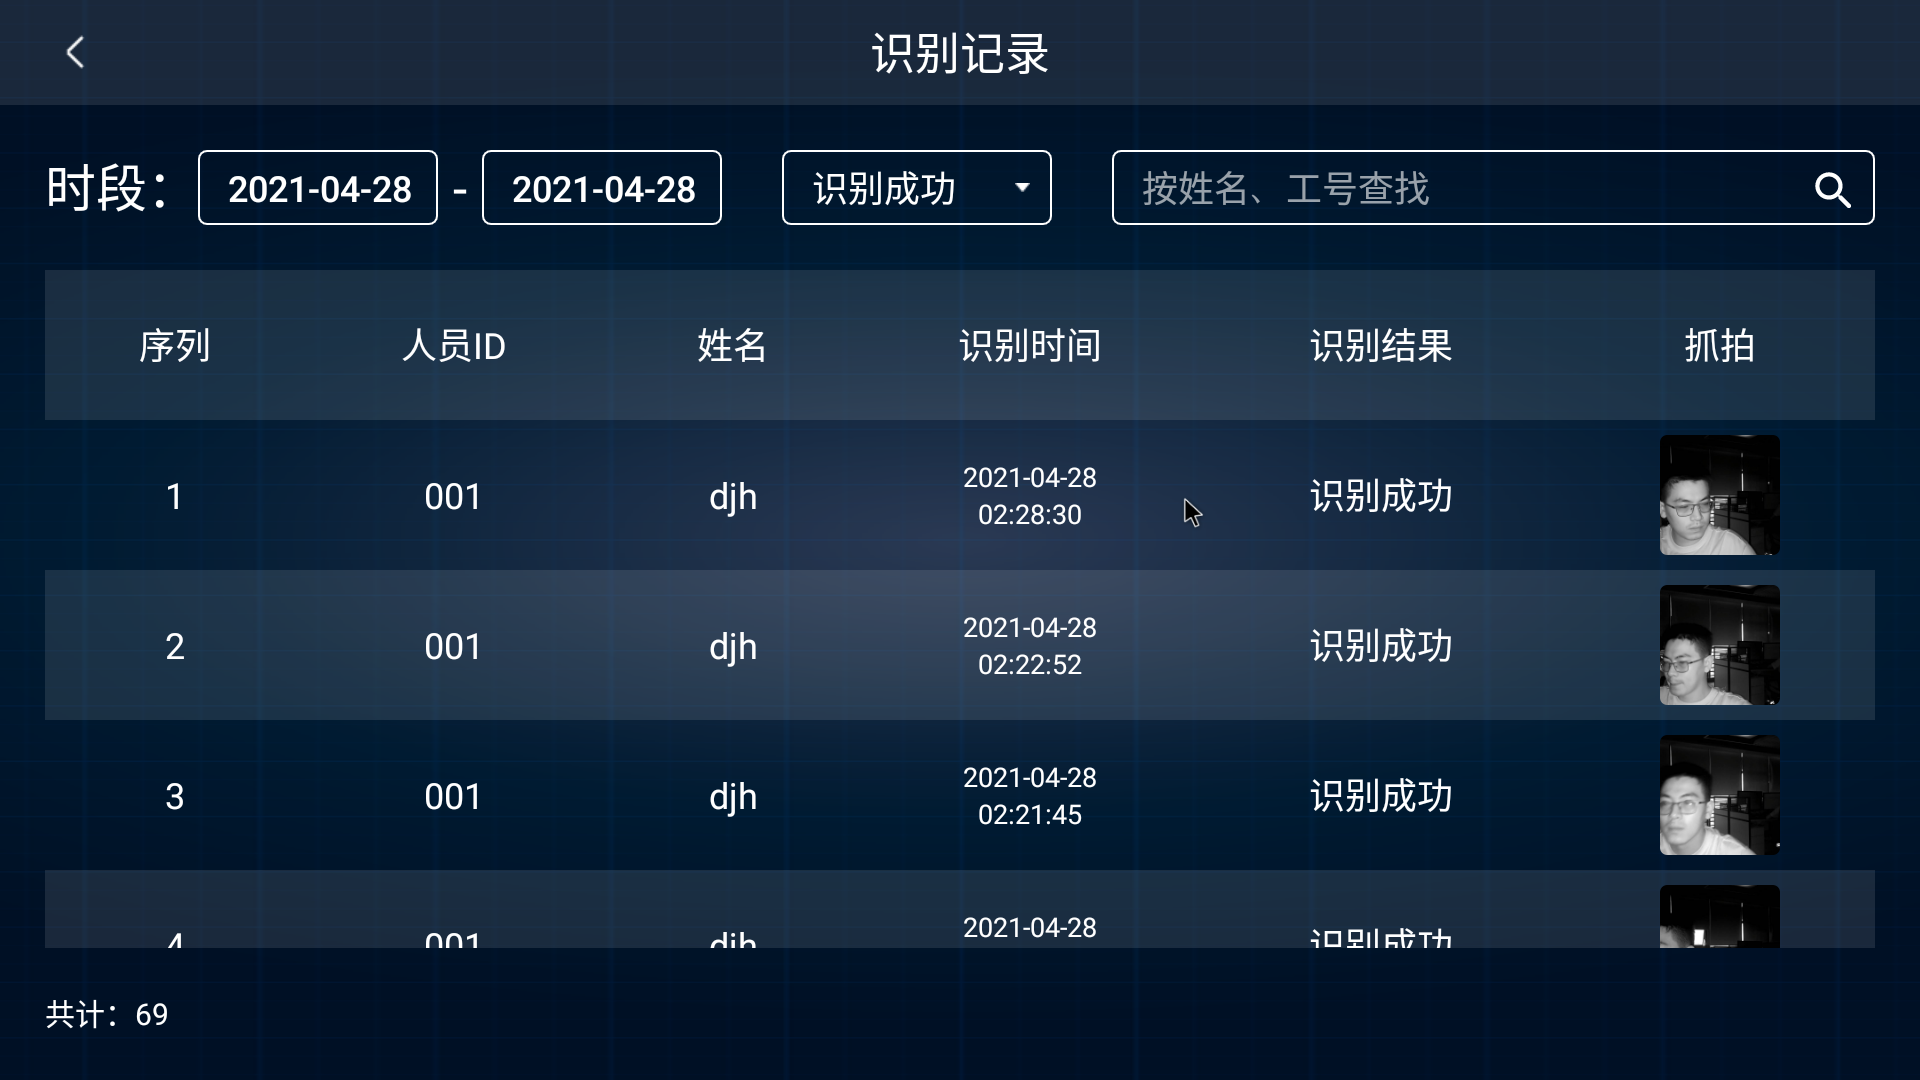
You can enter settings to browse and identify success and failure records:
Authorization
No matter you use Windows or Android to activate, please click Collect Device Information to copy and save the file generated by the prompt, then contact our customer service to purchase the authorization and send the file to us, we will provide the corresponding device Offline activation file, you can use this file to activate the device.
Very important:
The activation file and the device are in a
one-to-onecorrespondence. After obtaining the activation file, be sure to save it.After upgrading the official firmware, you can use the corresponding activation file
Reactivate.After activating the device, you must not
eraseor modify thebackuppartition, otherwise you need to re-purchase the authorization to activate

Debug Interface
CAM-CRV1126S2U/CAM-CRV1109S2U comes with Typec otg and serial port, both interfaces can be used for device debugging.
ADB Debug
Use Typec cable to connect the device and the host. Try to use the USB 3.0 interface from the host motherboard, because if the device is connected to some high power consumption peripherals, such as MIPI screen, the USB 2.0 port may have insufficient power supply and cause the device to not start or keep restarting.
Install adb driver and commands based on your system.
Check whether the device is recognized through
adb devices,adb shellenters the debugging window.
Serial Debug
Prepare USB-to-serial module. It is recommended to use Firefly’s serial module.
The USB serial port module connects the host USB port and the device serial port.
Set the baud rate to 1.5 M.
Download, install and open the serial debugging tools supported by the system platform according to your system (minicom is recommended for Ubuntu and putty is recommended for window). If there is a serial port debugging tool and there is a configuration item of software and hardware flow control, please turn off the function.
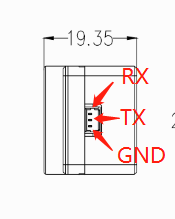
Serial port wiring instructions: as shown in the figure below, it is
RX, TX, GNDfrom top to bottom.
Device Network
CAM-CRV1126S2U/CAM-CRV1109S2U default network configuration:
Device IP address: 172.16.110.2
Device default gateway: 172.16.110.1
Device default DNS: 8.8.8.8
The device itself does not have a network card, which is virtualized through RNDIS. If you want to realize the device access to the external network (the authorization may be used when adapting the algorithm), you need to realize the multi network card traffic forwarding on the host computer.
Linux Host
The verification is based on the Ubuntu 18.04 system, which may be different from other systems. Ubuntu can forward traffic through iptables. Before forwarding, you need to set the static IP of USB network card to 172.16.110.1.
nmtui #Enter the graphical interface to set the static IP of USB network card

echo 1 >  /proc/sys/net/ipv4/ip_forward

iptables -t nat -A POSTROUTING -j MASQUERADE

iptables -F #Clear all previous iptables rules
iptables -P INPUT ACCEPT #Allow to receive packets
iptables -P FORWARD ACCEPT #Allow to send packets
#NAT on the eth0 network port, eth0 is the network card that my PC connects to the external network, configure it according to your actual situation
iptables -t nat -A POSTROUTING -s 172.16.110.0/24 -o eth0 -j MASQUERADE
Windows Host
The verification is carried out with Windows 10 system, other systems may be different. Windows 10 can directly connect devices to the Internet through a shared network.
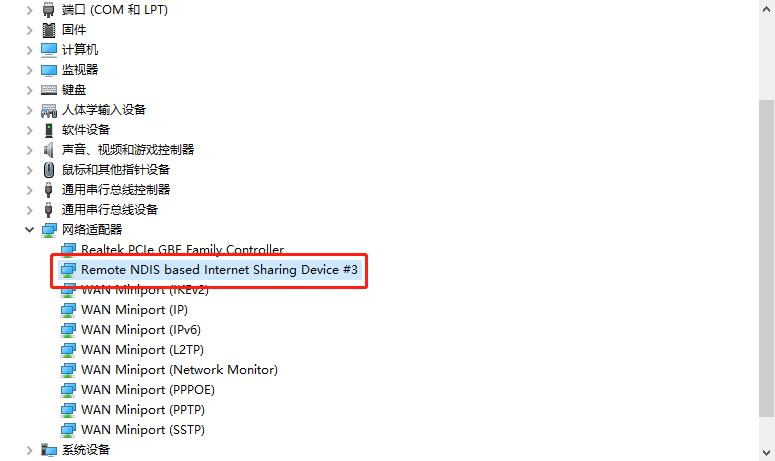
Install the driver, connect the device and turn on the computer to open the device manager and you will see the RNDIS device, just right-click to update the driver.
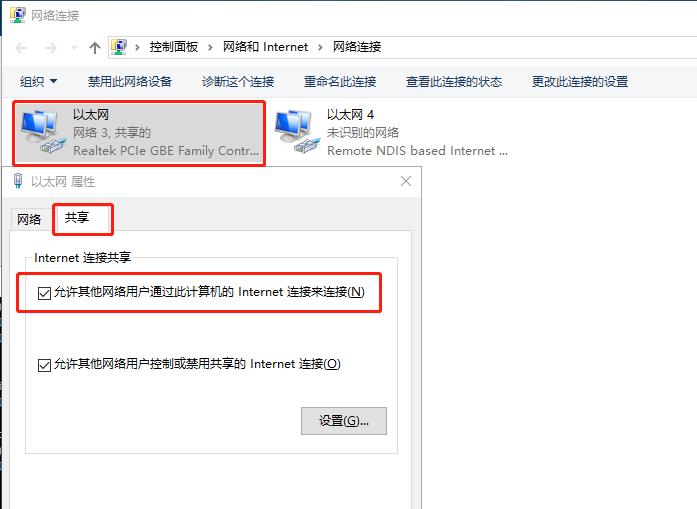
Set the host’s own network card connected to the external network to share the network.
Set the static IP of the RNDIS network card to
172.16.110.1.
MIPI Screen
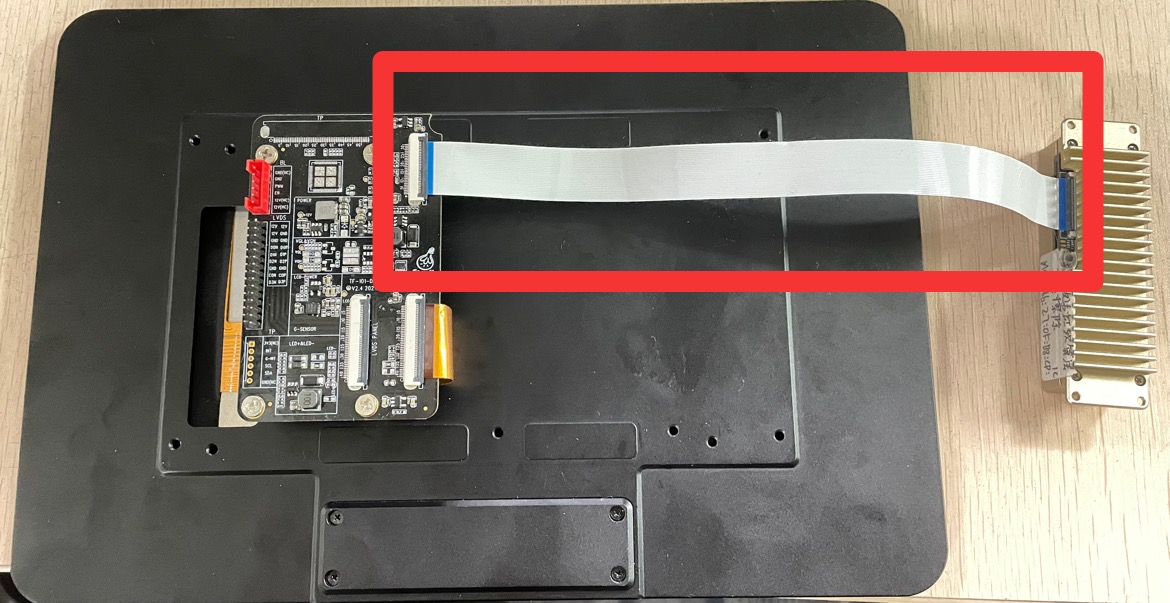
The matching screen of RV1126/RV1109 is [10.1 inch IPS full vision screen module MIPI multi-touch 1280x800 pixels](https://item.taobao.com/item.htm?spm=a1z10.5-cs.w4002-24147662620.19 .187cce42Nq5fe8&id=655100190974). The MIPI screen looks like this:

The hardware connection between the smart binocular module and the MIPI screen is shown in the figure:
