2. Camera
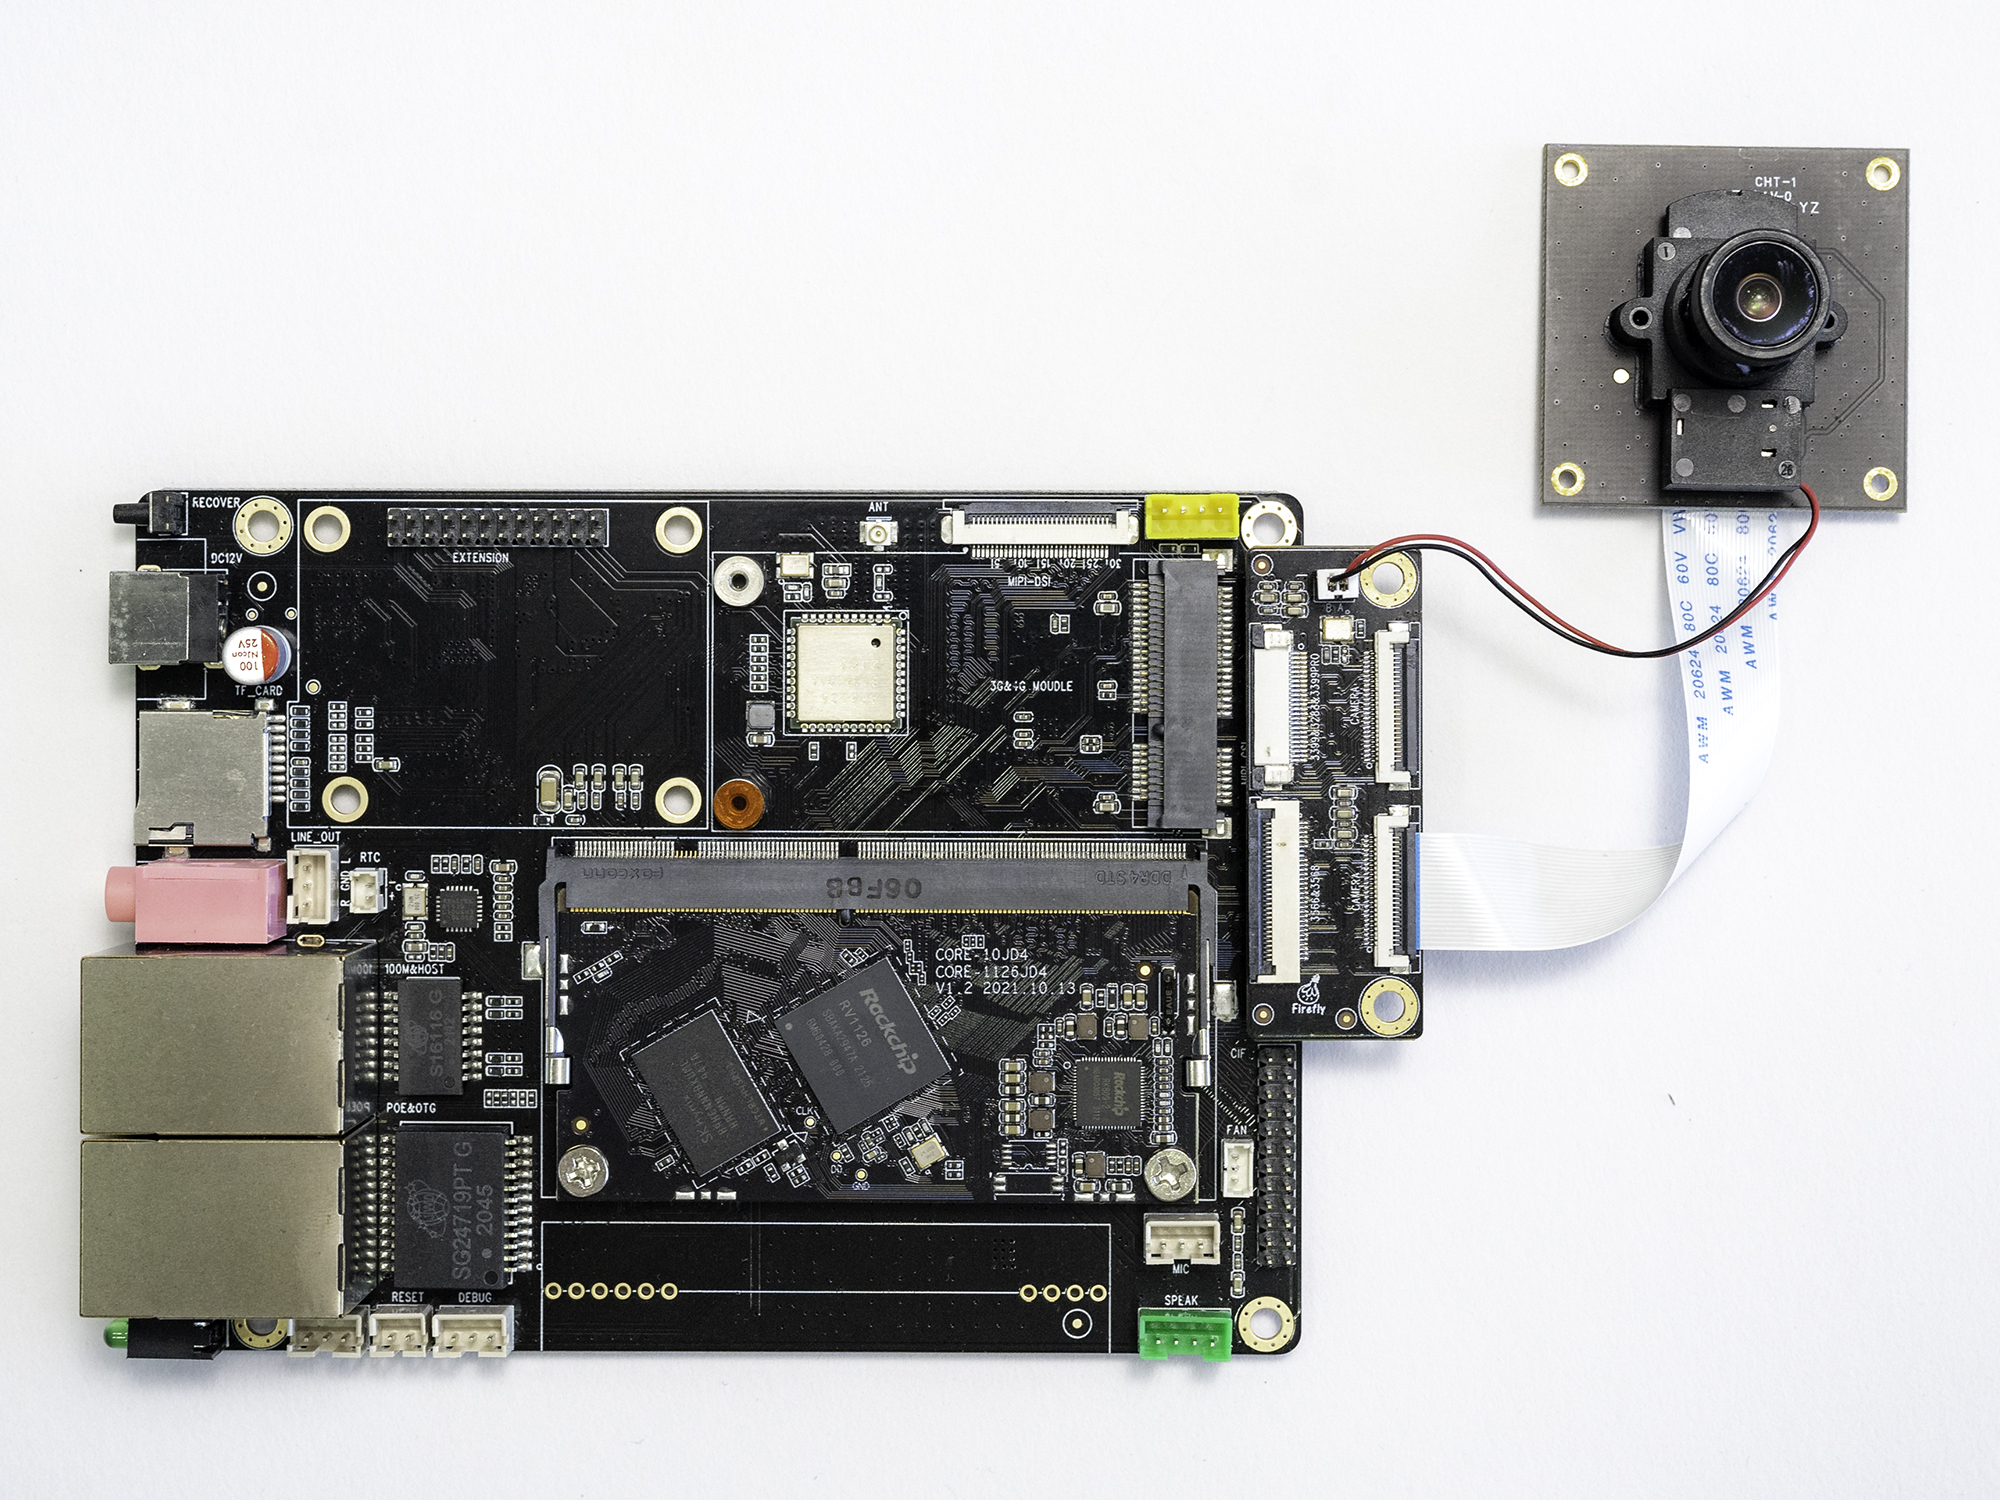
The connection method between the bottom plate and the camera is shown in the figure:

Note: The red and black lines on the camera are used as switching filters.
Command switch filter
# View SDK version
cd path-to-sdk/
realpath .repo/manifest.xml
If the SDK version obtained by the above command is rv1126_rv1109_linux_release_20220324_v2.2.5b.xml version and the date is 2022.03.24 or later, use the following command to perform IRCUT (filter switching):
# Close the filter
v4l2-ctl -d /dev/v4l-subdev5 --set-ctrl 'band_stop_filter=0'

# Open the filter
v4l2-ctl -d /dev/v4l-subdev5 --set-ctrl 'band_stop_filter=1'
If the SDK version obtained by the above command is not rv1126_rv1109_linux_release_20220324_v2.2.5b.xml version and the date is 2022.03.24 or later, use the following command to perform IRCUT (filter switching):
# Close the filter
v4l2-ctl -d /dev/v4l-subdev4 --set-ctrl 'band_stop_filter=0'

# Open the filter
v4l2-ctl -d /dev/v4l-subdev4 --set-ctrl 'band_stop_filter=1'
2.1. MIPI CSI
MIPI-CSI Camera requires purchase of adapter board
v4l2 interface to operate MIPI-CSI camera
#If the probe is successful, there will be video and media devices in /dev/.
#There may be multiple /dev/video devices in the system. You can find the registered video node of RKISP through /sys.
#It corresponds to the rkispp_scale0 node, the following print is /dev/video19
[root@RV1126_RV1109:/]# grep '' /sys/class/video4linux/video*/name
/sys/class/video4linux/video0/name:stream_cif_mipi_id0
/sys/class/video4linux/video1/name:stream_cif_mipi_id1
/sys/class/video4linux/video10/name:rkisp_rawwr3
/sys/class/video4linux/video11/name:rkisp_rawrd0_m
/sys/class/video4linux/video12/name:rkisp_rawrd2_s
/sys/class/video4linux/video13/name:rkisp_rawrd1_l
/sys/class/video4linux/video14/name:rkisp-statistics
/sys/class/video4linux/video15/name:rkisp-input-params
/sys/class/video4linux/video16/name:rkisp-mipi-luma
/sys/class/video4linux/video17/name:rkispp_input_image
/sys/class/video4linux/video18/name:rkispp_m_bypass
/sys/class/video4linux/video19/name:rkispp_scale0
/sys/class/video4linux/video2/name:stream_cif_mipi_id2
/sys/class/video4linux/video20/name:rkispp_scale1
/sys/class/video4linux/video21/name:rkispp_scale2
/sys/class/video4linux/video22/name:rkispp_iqtool
/sys/class/video4linux/video23/name:rkispp_input_params
/sys/class/video4linux/video24/name:rkispp-stats
/sys/class/video4linux/video3/name:stream_cif_mipi_id3
/sys/class/video4linux/video4/name:rkcif-mipi-luma
/sys/class/video4linux/video5/name:rkisp_mainpath
/sys/class/video4linux/video6/name:rkisp_selfpath
/sys/class/video4linux/video7/name:rkisp_rawwr0
/sys/class/video4linux/video8/name:rkisp_rawwr1
/sys/class/video4linux/video9/name:rkisp_rawwr2

#v4l2-ctl grabs a frame and saves it in /tmp/cif.out
# /dev/video19 is not fixed, it needs to be configured according to the above matching to get the corresponding node
#You need to close the default camera application before grabbing pictures
/oem/RkLunch-stop.sh
/oem/usr/bin/dbserver &
/usr/bin/ispserver &

#After opening dbserver and ispserver, you can take a screenshot
v4l2-ctl -d /dev/video19 \
--set-fmt-video=width=1920,height=1080,pixelformat=NV12 \
--stream-mmap=3 \
--stream-skip=3 \
--stream-to=/tmp/cif.out \
--stream-count=1 \
--stream-poll

#v4l2-ctl grabs 10 frames of continuous images as a video and saves it in /tmp/test.yuv
v4l2-ctl -d /dev/video19  --try-fmt-video=width=1920,height=1080,pixelformat=NV12 --stream-mmap=3 --stream-to=/tmp/test.yuv --stream-count=10 --stream-poll

#Linux PC uses ffplay to play captured videos
ffplay -f rawvideo -video_size 1920x1080 -pix_fmt nv12 test.yuv
Access network code streams Access using a player that supports RTSP or RTMP, for example (VLC player).
RTSP access address:
rtsp://Device IP address/live/mainstream
rtsp://Device IP address/live/substream
rtsp://Device IP address/live/thirdstream
RTMP access address:
rtmp://Device IP address:1935/live/substream
Example: VLC player previews an RTSP stream
#Note: VLC player needs to be installed
vlc rtsp://Device IP address/live/mainstream
Access device information via web pages Open a Web browser (Chrome is recommended) to access the following address:
http://Device IP address
#Username and password are admin.
See Rockchip_Instructions_Linux_Web_Configuration_CN.pdf under SDK directory docs for detailed instructions on the web side.
