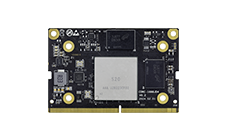
UART Usage
AIO-1688JD4 Serial Port location as shown in the figure
Introduction
AIO-1688JD4 supports 3 UART devices:
| Device Name | Interface Function | Baud Rate | Full Duplex | Level |
|---|---|---|---|---|
| /dev/ttyS0 | Debug Serial Port (Type-C / 4 Pin) | 115200 | Yes | TTL |
| /dev/ttyS1 | RS232 | 115200 | Yes | RS232 |
| /dev/ttyS4 | RS485 | 9600 | No | RS485 |
RS485 Debugging Method
Users can use different USB-to-serial adapters from different hosts to send and receive data to the development board’s serial port. For example, the debugging steps for RS485 are as follows:
(1) Connect HardwareConnect the A, B, and GND pins of the development board’s RS485 to the A, B, and GND pins of the host’s serial adapter (USB to 485 to serial module).
(2) Open the Host’s Serial Terminal
Open kermit in the terminal and set the baud rate:
$ sudo kermit
C-Kermit> set line /dev/ttyUSB0
C-Kermit> set speed 9600
C-Kermit> set flow-control none
C-Kermit> connect
/dev/ttyUSB0is the device file for the USB-to-serial adapter.
(3) Send Data
The device file for RS485 is /dev/ttyS4. Run the following commands on the device (Note: Before running the commands, the RS485 send function must be enabled, as AIO-1688JD4 has a GPIO switch to toggle RS485 between send and receive states.):
sudo -s
echo 1 > /sys/class/leds/RS485_H_SEND_L_RECV/brightness # 1 -> TX, 0 -> RX
stty -F /dev/ttyS4 9600 -echo
echo firefly RS485 test... > /dev/ttyS4
The string “firefly RS485 test…” will be received in the serial terminal on the host.
(4) Receive Data
First, run the following command on the device:
sudo -s
cat /dev/ttyS4
Then, type the string “Firefly RS485 test…” in the host’s serial terminal, and the device side will see the same string.
RS232 Debugging Method
The testing method is similar to that of RS485; just pay attention to the device name and baud rate. The only difference is that RS232 does not require switching between send and receive modes.
