
First use
Product description
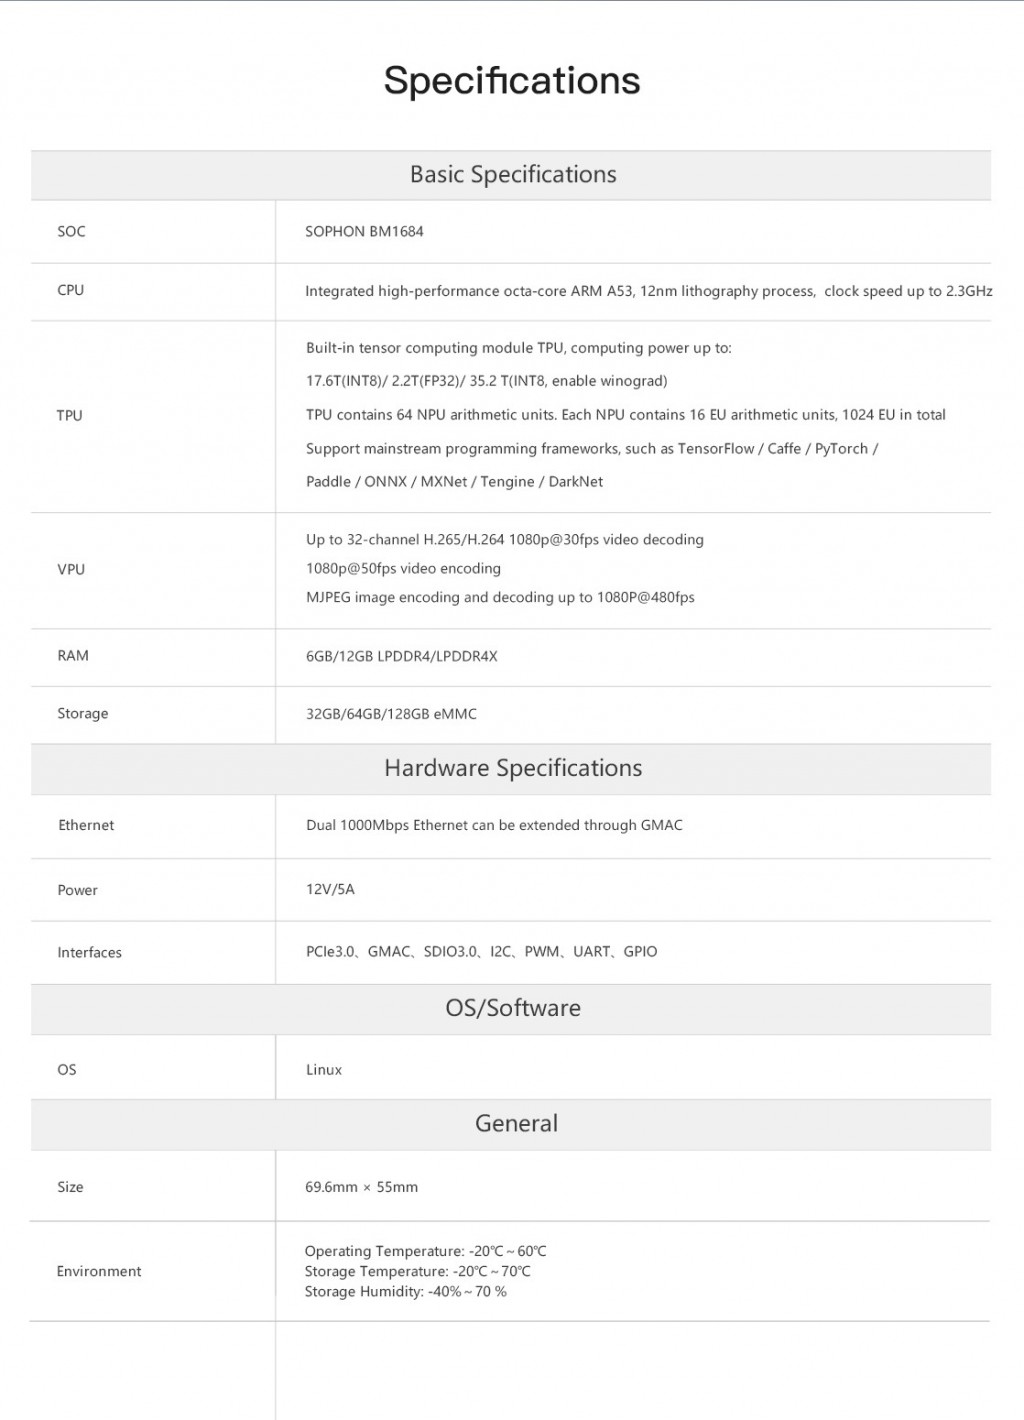
Core-1684JD4 powered by SOPHON AI processor BM1684, this mainboard can be configured with 12GB RAM. INT8 computing power is up to 17.6TOPS. It supports mainstream frameworks and complete, easy-to-use toolchain, featuring low cost of algorithm migration. With various interfaces, it is easy to integrate into various edge embedded products. It can be applied to various AI scenarios, such as visual computing, edge computing, general computing power services, security surveillance, UAV etc.
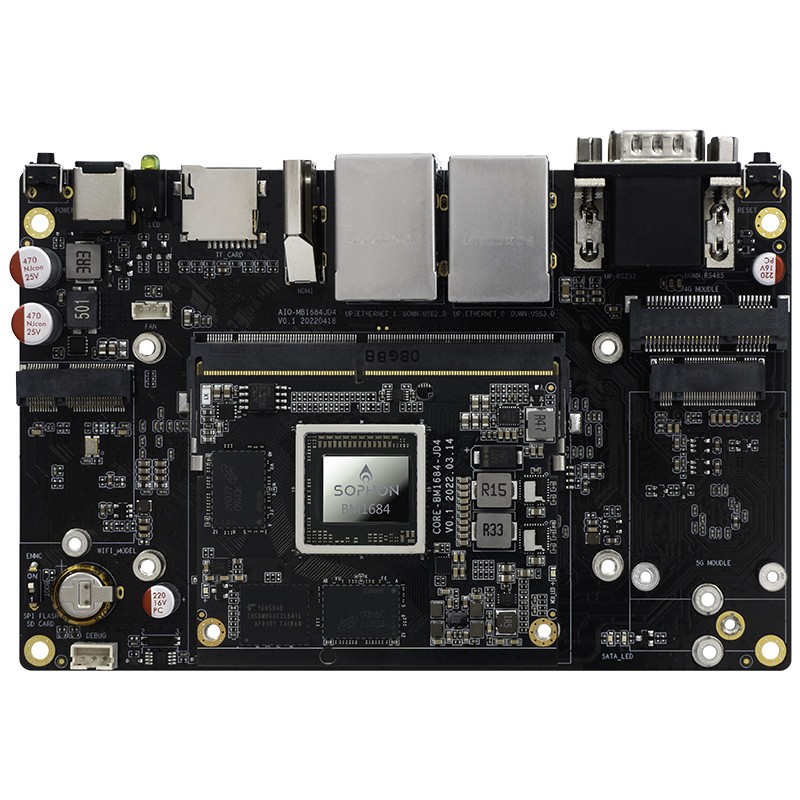
Front of Core-1684JD4:

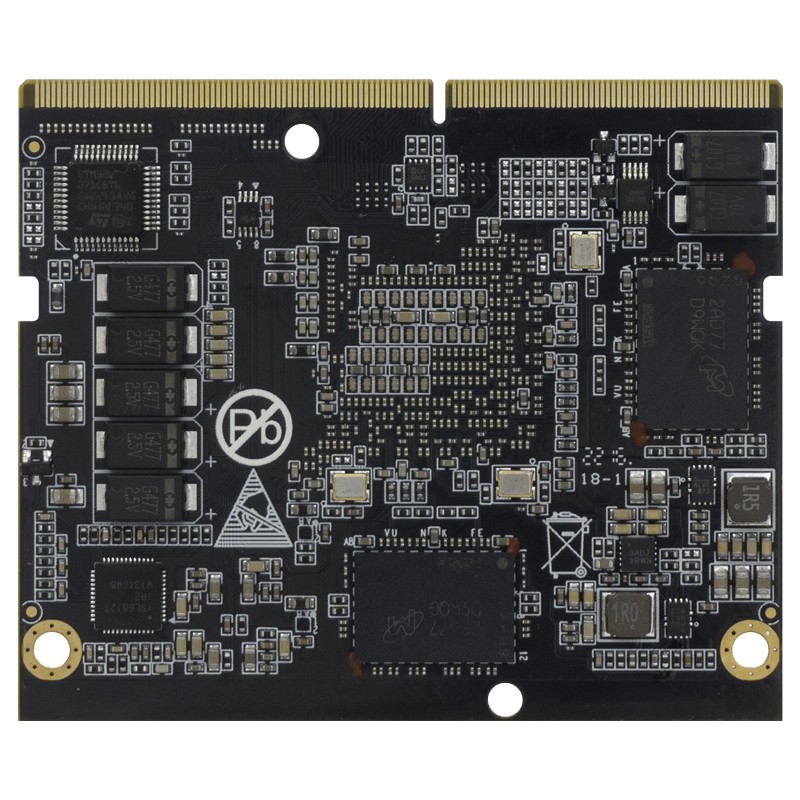
Back of Core-1684JD4:
AIO-1684JD4 consists of Core-1684JD4 + MB-JD4-BM1684, AIO-1684JD4 onboard HDMI, mSATA, USB3.0, USB2.0, RS485, RS232 and other rich interfaces, which can be directly applied to AI edge computing in the product.
Specifications:
Accessories List
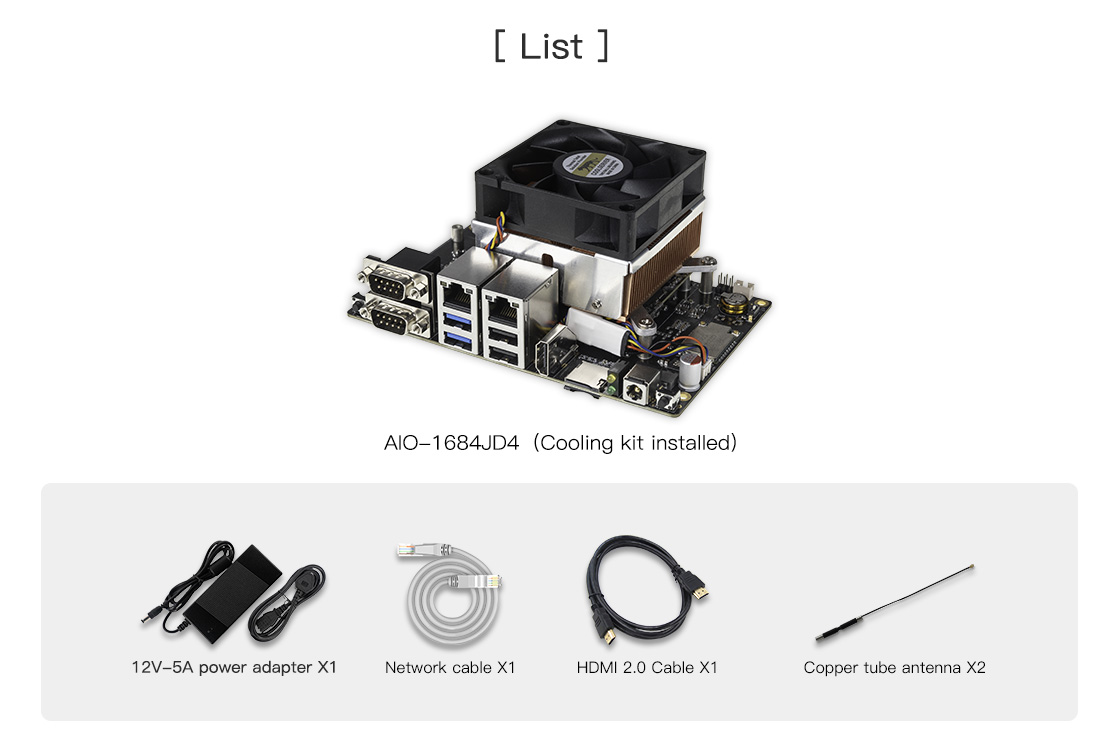
After receiving the development board, check whether the list of accessories is complete:
A complete machine with a case, or a JD4-BM1684 core board and a bottom plate each and a cooling fan
One 12V-5A power adapter
Optional accessories include:
Firefly serial port module
In addition, during use, you may need the following accessories:
display screen
Monitor or TV with HDMI port and HDMI cable
network
100M/1000M Ethernet cable, wired router
WiFi router
upgrade firmware
TF card, above 4GB/Class 10
debug
USB to Serial adapter
Shipping list reference
Power on
If it is not the whole machine, install it according to the following steps:
Align the gold fingers of the core board (the main chip is facing up) to the card slot on the bottom plate and insert it to the end, and then press the core board to ensure that the buckles on both sides are tightly closed.
Connect the power supply of the cooling fan to the FAN interface (near the power interface), place the cooling pad in the center of the heat sink, and then buckle the fan on the main chip to ensure that the cooling pad completely covers the main chip.
The 12V-5A power adapter is connected to the power cord, the power cord is connected to the 100~220V AC power supply, and the power port on the other end is inserted into the power port of the development board.
The development board will automatically turn on when it is powered on.
Network remote login
Ethernet port 0 (near the serial port) is set with a dynamic IP, while Ethernet port 1 (near the HDMI port) is set with a static IP 192.168.150.1, subnet mask 255.255.255.0, you can set the PC to 192.168.150.2 /24` for the initial visit.
If the PC can successfully ping the IP address of the network port, then you can log in with ssh, the port number is 22, and the username and password are also linaro:
ssh linaro@192.168.150.1
After connecting to the development board, you can modify the network configuration. The method is similar to the Debian/Ubuntu desktop version. You can configure it in the /etc/network/interfaces.d/ directory.
Serial terminal access
Please see “Serial debug”.
Power off
Please try not to directly disconnect the power when shutting down, run sudo poweroff first, and then power off to avoid damage to the file system data.
In addition, if you have successfully entered the Linux system, you can also long press the power button, and the system will detect and safely power off the system and development board.