4. Upgrade the firmware via SD card
This article mainly introduces how to use a MicroSD card to update the firmware on the motherboard. But only if the firmware is smaller than 4G, otherwise, please check “If the firmware is larger than 4G SD upgrade card making tutorial”.
To use MicroSD to update the firmware, you need to write the unified firmware into the MicroSD card by using a card tool on the computer. Currently, this operation is only supported on the Windows operating system.
4.1. Preparatory Tools
AIO-3399C
computer
MicroSD card (ie TF card)
USB card reader
4.2. Run SD_Firmware_Tool.exe
Run
SD_Firmware_Tool.exeYou can modify the config.ini file, set
Selected=1to set the language to Chinese, setSelected=2to set the language to English.Download the unified firmware that needs to be upgraded to the motherboard.
Insert the MicroSD into the USB card reader and then into the USB port of the computer.
Open SD_Firmware_Tool, select the correct removable disk device, check the
Upgrade Firmwarebox, clickFirmwareto select the firmware you want to upgrade.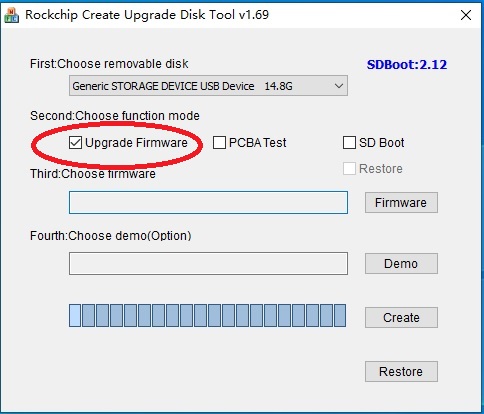
After clicking
Create, wait for the creation to finish.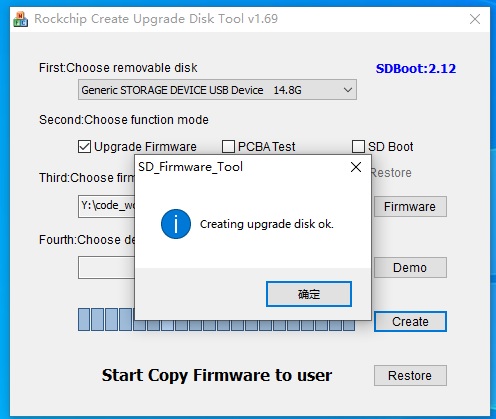
Take out the MicroSD card, insert it into the MicroSD card slot of the motherboard, power on the motherboard, and the motherboard will automatically start to upgrade.
After the upgrade is complete, take out the MicroSD card and the motherboard will automatically restart to complete the entire firmware update process.