
一、产品介绍
产品简介
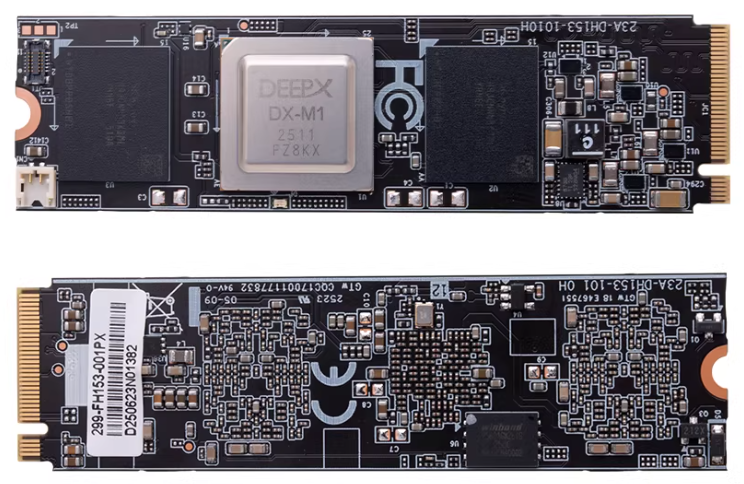
DEEPX DX-M1 M.2 模块将服务器级 AI 推理直接带到边缘设备。DX-M1 仅需 2 W 至 5 W 功耗即可提供 25 TOPS 的性能,性能效率 (FPS/W) 比 GPGPU 高出 20 倍,同时还保持了 GPU 级 AI 精度。
详细参数
| 名称 | 参数 |
|---|---|
| AI 算力 | 25 TOPS |
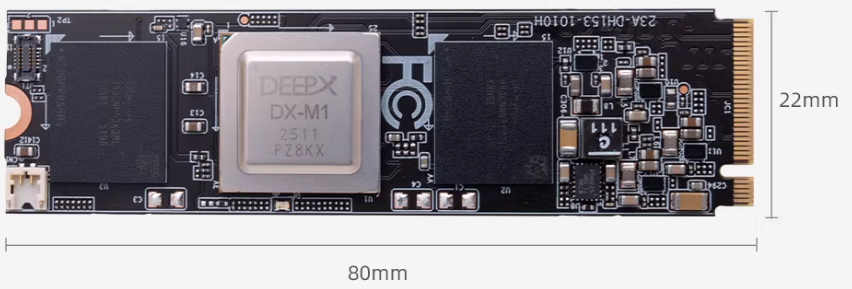
| 外形规格 | M.2 M key |
| 尺寸 | 22 × 80 mm |
| 接口 | PCIe Gen 3 ×4 |
| 内存配置 | 4GB LPDDR5 + 1Gbit QSPI NAND Flash |
| 调试接口 | UART0, JTAG1 |
二、使用方法
安装
接入 rk3588 带 m2 接口的设备,开机上电,确认是否能识别到 DX-M1 pcie 加速卡。
root@firefly:/home/firefly# lspci
0004:40:00.0 PCI bridge: Rockchip Electronics Co., Ltd Device 3588 (rev 01)
0004:41:00.0 Processing accelerators: Device 1ff4:0000 (rev 01)
部署环境
下载代码
git clone -b v2.1.0 --recurse-submodules https://github.com/DEEPX-AI/dx-all-suite.git
编译安装驱动
# 编译前设备上需要安装 Linux Headers,请参考 https://wiki.t-firefly.com/zh_CN/Firefly-Linux-Guide/first_use.html#linux-headers
cd /dx-all-suite/dx-runtime/dx_rt_npu_linux_driver/modules/
./build.sh -d m1
./build.sh -d m1 -c install

# 安装完成后 lsmod 可以看到 dxrt_driver
lsmod
安装 dx_rt
cd ./dx-all-suite/dx-runtime/dx_rt
./install.sh --all
./build.sh --install /usr/local
sudo cp ./service/dxrt.service /etc/systemd/system
sudo systemctl start dxrt.service
sudo systemctl enable dxrt.service
cd python_package
pip3 install .
reboot

# 安装后可以通过命令查看加速卡状态
dxrt-cli -s
更新固件
# 加速卡上的固件可能和当前 SDK 不配套,可以先更新 SDK 对应的固件。
cd ~/dx-all-suite/dx-runtime/dx_fw
dxrt-cli -u ./m1/latest/mdot2/fw.bin
测试
# 下载预编译模型 https://developer.deepx.ai/article/modelzoo/,这里测试的是 YoloV5S

# run_model 是模型的 benchmark 工具。
run_model -m ./YoloV5S.dxnn -b -l 100 -v
三、更多资料
github: https://github.com/DEEPX-AI/