Alexa
Reference firmware
Firmware: ROC-RK3308-CC Alexa
Amazon authorization
The Alexa Voice Service (AVS) Device SDK for C++ relies on Login with Amazon (LWA) to authorize your client to use AVS. So you should firstly register an Amazon account, and register your products in Amazon.
Step 1, according to Official Guide, register a products step by step carefully, and create a security profile.
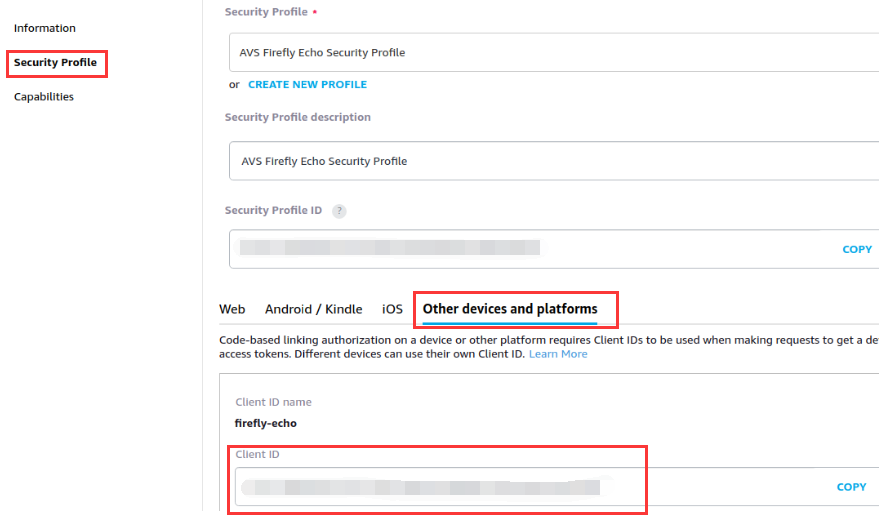
Step 2, get your Client ID and Product ID
Acquire Product ID:

Acquire Client ID:
Network configuration
If there’s no network or the network is invalid, please configure it according to “Network Configuration” .
How to use
Note: AVS do not support Chinese
● Power on and boot the machine, if there’s an invalid network, you should configure network firstly.
● Input the acquired Client ID and Product ID above in the deviceInfo attribute of /oem/AlexaClientSDKConfig.json:
"deviceInfo":{
    // Unique device serial number. e.g. 123456
    "deviceSerialNumber":"123456",
    // The Client ID of the Product from developer.amazon.com
    "clientId":"YOUR_CLIENT_ID",
    // Product ID from developer.amazon.com
    "productId":"YOUR_PRODUCT_ID"
},
● Execute the following command to boot Alexa
SampleApp /oem/AlexaClientSDKConfig.json /oem/resources/
● When alexa was first started, it needs authorization. You can follow the prompts to open the corresponding web page, enter the verification code to authenticate
##################################
#       NOT YET AUTHORIZED       #
##################################

################################################################################################
#       To authorize, browse to: 'https://amazon.com/us/code' and enter the code: AT4HLU       #
################################################################################################

#################################################
#       Checking for authorization (1)...       #
#################################################
● During the authentication process, you can talk with Alexa after a few minutes. You can awake alexa by calling a key word “alexa”. However, most interactive experience can only be achieved via command line.
+----------------------------------------------------------------------------+
|                                  Options:                                  |
| Wake word:                                                                 |
|       Simply say Alexa and begin your query.                               |
| Tap to talk:                                                               |
|       Press 't' and Enter followed by your query (no need for the 'Alexa').|
| Hold to talk:                                                              |
|       Press 'h' followed by Enter to simulate holding a button.            |
|       Then say your query (no need for the 'Alexa').                       |
|       Press 'h' followed by Enter to simulate releasing a button.          |
| Stop an interaction:                                                       |
|       Press 's' and Enter to stop an ongoing interaction.                  |
| Privacy mode (microphone off):                                             |
|       Press 'm' and Enter to turn on and off the microphone.               |
| Echo Spatial Perception (ESP): This is for testing purpose only!           |
|       Press 'e' followed by Enter at any time to adjust ESP settings.      |
| Playback Controls:                                                         |
|       Press '1' for a 'PLAY' button press.                                 |
|       Press '2' for a 'PAUSE' button press.                                |
|       Press '3' for a 'NEXT' button press.                                 |
|       Press '4' for a 'PREVIOUS' button press.                             |
| Settings:                                                                  |
|       Press 'c' followed by Enter at any time to see the settings screen.  |
| Speaker Control:                                                           |
|       Press 'p' followed by Enter at any time to adjust speaker settings.  |
| Firmware Version:                                                          |
|       Press 'f' followed by Enter at any time to report a different        |
|       firmware version.                                                    |
| Info:                                                                      |
|       Press 'i' followed by Enter at any time to see the help screen.      |
| Reset device:                                                              |
|       Press 'k' followed by Enter at any time to reset your device. This   |
|       will erase any data stored in the device and you will have to        |
|       re-register your device.                                             |
|       This option will also exit the application.                          |
| Reauthorize device:                                                        |
|       Press 'z' followed by Enter at any time to re-authorize your device. |
|       This will erase any data stored in the device and initiate           |
|       re-authorization.                                                    |
| Quit:                                                                      |
|       Press 'q' followed by Enter at any time to quit the application.     |
+----------------------------------------------------------------------------+
Resource
The source directory of alexa:
SDK/external/alexaClientSDK/
Alexa package in Buildroot:
SDK/buildroot/package/rockchip/alexaClientSDK/
After building alexa sdk and burning the firmware,we need to start the sample app manually, as mentioned above. If you want to make alexa start automatically,you can refer to “Baidu DuerOS”.
Building with AVS Device SDK
● Before compiling, you can input your Client ID and Product ID into deviceInfo attribute of SDK/device/rockchip/rk3308/alexa/AlexaClientSDKConfig.json, to make sure the firmware contain the Client ID and Product ID by default.
"deviceInfo":{
    // Unique device serial number. e.g. 123456
    "deviceSerialNumber":"123456",
    // The Client ID of the Product from developer.amazon.com
    "clientId":"YOUR_CLIENT_ID",
    // Product ID from developer.amazon.com
    "productId":"YOUR_PRODUCT_ID"
},
● Or you can even copy the /oem/application-necessities/cblAuthDelegate.db from the authenticated device to the SDK device/rockchip/rk3308/alexa/application-necessities/cblAuthDelegate.db, so that alexa can skip over authentication and start talking directly.
● Edit SDK/device/rockchip/rk3308/BoardConfig.mk, modify OEM_PATH=oem as OEM_PATH=alexa, then save it
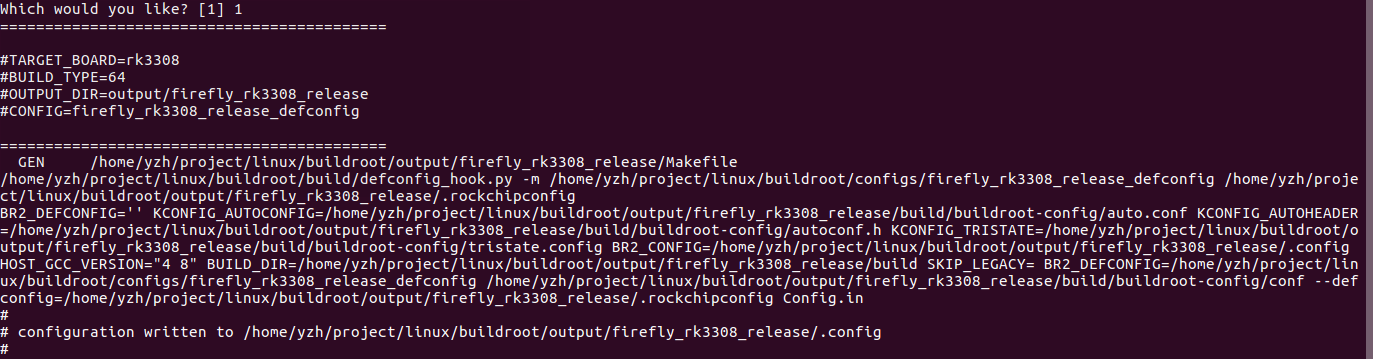
● Configure SDK environment variable with option firefly_rk3308_release
source buildroot/build/envsetup.sh
Select [1], and press enter. When it is successfully configured, it would be as follow:
● Configure Buildroot: BR2_PACKAGE_ALEXACLIENTSDK=y
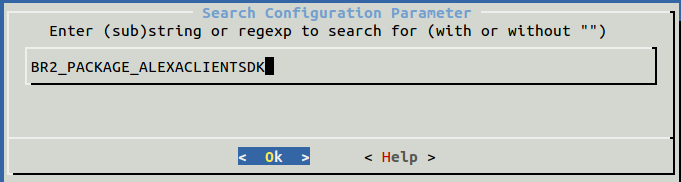
make menuconfig
Enter a menu-driven user interface, input / to show the search interface as below, input BR2_PACKAGE_ALEXACLIENTSDK, and press enter to search it
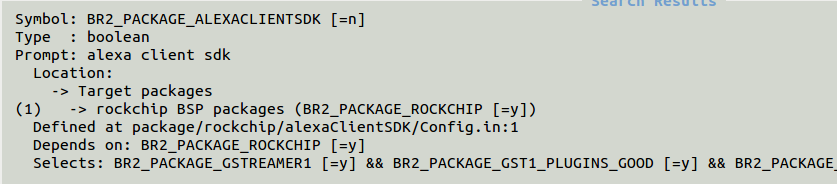
Select [1], and press SPACE to select alexa client sdk
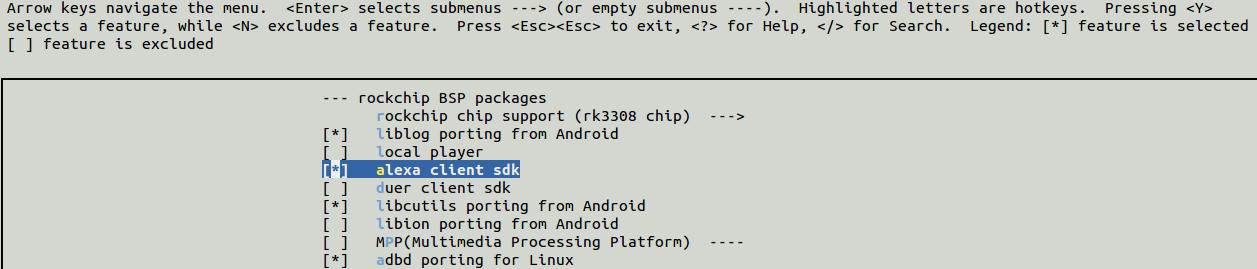
If there’s [ * ] in front, it means the specific item has been selected, and then, choose< Save > to save, choose < Exit > to exit, and run the following command to save the configuration:
make savedefconfig
If not, it can be reset by the one-key compiling scripts
● Before compiling, if it is not the first time to compile the whole SDK, please run the command:
make gst1-plugins-good-reconfigure && make gst1-plugins-good-rebuild
● One-key compiling
./build.sh