Upgrade firmware
Introduction
This page introduces how to use the Micro USB OTG cable to write the firmware image file on the host into the flash memory of the development board.
Before upgrading, please choose the right way to do it. You can decide it according to your host operation system and firmware type.
Preparation
Firefly-PX3-SE development board
Firmware
Host
Micro USB OTG cable
There are two kinds of firmware files:
Single global firmware
update.img, packing the loader, parameters and all the partition images together for firmware release.Multi partition images, such as kernel.img, rootfs.img, recovery.img and etc., are generated during development process.
You can find the Released firmware. Please download the firmware package and decompress it. Meanwhile, you can also follow the instruction of Build root filesystem to compile the firmware of your own.
Supported host operation systems are as below:
Windows XP (32/64 bit)
Windows 7 (32/64 bit)
Windows 8 (32/64 bit)
Linux (32/64 bit)
Windows
In the past, we used the following two tools to upgrade the RK firmware.
Mass production tool
RKBatchTool,used for upgrading the unified firmware image(update.img).Developer tool
RKDevelopTool,used for upgrading partition images respectively.
Later, RK released the AndroidTool tool, adding support for the unified firmware (update.img) based on RKDevelopTool, so only this tool is needed now.
Before using the upgrading tool, please install the RK USB driver first. If you have already installed the driver, just skip to the next step.
Install RK USB driver
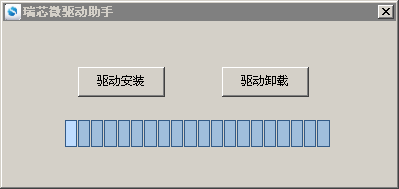
Download Release_DriverAssistant.zip and decompress it, and then run the DriverInstall.exe in the above package.
To ensure all the devices using the updated driver, please choose “Uninstall driver” first and then choose “Install driver”.
Device connection
There are two ways to enter the upgrade mode
One way is to disconnect the power adapter and the Micro USB OTG from the device:
One end of the Micro USB OTG cable is connected to the host.
Press the RECOVERY button on the device and hold the button.
Connect the other end of the Micro USB OTG cable to the device.
Wait for about 2 seconds and release the RECOVERY button.
Another way is to disconnect the power adapter and the Micro USB OTG cable is also connected.
Connect the device and the host with the Micro USB OTG cable.
Press the RECOVERY button on the device and hold the button.
Short press the RESET button.
Wait for about 2 seconds and release the RECOVERY button.
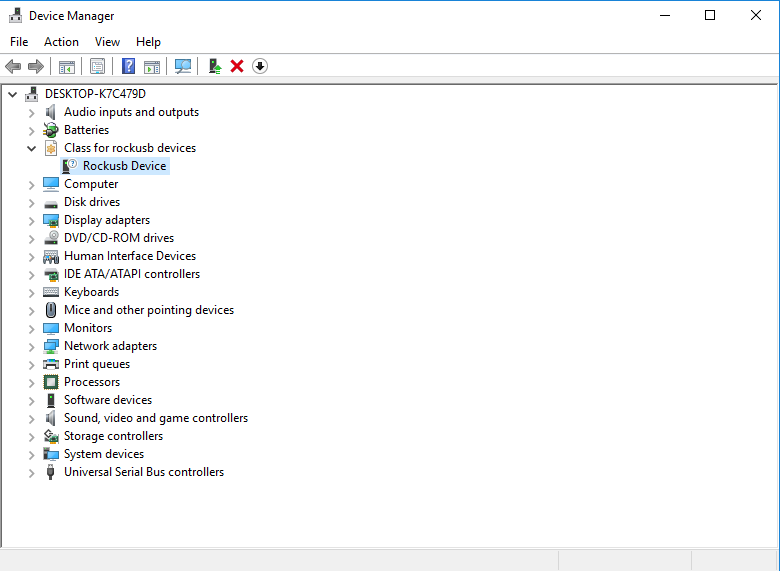
The host will tell you that the new hardware is discovered and the driver is configured. Open the device manager and you will find the new device “Rockusb Device” listed. If not, you need go back to the last stept to reinstall the driver and try again.
Upgrade firmware
Download AndroidTool and decompress it. Run AndroidTool.exe under AndroidTool_Release_v2.33 directory.(Note: if your host operation system is Windows 7/8, you need right click the mouse to run the application as administrator), as shown in the following figure.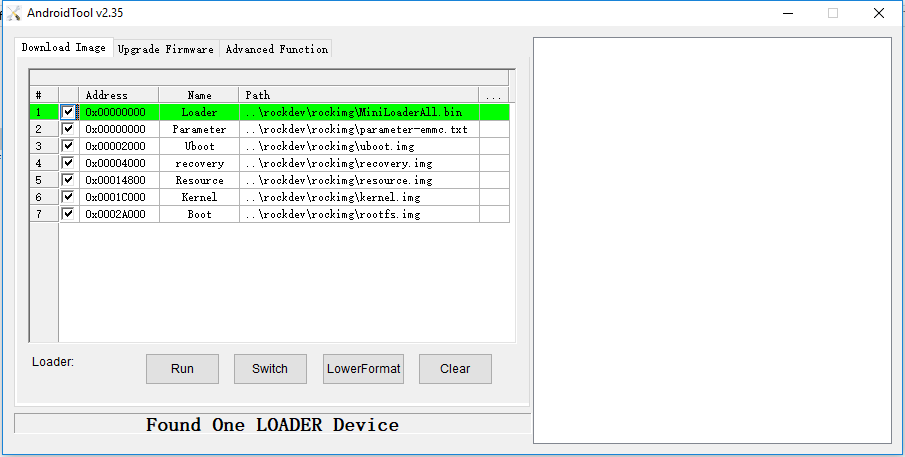
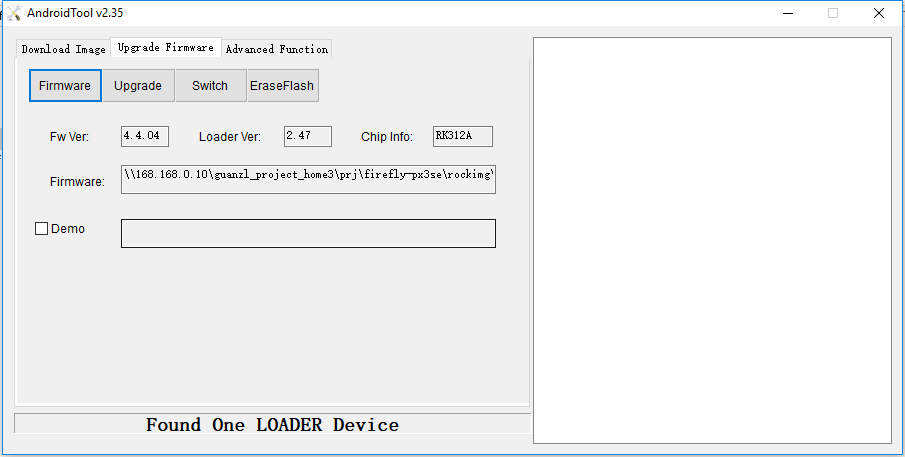
Upgrade the unified firmware: update.img
The steps to upgrade the Unified firmware are as below:
switch to the
Firmware upgradepage.select the
Firmwarebutton to choose the firmware you want to upgrade and open it. The upgrade tool will list the detailed firmware information.click the
Upgradebutton to start upgrading firmware.if the upgrading failed, you can click the
Erase Flashbutton to erase the flash and try to upgrade the firmware again.
Note: if the loader version of the firmware that you want to upgrade is different from the former one on the device, please click the Erase Flash button before you upgrading the firmware.
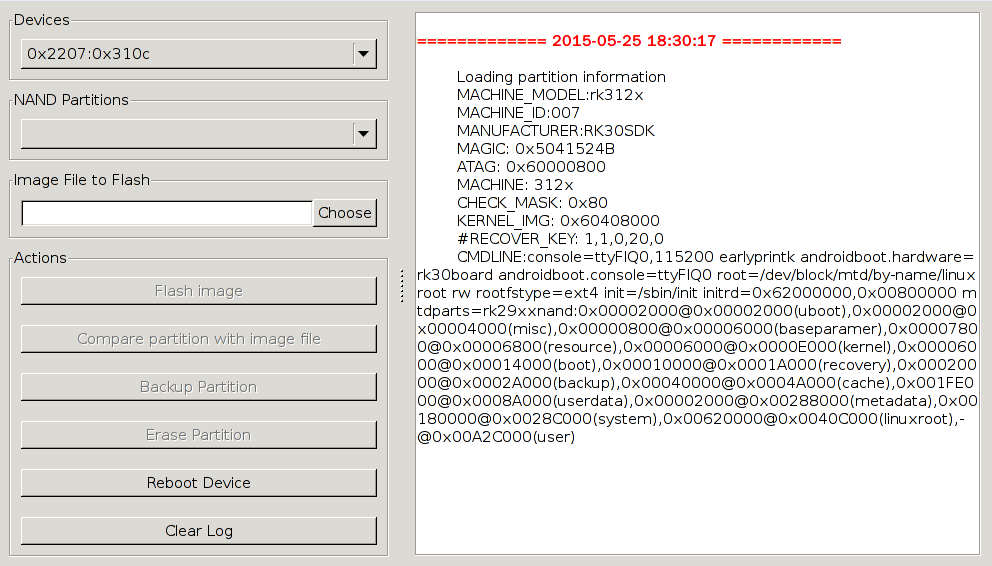
Upgrade partition image
The steps to upgrade partition image are as below:
switch to
Image downloadpage;select the partition(s) you need to upgrade (you can choose more than one partitions).
make sure that the image file path is correct. If needed, you can click the blank table cell in the right of the path to rechoose the path.
click the
Executebutton to start upgrade. Once finished, the device will restart automatically.
Linux
RK provides a command line tool upgrade_tool under Linux, which supports to upgrade the unified firmware image and also the partition image.
While there are two open source tools for you to choose:
Both of the above two tools support partition image upgrade but not support unified firmware image upgrade. rkflashtool is a command line tool while rkflashkit has a friendly GUI and is also supported with command line tool. We will only introduce rkflashkit in the next part.
Under Linux, you don’t need to install any device drive. Just refer to the chapters in Windows to connect to the device.
upgrade_tool
Download Linux_Upgrade_Tool and installed into the system as follows, easy to call:
unzip Linux_Upgrade_Tool_v1.24.zip
cd Linux_UpgradeTool_v1.24
sudo mv upgrade_tool /usr/local/bin
sudo chown root:root /usr/local/bin/upgrade_tool
Upgrade the unified firmware: update.img
sudo upgrade_tool uf update.img
Upgrade partition image:
sudo upgrade_tool di -b /path/to/boot.img
sudo upgrade_tool di -k /path/to/kernel.img
sudo upgrade_tool di -s /path/to/system.img
sudo upgrade_tool di -r /path/to/recovery.img
sudo upgrade_tool di -m /path/to/misc.img
sudo upgrade_tool di resource /path/to/resource.img
sudo upgrade_tool di -p paramater   #upgrade parameter
sudo upgrade_tool ul bootloader.bin # Upgrade bootloader
If error occurs during the upgrading progress due to flash problems, please try to execute a low-level formatting to erase the flash:
sudo upgrade_tool lf   # low-level fomat
sudo upgrade_tool ef   # erase format
rkflashkit
Install:
sudo apt-get install build-essential fakeroot
git clone https://github.com/linuxerwang/rkflashkit
cd rkflashkit
./waf debian
sudo apt-get install python-gtk2
sudo dpkg -i rkflashkit_0.1.4_all.deb
GUI:
sudo rkflashkit
Command lines:
$ rkflashkit --help
Usage:  [args] [ [args]...]

part                              List partition
flash @    Flash partition with image file
cmp @      Compare partition with image file
backup @   Backup partition to image file
erase  @               Erase partition
reboot                            Reboot device

For example, flash device with boot.img and kernel.img, then reboot:

sudo rkflashkit flash @boot boot.img @kernel.img kernel.img reboot
There are examples of use in the help information. It can be seen that one command can burn multiple image files and restart the device. It is a good news for developers who need to compile and burn kernel image frequently.
FAQ
How to enter into MaskRom mode by force
If you fail to make the board enter into Loader mode and it is invalid to boot the SD card, you can try to enter into MaskRom mode by force. Please refer to the article MaskRom Mode for details.